How to Draw a Dog Body Step by Step
The easiest way to start drawing anything is to break it down into its simplest form and then gradually refine its details. This makes even the most daunting subjects accessible.
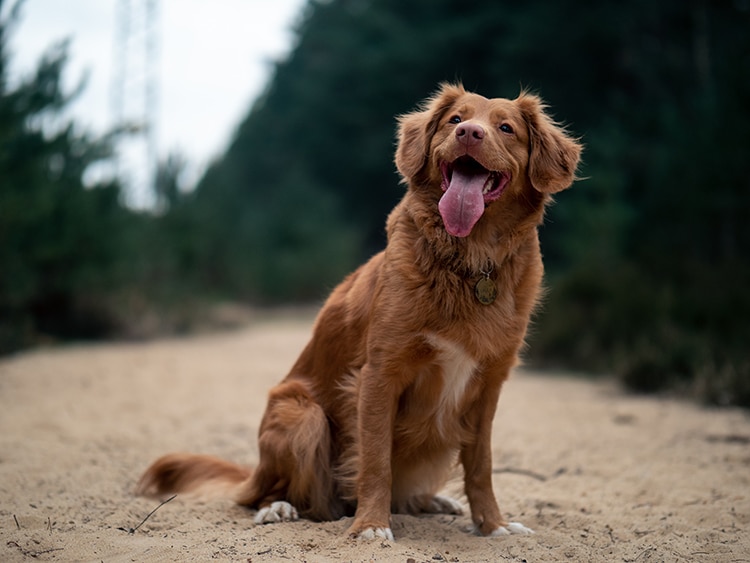
Photo: Jamie Street
For this exercise, you’ll want to find a photo of a dog. Generally, it’s best to draw from life whenever possible—it helps keep your observation skills sharp. But for a subject like a dog, which moves a lot, opt for a still image instead.
Step 1: Study your source photo.
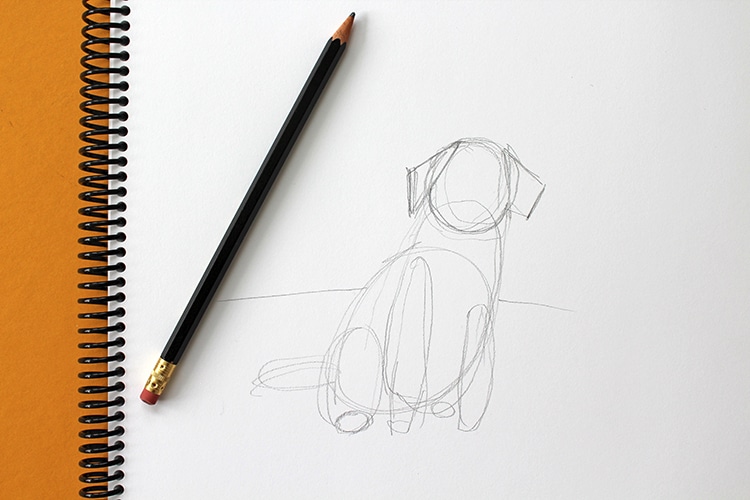
Photo & art: Sara Barnes / My Modern Met
Just because you aren’t drawing the dog from life doesn’t mean you’re free of observation. In fact, a photograph gives you even more opportunity to study your subject.
Before putting pencil to paper, take time to look at your photo. Start to note all of the things you see. How are the legs positioned? Do they overlap with any other body parts? What is their head doing? How big is the head compared to the rest of their body? Once you’ve studied the photograph, then express those observations in the form of simple shapes. Lightly draw circles, triangles, and ovals to represent parts of the body (such as the snout) and where it moves and bends. Don’t press too hard on your paper—you’ll likely erase a lot of these lines later.
Step 2: Refine your simple shapes.
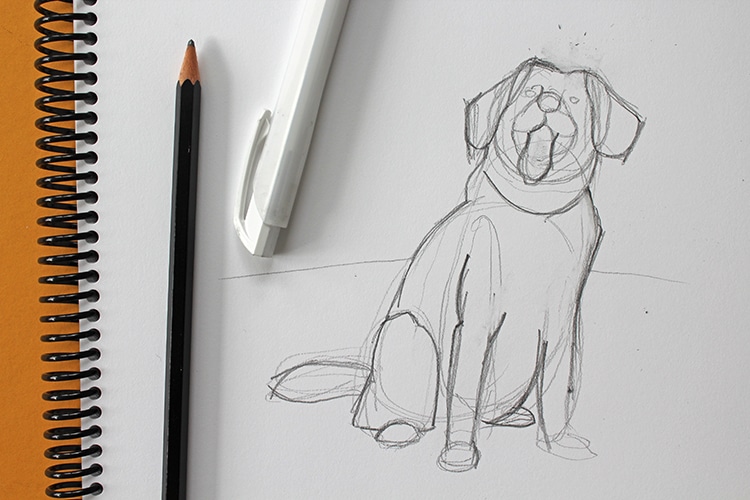
Photo & art: Sara Barnes / My Modern Met
Your initial sketch will be very abstract, and that’s okay—think of it as a road map.
With your simple shapes drawn, return to your photograph and consider: what’s inside of those forms? The snout, for instance, will have a circle for the nose while the rest of the head will have two circles for the eyes. Return to your drawing and sketch these details. At this point, you’ll also refine your initial sketch. A circle for the head, for instance, will become less circular and reflect characteristics like a brow line.
These first few steps of a dog drawing are crucial. Take your time getting proportions and these shapes correct—it’s easier to fix things now rather than later once you’ve started shading.
Step 3: Continue to clarify your drawing.
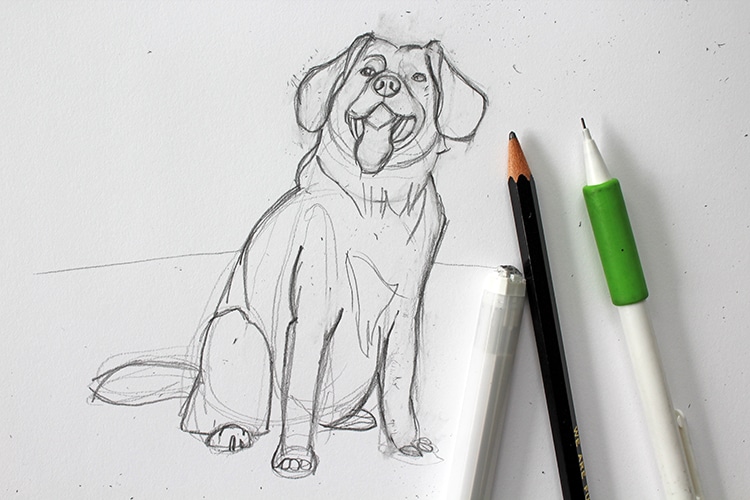
Photo & art: Sara Barnes / My Modern Met
We’re not to the shading stage—yet. After you’ve refined your sketch with smaller, more defined shapes, continue to map out the finer details. This includes coloration. Does your dog have spots on its coat? Are there any areas of shadows? Can you see its teeth? Block out these parts of your drawing. When it’s time to shade, this will help guide you on where to apply darker and lighter tones.
Step 4: Time to add shading!
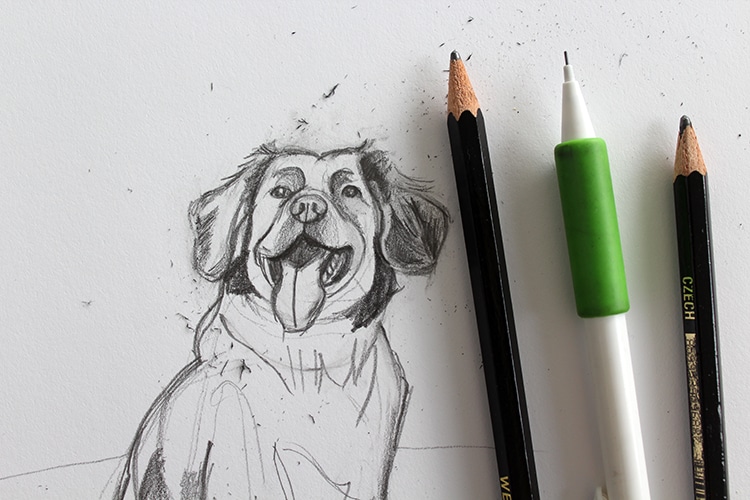
Photo & art: Sara Barnes / My Modern Met
Once you’ve reached this part, consider yourself almost done. Because we’re focusing on the entire body of the canine, we’re not going to concern ourselves with depicting every little fur on its face and torso—that would make the drawing appear less realistic. Hair moves as a unit, so focus on the overall direction of how the fur is going by moving your pencil back and forth over your paper.
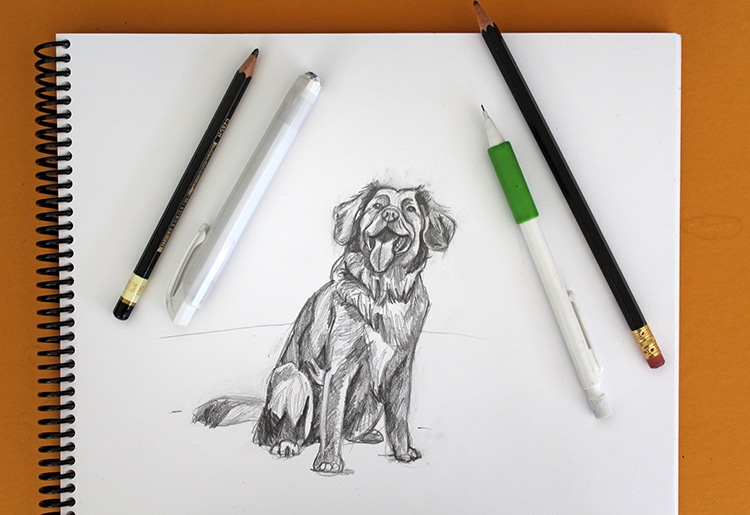
Photo & art: Sara Barnes / My Modern Met
The back-and-forth method is one of the most popular types of drawing techniques, and it’s ideal for rendering fur since it resembles fur. Remember how you mapped out areas of shadows? Now is the time to darken them by pressing harder on your paper. For areas that need to remain light, press gently on your pencil.
Step 5: Clean up your drawing.
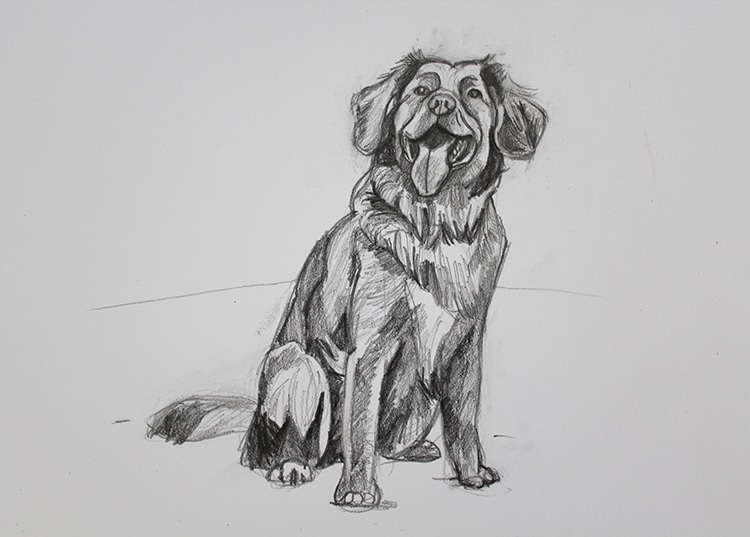
Photo & art: Sara Barnes / My Modern Met
With the shading done, return to your source photo. Are there any areas that you missed? Anything that isn’t matching up with your drawing? Hopefully, these are both a “no,” especially if you took the time to refine your sketch at the beginning. But, if there are parts that need correction, that’s okay—it happens to even the most experienced drawers. Erase the parts that need redone and redraw them using the same steps you just followed.
Once you feel confident your drawing is correct, erase any stray marks and smudges. Congratulations! You’re done!