How to Draw a Straight-Forward View of the Face
If this is your first time drawing a face, you'll way to start with a straightforward point of view. This one is the easiest to understand as there is no distortion of features or foreshortening that would complicate your sketch.
Step 1: Sketch your guiding lines.
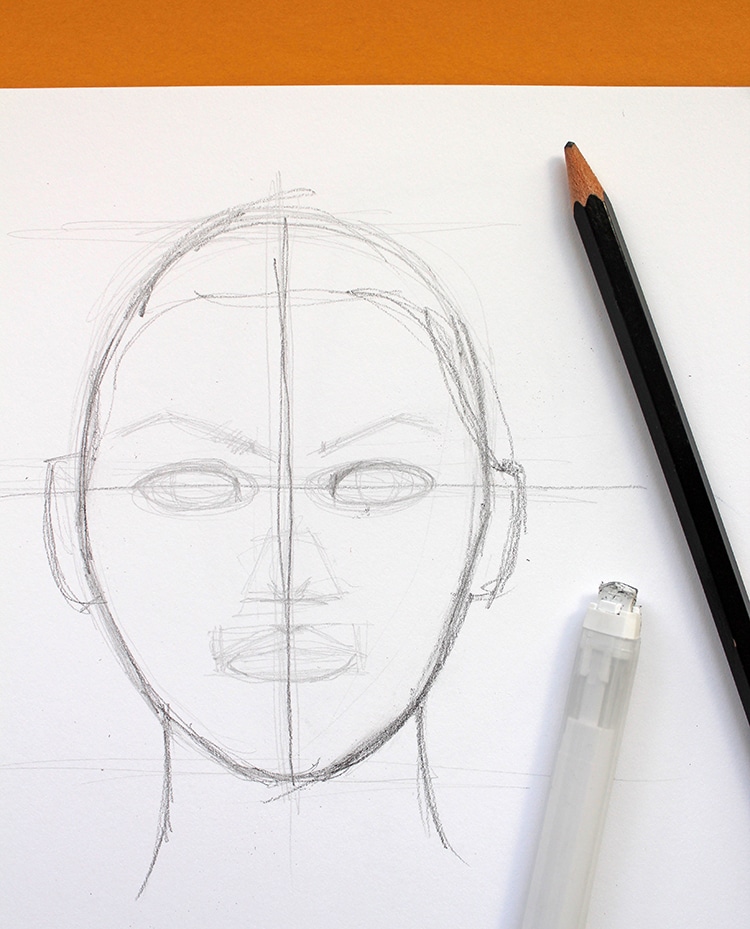
Photo & Art: Sara Barnes / My Modern Met
As with all complex drawing subjects, the best way to sketch a face is by breaking it down into smaller, more manageable steps. By starting out with basic lines and shapes, you can gradually refine your drawing into a realistic face.
With this in mind, sketch the most basic shapes you see. Once you have your head drawn, make a vertical line in the middle of the face and a horizontal line in the middle, too. Remember your proportions—in particular, the importance of the eyes. Sketch them on the horizontal line. Their size will inform the length of the nose and more.
Your resulting sketch should include a rounded head, oval eyes, a line for the end of the nose, and an oval or rectangle for the lips. If the ears are visible in your source photo, block them out too. The same goes for the hair.
Take the time to make sure all of your proportions are correct. It's much easier to fix any mistakes now than later in the process.
Step 2: Refine your sketch.
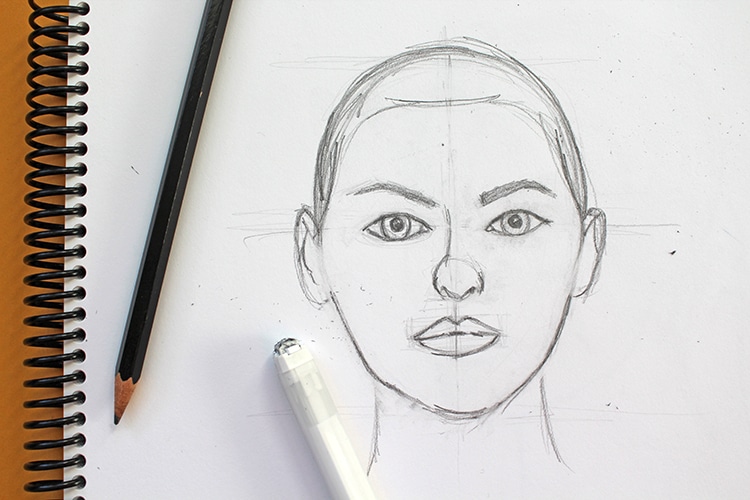
Photo & Art: Sara Barnes / My Modern Met
At this point, your drawing looks like a bunch of marks that sort of resemble a face. With the guiding lines and placement of features done, start to refine the shape of the head, eyes, nose, mouth, and more.
Realistic drawing is often asking yourself a ton of questions in order to fully understand your subject and to constantly check your sketch to ensure that everything is where it should be. This will require you to observe the tiny idiosyncrasies of the face. Consider the angle of the eyelids, eyebrows, and the roundness of the nose. How long are the eyelashes? How plump are the lips? Continue to ask yourself these types of questions until you feel as though your drawing faithfully resembles your source photograph.
Step 3: Erase your guiding lines and apply shading.
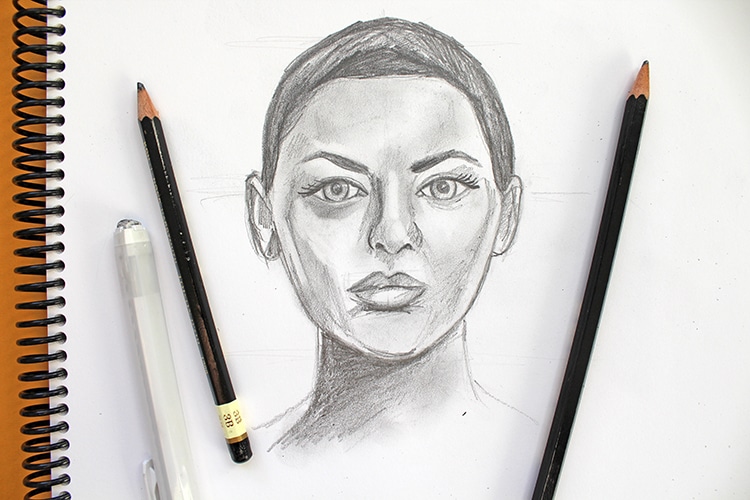
Photo & Art: Sara Barnes / My Modern Met
At this final stage, you'll bring your drawing to life through shading. The added contrast will make your refined sketch look three dimensional as it will accentuate the cheekbones, eyelids, and more.
You can start shading anywhere on your drawing, but think about working from the lighter areas to the darker ones. It's important to not add too much contrast to your sketch, as dark lines can prematurely age someone by making it appear that they have deep wrinkles.
There are many drawing techniques that you can use when shading your art. Blending, either with your finger or a blending stump, is one of the most useful. It will create smooth tones that mimic skin. Doing this will make your graphite a little lighter, however, as you are diffusing the lead onto the page. To ensure you achieve the necessary dark tones, use the back-and-forth approach across those blended areas.
Looking for a way to convey highlights? Your eraser can be for more than just getting rid of mistakes. Use it to show the lightest parts of your subject's skin, such as their cheekbone or brow line.