Step 3: Begin your shading.
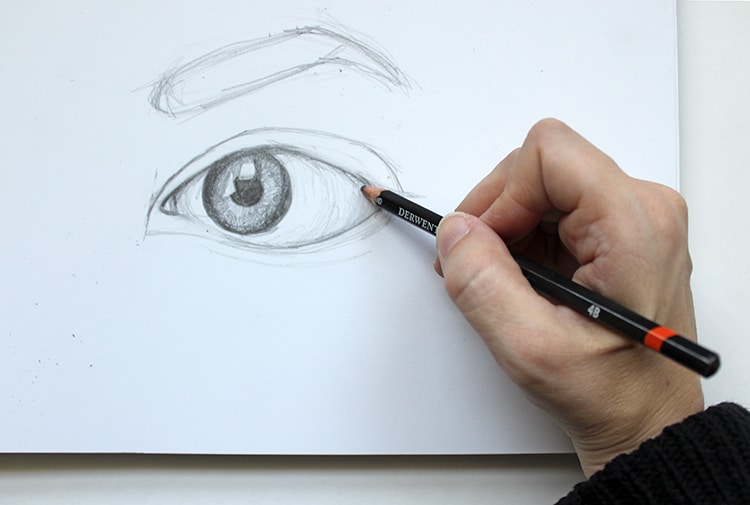
Photo & art: Sara Barnes / My Modern Met
When you're confident that your contour lines are on point, it's time to bring your drawing to life. Begin with the lightest tones and start to apply shading to your entire sketch, working slowly to the darker values. (We used a 4B pencil to achieve this.) Because the eye is curved, think about using rounded marks for shading. These directional lines will help create the illusion that the eye (and its surroundings) are circular. If you would like to convey the smooth texture of the eyeball, try blending your tones with your finger or a blending stump.
To add another three-dimensional touch, include a glint on the eye. These small reflections indicate roundness, and they are something that's present in every photographed portrait.
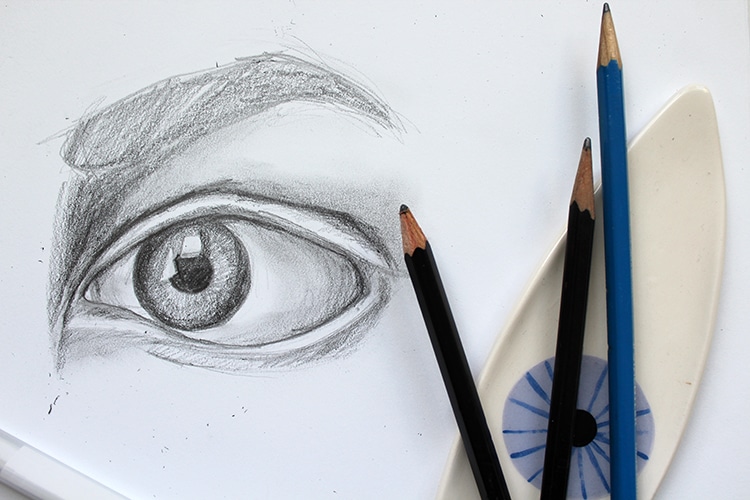
Photo & art: Sara Barnes / My Modern Met
At this point, do not add eyelashes or eyebrow hairs. We'll do that in the next step.
Step 4: Finish with the finer details.
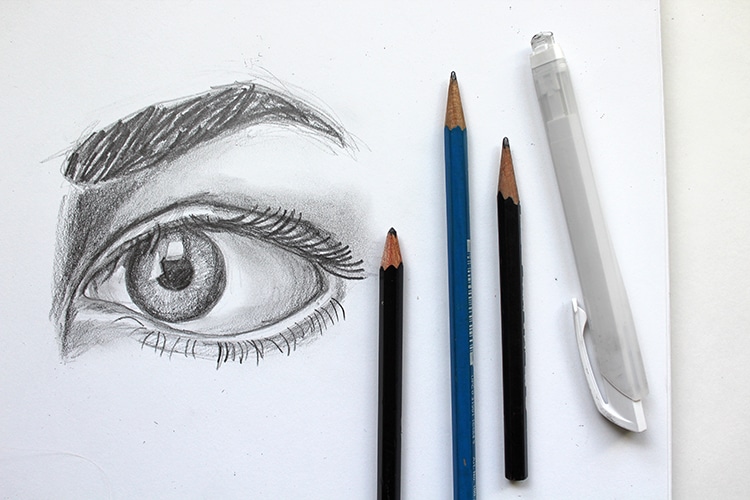
Photo & art: Sara Barnes / My Modern Met
With the shading complete, finish your drawing by adding small but important details—the eyelashes and the eyebrow hair. For this task, grab your darker pencil.
Work across the eye and create single curved strokes. Be confident in your mark-making and create a swooping line, but be observant, too. The top eyelashes are going to be thicker and longer than those that are below the eye. Notice, before you form each eyelash, its position on the eye. If the lash is at the center (highest) point of it, you'll want to make the line shorter and straighter. Eyelashes at the end of the eye (towards the ear) will be thicker and curvier.
Bottom lashes are placed a little below the eye with a patch of skin between them. They are also thinner. Whereas the top lashes can look bunched together, the bottom lashes are going to be drawn farther apart.
Eyebrows are different on everyone. Some people have thick hairs that you can indicate with a really dark pencil, while others might have thinner strands that can be drawn with an HB pencil or lighter. For those with thicker brows, you can use individual lines to show the strands. If someone has shorter or finer hairs, you can imply a bunch of strands by using the back-and-forth approach in your drawing.
Looking for others who love drawing? Join our Art, Design, Photography, and Drawing Club on Facebook!
Related Articles:
ew to Art Making? Make Sure You Have These Essential Drawing Supplies
Build Your Drawing Foundation When You Learn How to Draw a Skull
Talented Artists Share Their Favorite Tips for Improving Your Drawing Skills
10 Drawing Books That’ll Teach You Everything You Need to Know About Sketching