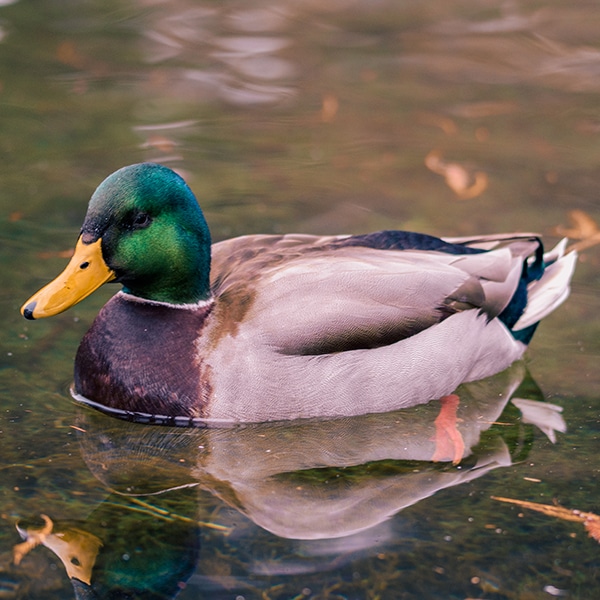
In the realm of drawing, there are a lot of popular subjects that you should learn. Feathers rank as one of these topics, and it should come as no surprise—there are hundreds of millions of birds in the world. If you want to start drawing these creatures, you’re going to have to become comfortable with sketching a lot of feathers.
When it comes to creating a feather drawing, the process is similar from bird to bird. Anatomy of a feather is one of the most important things to know, as is observing how this plumage is fashioned on a bird's body. To demystify bird drawing, we’re going to show you both elements.
Once you understand the structure of a feather and the steps for sketching one, you’ll be able to draw any bird you like. So, get your pencils and paper ready and check out our step-by-step tutorial.
Learn how to create a feather drawing in our step-by-step tutorial.
Anatomy of a Feather
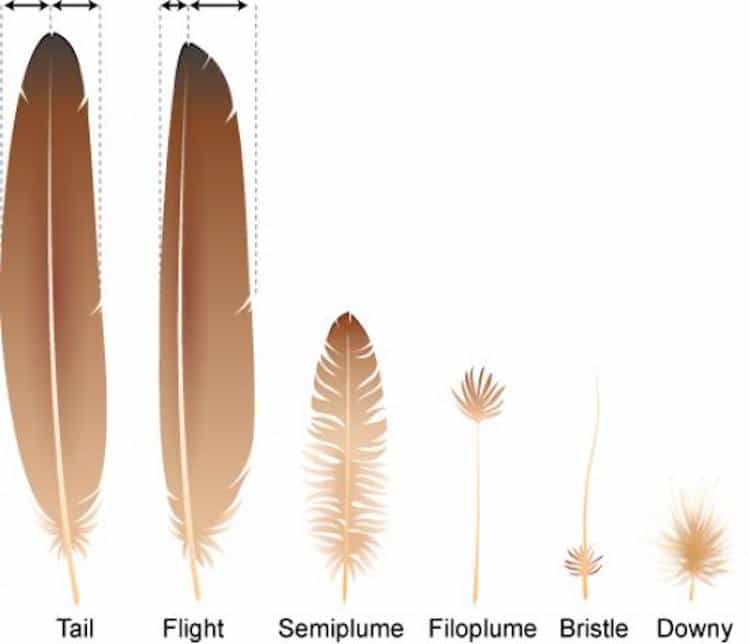
An individual feather might seem simple, but they are a powerful force when banded together. In fact, there are 23 different uses for feathers on a bird's body, from flying to rain protection to keeping warm. Of course, not all birds use their feathers in the same way, and there are six styles of feathers the creature can have:
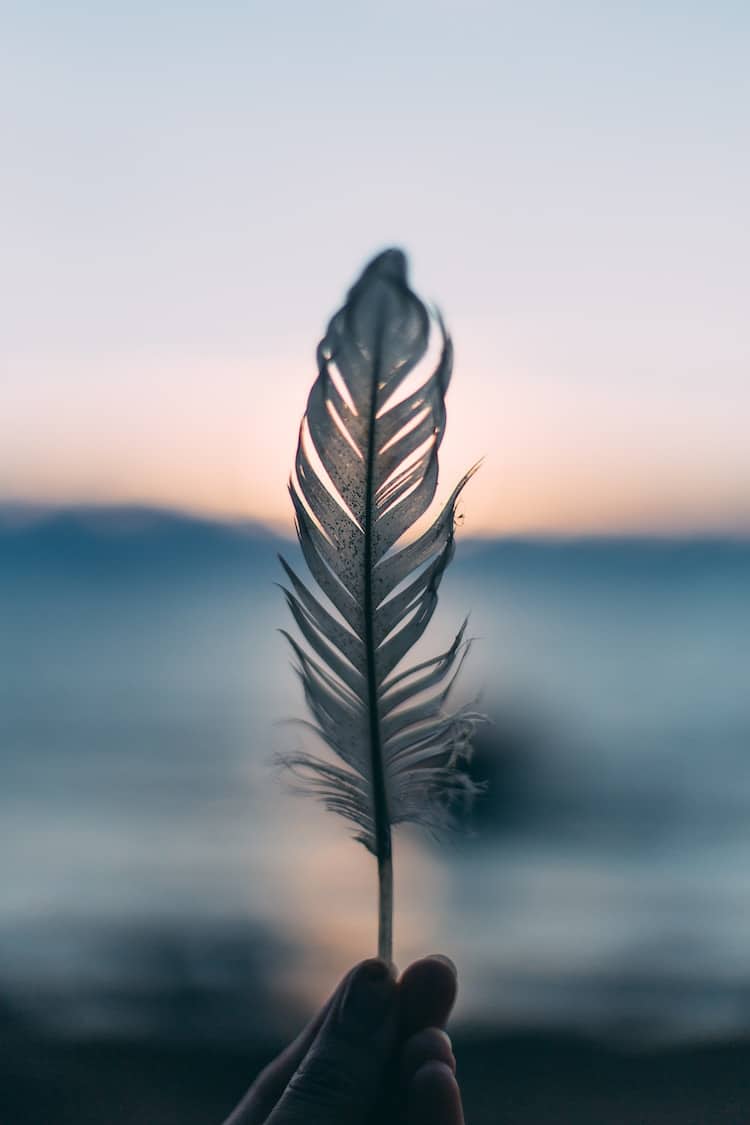
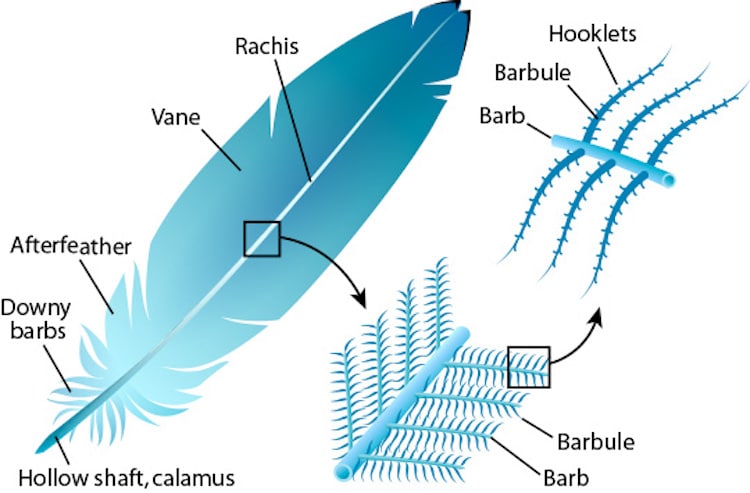
Here's the general breakdown of a feather. Notice that at its base is a hollow shaft called the calamus. From there, the center is called the rachis, and it holds barbs made up of barbules and hooklets (they cannot be seen without magnification). With the help of these tiny elements, they give the entire vane its shape.
Drawing Steps: How to Draw a Feather
1. Grab your source material.
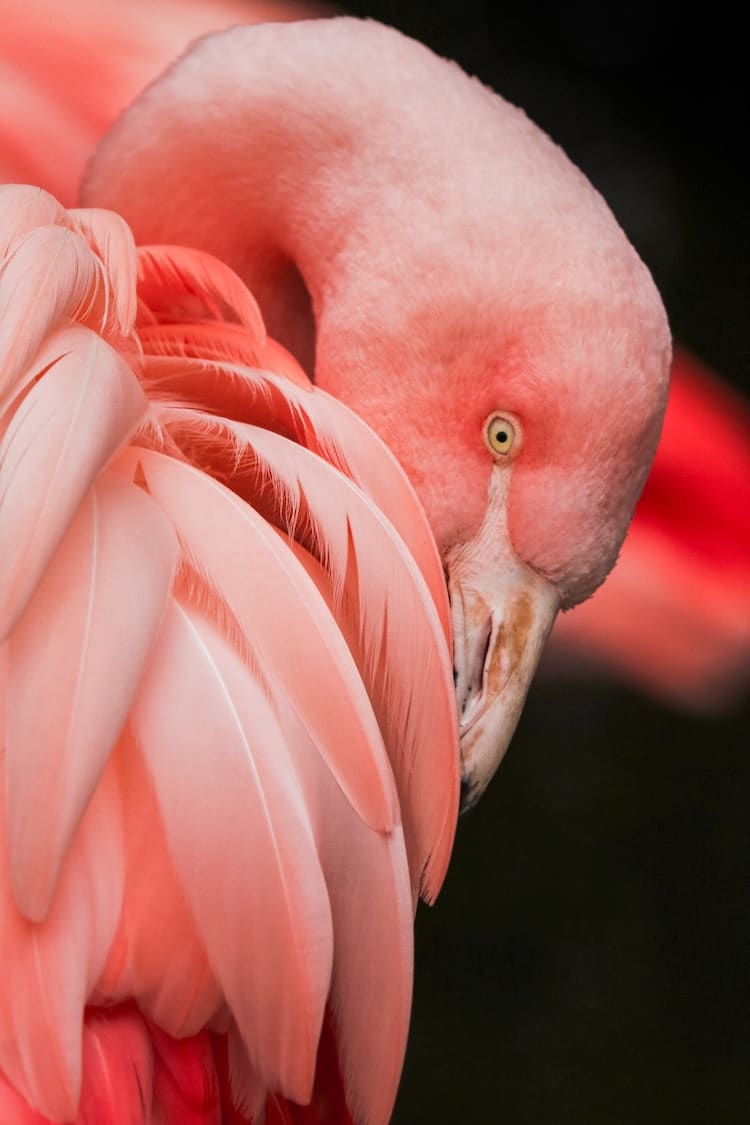
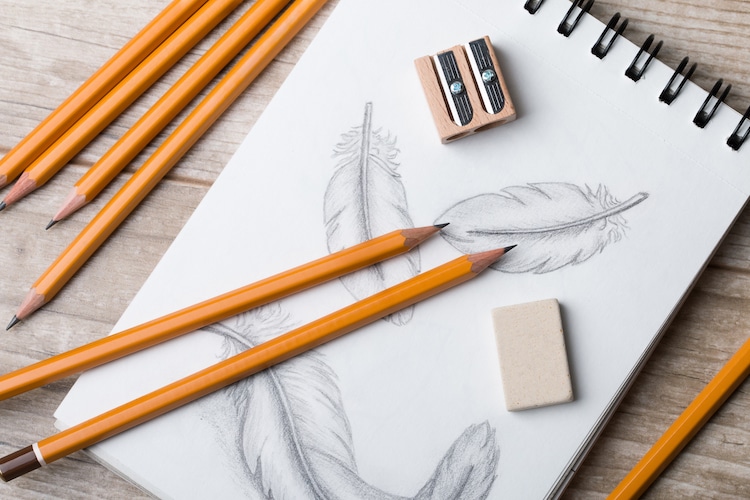
The best way to practice feather drawing is by having a great bird photo as your source. Look for a high-quality image that highlights the feathers. For an extra challenge, draw a bird who has a lot of plumage.
2. Gather your supplies.

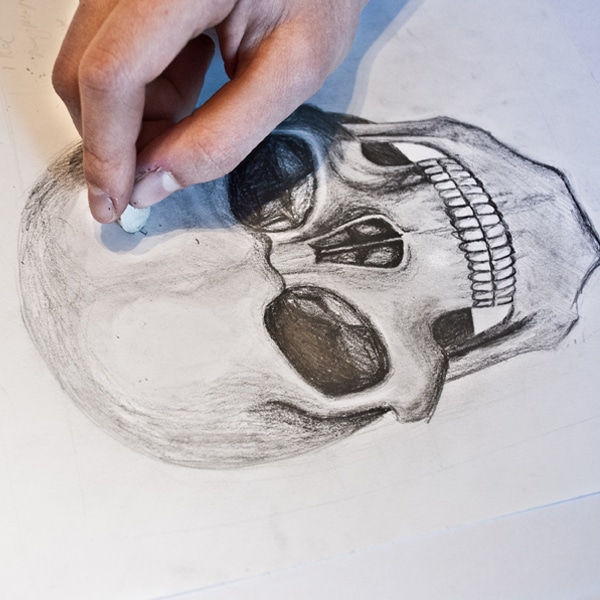
Before you start to draw, take time to gather your supplies. Pencils are the best tools to use for this tutorial; coupled with an eraser, they prove to be the most forgiving utensil. You will want to have at least two or three pencils with varying types of graphite. This includes an HB pencil (for initial sketching), an H pencil (for fine details) and a B pencil for heavy shadows.
Need pencil recommendations? We've written an entire guide on the best drawing pencils for people of every skill level.
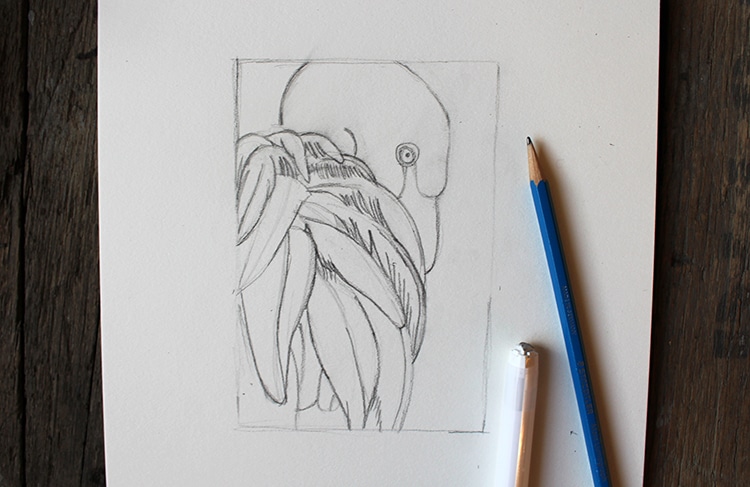
3. Lightly sketch your outlines.
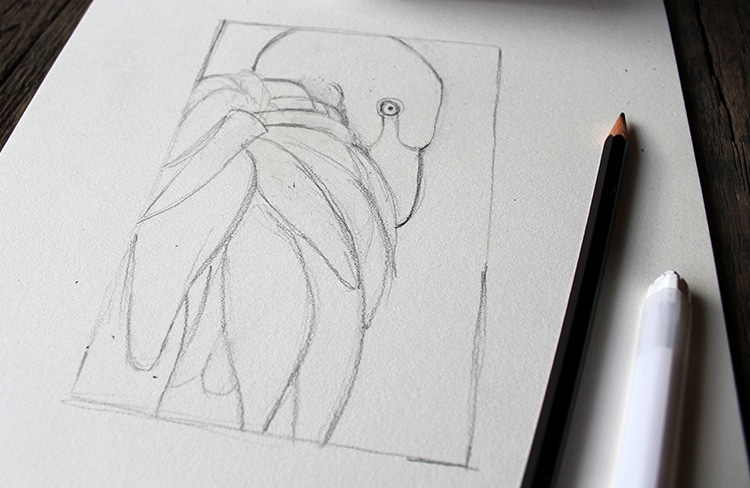
Study your source material to determine the most prominent features of the image. Then, begin lightly sketching its overall shapes using your HB pencil. The beginning stages of these drawings are often the most important part of the entire process. It's here that you'll want to be thoughtful and figure out proportions. Ask yourself questions about the image. What types of feathers are visible? How much bigger are the feathers in the front compared to the feathers in the back? Do the feathers obscure anything? What is behind them?
Once you have an initial sketch complete, go back through and check your work. Does your drawing look like the photograph? If not, make the necessary changes; once you start shading your drawing and adding details, it's much messier to go back and fix mistakes. (You'll be less likely to do so, too!)
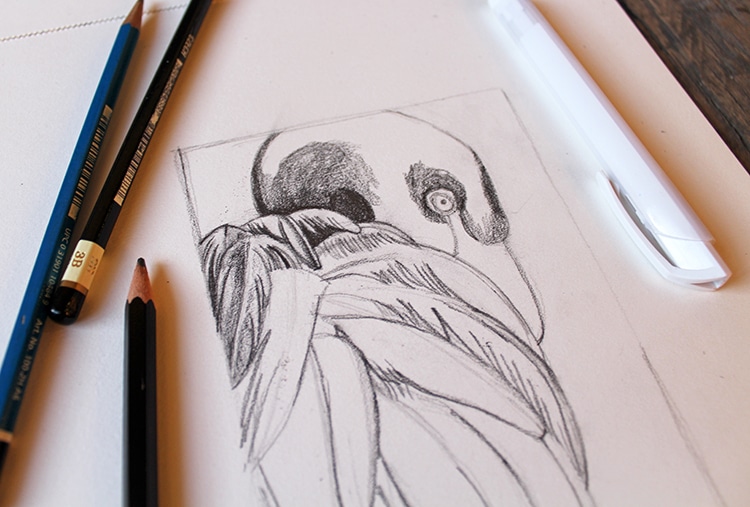
4. Refine your initial sketch.
Once you're confident and happy with your outlines, begin to refine your feather drawing. This might seem like a daunting step, but don't worry. Take it feather by feather and you'll be fine.
With each part of the plumage, observe what you see and record it on your paper. Sometimes, you'll be able to see the feather's long, delicate fringe while other times the plumage will appear stiff and compact. Note when this happens and signify the fringe with long, single lines that drape over other feathers.
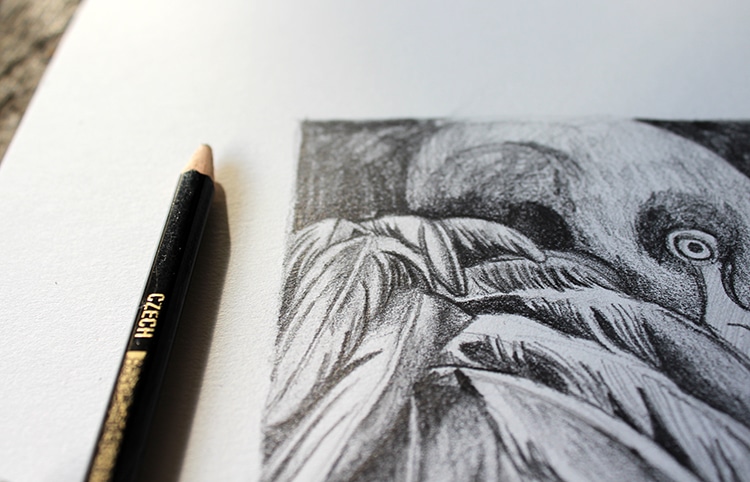
5. Begin to shade your drawing.
Now the fun begins! All of your sketching and planning begins to take on a three-dimensional form when you begin shading. Using your B-graphite pencil for the dark tones and your H-graphite for the fine details, use the same strategy you did in the initial sketching. Going feather by feather, replicate its shading and highlights in your drawing.
Here's where knowledge of feather structure will come in handy; the center of the feather, the rachis, is a hard ridge that sits slightly above the vane. It will most likely have some sort of highlight on it followed by thin shadows on either side.
When drawing the fringe of the feathers, it's best to use an H-graphite pencil. The hard lead doesn't easily smear and is perfect for precise details like long hairs. For feathers that are obscured by other feathers, the B-graphite pencil will achieve the rich black tones.
6. Work feather by feather until you're done.
Shading will take you a while, but the end result is worth it. When complete, you'll have a lifelike drawing of feathers and will have just practiced a strategy you can use for other birds.
Before you high-five yourself for a job well done, take one last look at your drawing. Make an assessment: Is there anything that looks strange? Is there anything that needs more shading or needs erased? Check your final work before you celebrate—you'll be glad you did.

All images via Sara Barnes / My Modern Met unless otherwise stated.
Related Articles:
100+ Drawing Ideas That Will Get You Sketching Right Now
7 Fun Drawing Games That Challenge You to Flex Your Creativity Muscles