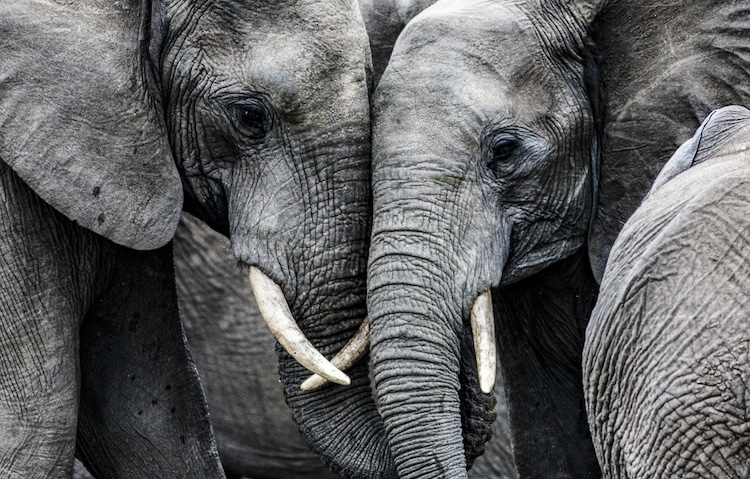
Elephants are some of the most spectacular animals on Earth. Not only are they massive, but they're also highly intelligent. Additionally, they have dexterous trunks and an incredible memory. It's no wonder that these gentle giants have won so many people's hearts.
Drawing an elephant may seem like a gargantuan task, but follow these step-by-step instructions and you'll be on your way to a striking illustration in no time. Want to give it a go? Then grab your drawing supplies and some paper—it's time to draw an elephant!
How to Draw an Elephant (Step by Step Guide)
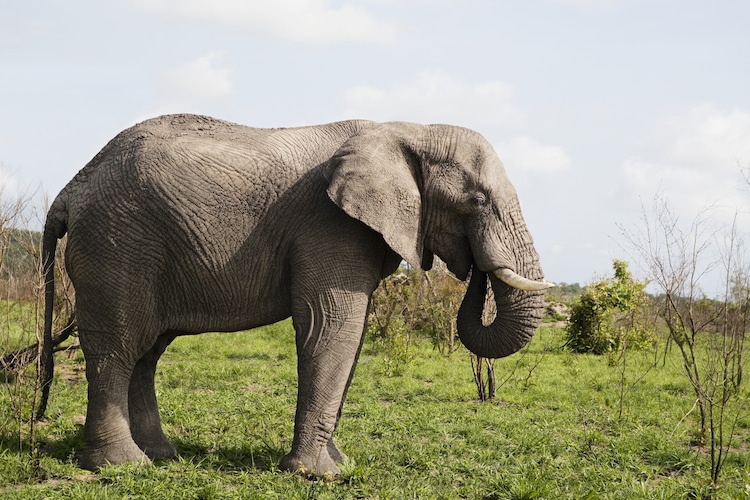
There are two species of elephants—African and Asian. They can be distinguished by the size and shape of their ears. For this tutorial, we'll be focusing on the larger-eared African elephant. And since we’re going to be drawing it walking in profile, you’ll want to make sure that you have several reference photos with a good view of its features, including the feet.
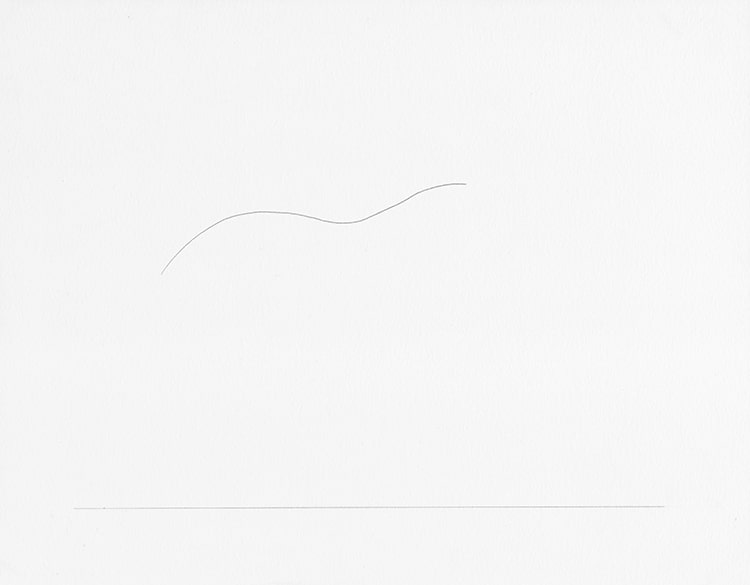
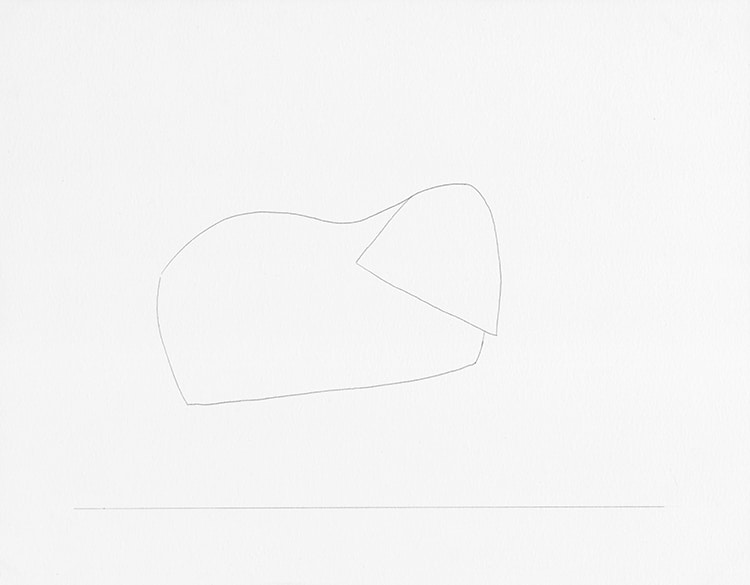
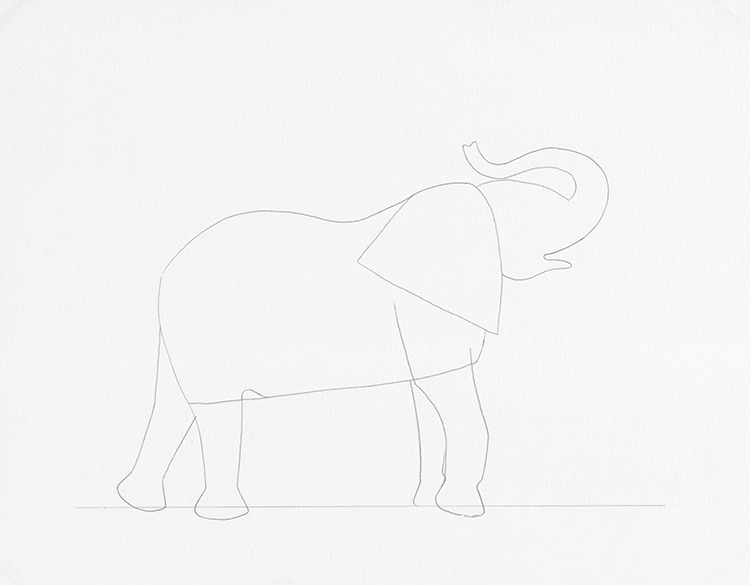
Step 1: Sketch the body
Art: Margherita Cole | My Modern Met
First, use a ruler to draw a horizontal line near the bottom of your paper. This will help you orient the size and proportions of your elephant. Next, move your pencil a ways above the line and draw an elongated S-shape to emulate the elephant's back.
Once you're pleased with it, complete the line by transforming it into a somewhat rectangular shape. Make sure it is slanting slightly upwards. Additionally, at the top right corner of the large shape, draw a triangle-shaped ear.
Art: Margherita Cole | My Modern Met
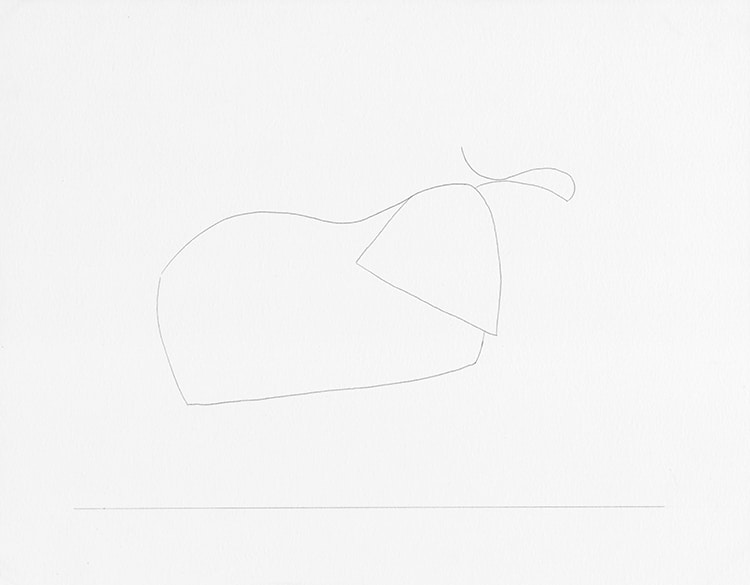
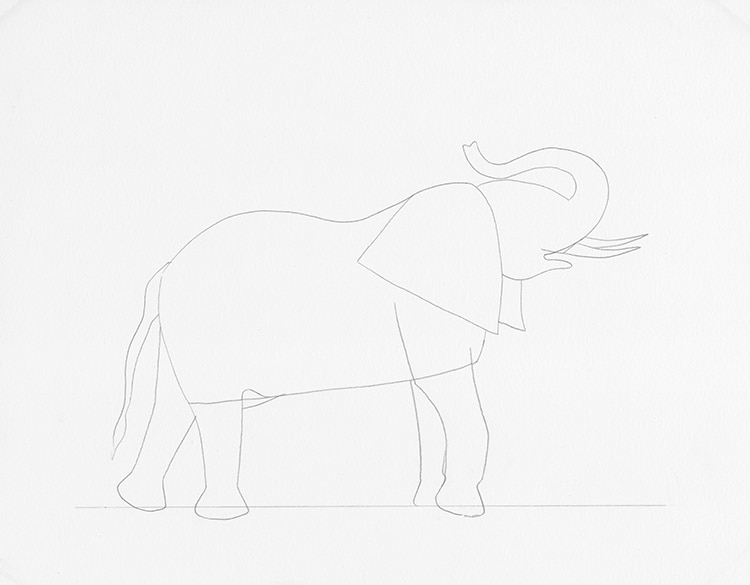
Step 2: Draw the trunk
Art: Margherita Cole | My Modern Met
Starting at the corner of the ear, use your pencil to draw a rounded line for the head. Then, sketch another S-shaped line that curls upwards to indicate the trunk. Once you reach the end, create a loose m-shape and take the line back down. When the trunk meets the elephant's head, sketch a slightly pointed open mouth, before rounding the chin halfway into the ear.
Be sure to have your reference photos handy for this step, as it can be a little tricky to find the right proportions. Take your time until you feel satisfied with how it looks.

Art: Margherita Cole | My Modern Met
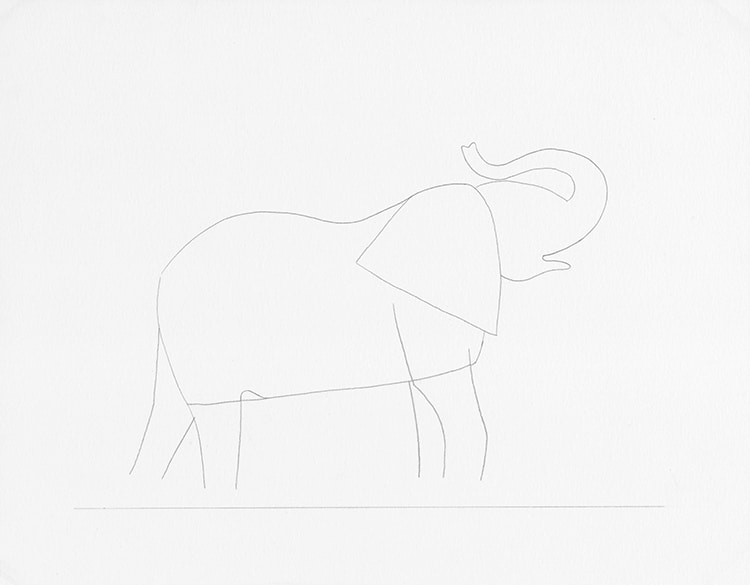
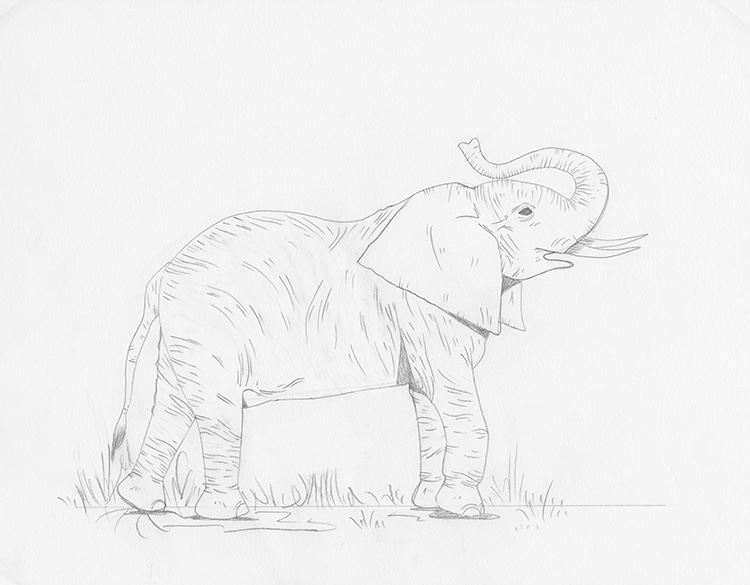
Step 3: Add the legs and feet
Art: Margherita Cole | My Modern Met
In comparison to their size, African elephants have surprisingly thin legs. So, beginning with the forelegs, sketch a long rectangular shape—bending slightly at the knee to indicate that the elephant is moving. Keep the far leg straight. Moving on to the hind legs, use the shape of the elephant's body to guide your drawing. The far back leg should be extending behind the elephant.
Next, it's time to add the feet. Unlike drawing wolf paws, an elephant's feet are fairly simple. Use your pencil to sketch a loose bell shape to the end of each leg.
Art: Margherita Cole | My Modern Met
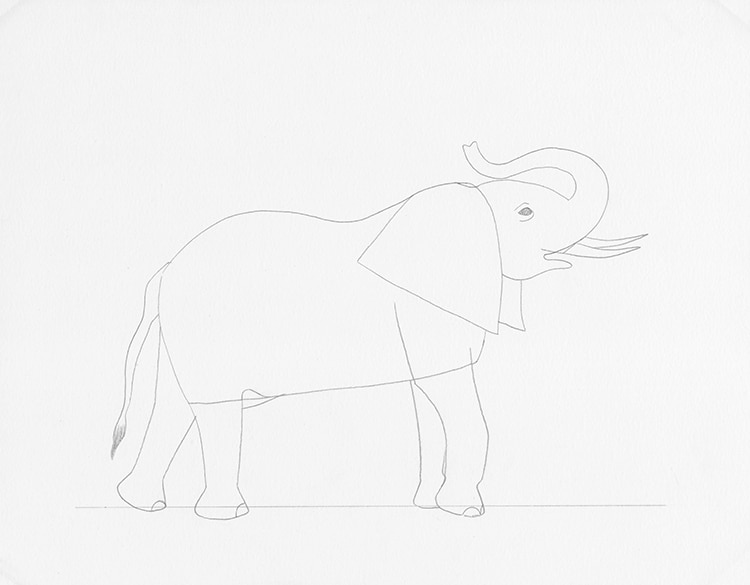
Step 4: Sketch the tusks
Art: Margherita Cole | My Modern Met
Now that we have the main components of our elephant done, we can begin focusing on the details. At the back of the elephant, sketch a long tail with a tuft of hair at the base. Then, turn your attention towards the elephant's head. Position your pencil at the roof of the mouth and add a single tusk. This can be as long or as short as you want it to be, depending on the age of your elephant. Just remember to add a second tusk behind it.
Afterward, you can sketch a large almond eye in the center of the head. (If you like, you can already add a few wrinkles at this stage.) Then, draw large nails on the elephant's feet in the shape of half-circles. Remember: African elephants have three nails on their back feet and four nails on their front feet so what you draw may depend on the orientation of your model.
Art: Margherita Cole | My Modern Met
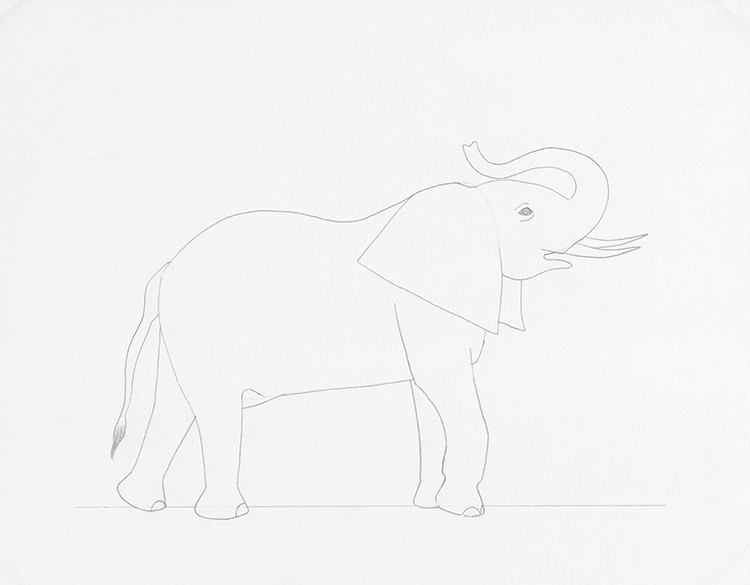
Step 5: Erase the guidelines
Art: Margherita Cole | My Modern Met
At last, when you’re content with the outline, you can start erasing any unnecessary guidelines. If something is still bothering you at this stage, set the drawing aside for a bit and come back to it. Once you have a bit of distance, go ahead and make any adjustments that you think are needed.
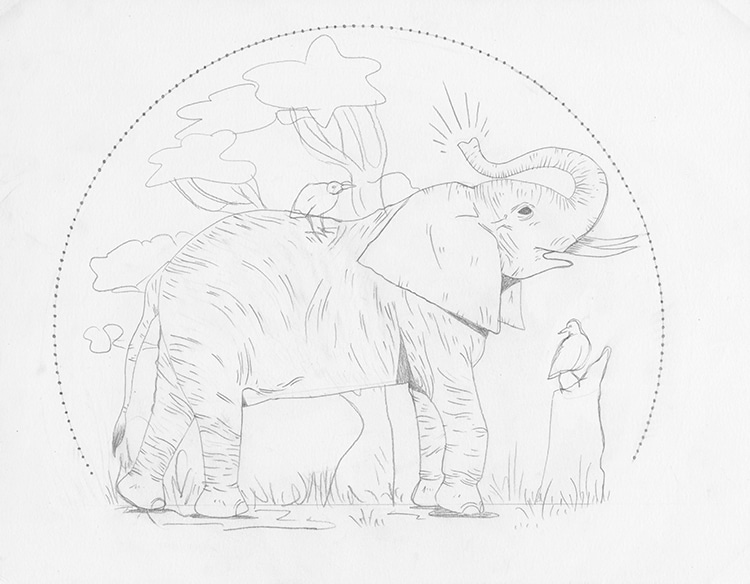
Step 6: Add details to the elephant
Art: Margherita Cole | My Modern Met
Elephants may be cute, but they're also very wrinkly. Although it can feel detrimental to your drawing to fill it with lines, the final effect is oftentimes worth it. Try adding a few wrinkles where the elephant is carrying more skin—like the elbows, ankles, knees, and trunk. If you like the effect, feel free to continue adding texture to the rest of the body, but keep the ear more or less smooth.
Next, it's time to complete your illustration with a little bit of background. Since you've already put so much effort into the elephant, you don't need to add much more. Just add a bit of foliage to the ground, and maybe a tree in the background. Sometimes African elephants are seen with birds riding on their backs, so feel free to include more animal friends.
If you want to make an easy border around your illustration, simply pull out a protractor and draw a semi-circular shape around the elephant. Then, make the border even more exciting by embellishing it with small dots.
Art: Margherita Cole | My Modern Met
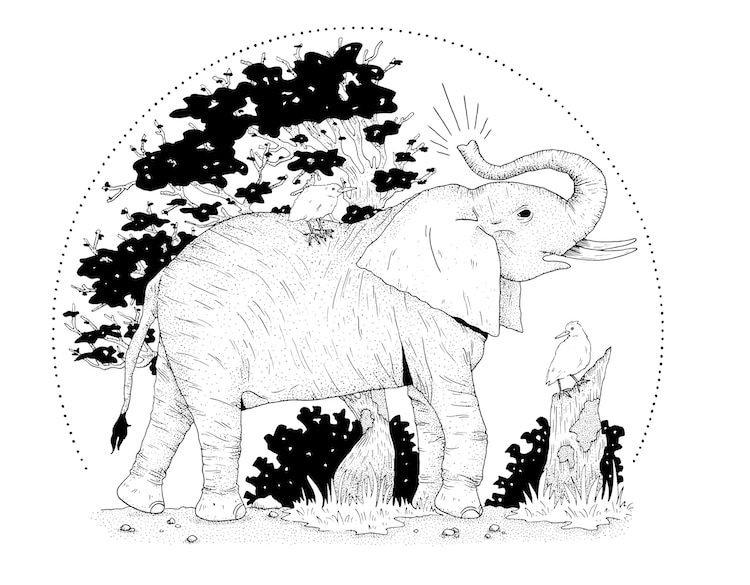
Step 7: Go over the drawing in ink
Art: Margherita Cole | My Modern Met
To finish your elephant in ink, pull out your favorite pens, and slowly trace over your final drawing. You can create interesting texture in your illustration by using a variety of inking techniques like hatching and stippling. Once you’ve gone along all of the graphite lines, consider adding large areas of black to create an attractive balance.
Finally, once you’ve given the ink ample time to dry, erase any remaining pencil lines. Congrats! You've completed your own drawing of an African elephant!
Looking for others who love drawing? Join our Art, Design, Photography, and Drawing Club on Facebook!
Related Articles:
Learn How to Draw a Lion in 7 Easy Steps
Learn How to Draw Koi Fish With This Easy Step-By-Step Guide