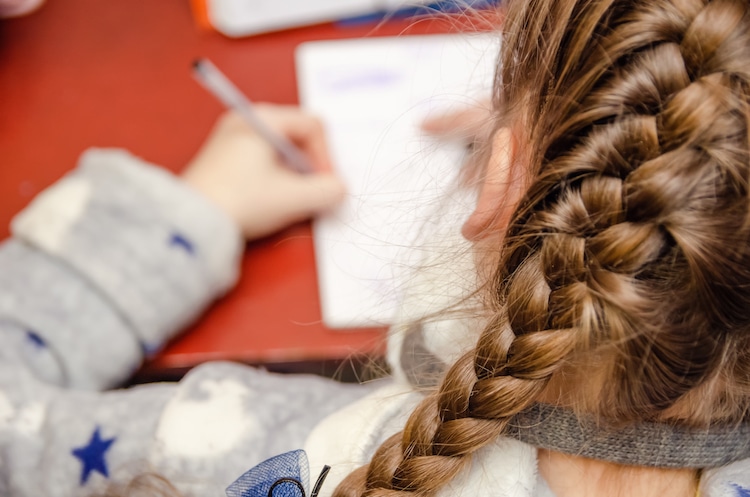
Photo: Stock Photos from Yaroslau Mikheyeu/Shutterstock
The way we wear our hair says a lot about our personality and style. This also applies to drawing illustrations of people. In fact, an easy way to distinguish your character in a crowd is by sketching their hair in a unique or noticeable way. If rendering hair intimidates you, don't worry. Like any new artistic subject, the key is to take it step by step.
In this tutorial, we'll learn how to draw three different types of braids: three-strand, French, and fishtail. All you'll need to get started is some reference photos of these hairstyles, a pencil, an eraser, a pen, and paper. Ready to get started? Then let's draw a braid!
Learn how to draw three types of braids step by step
View this post on Instagram
How to Draw a Three-Strand Braid
Step 1: Sketch three sections of hair
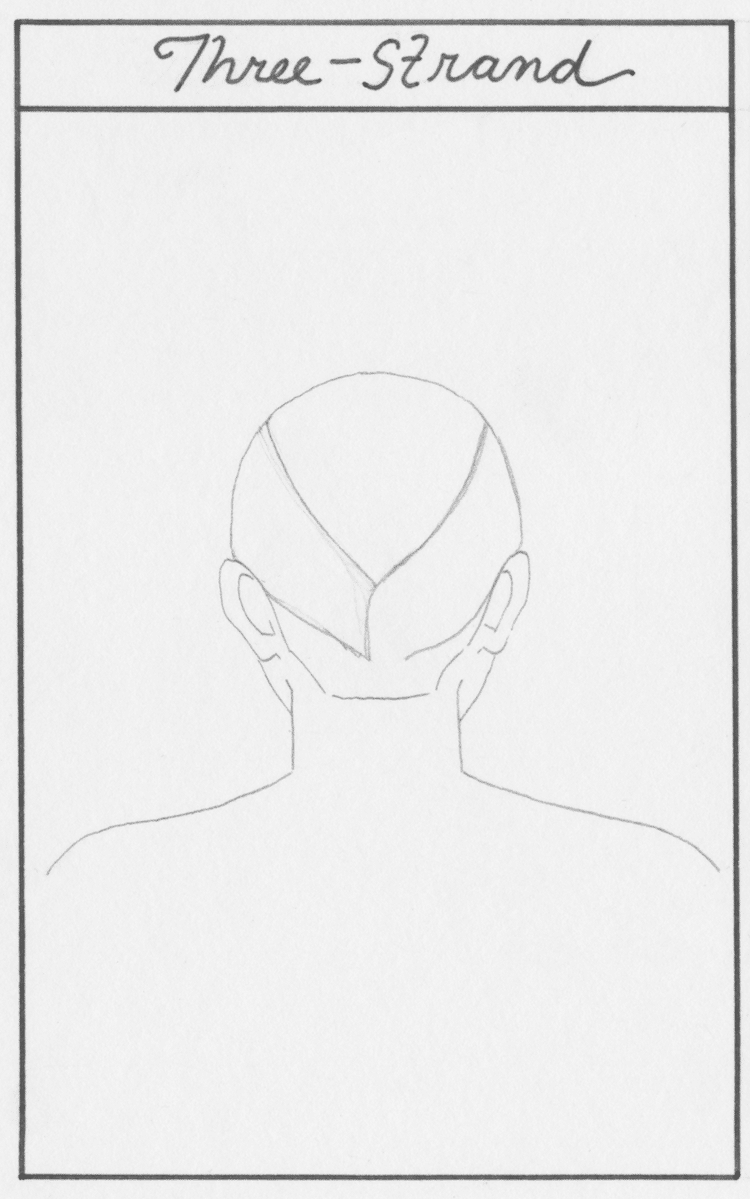
Photo & Art: Margherita Cole | My Modern Met
Starting above the ears, divide the hair into three sections. Then, merge the two side sections in the back.
Step 2: Continue intertwining sections of hair
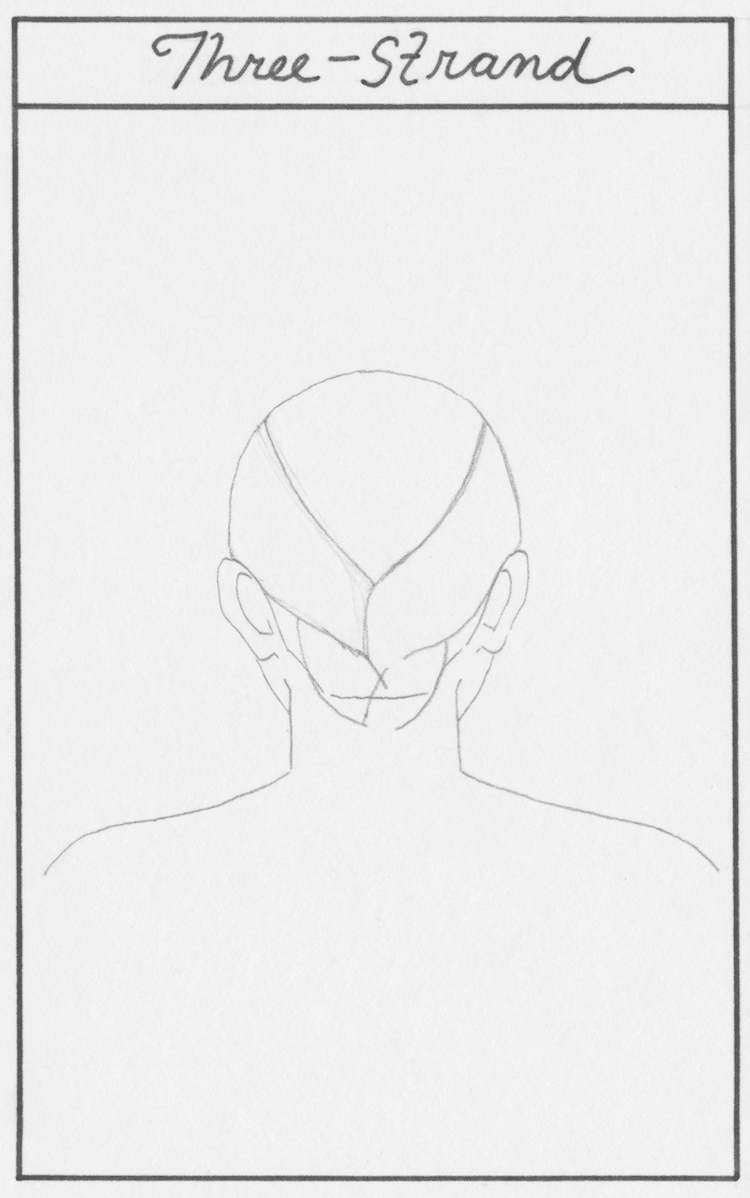
Photo & Art: Margherita Cole | My Modern Met
Next, add two more sections below, making sure to intersect one into the other.
Step 3: Continue drawing sections of the braid
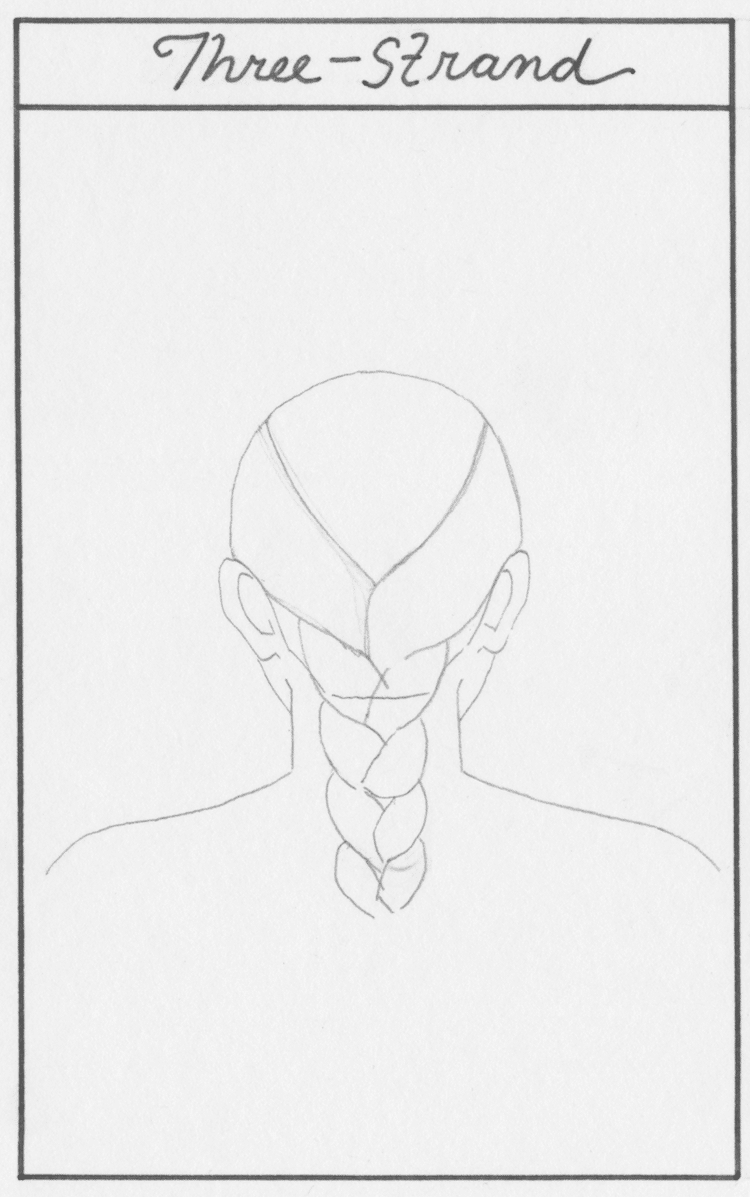
Photo & Art: Margherita Cole | My Modern Met
Continue adding sections to the braid in the same way to make it longer. As you go further down, these sections should start to look marginally smaller.
Step 4: Finish off the braid
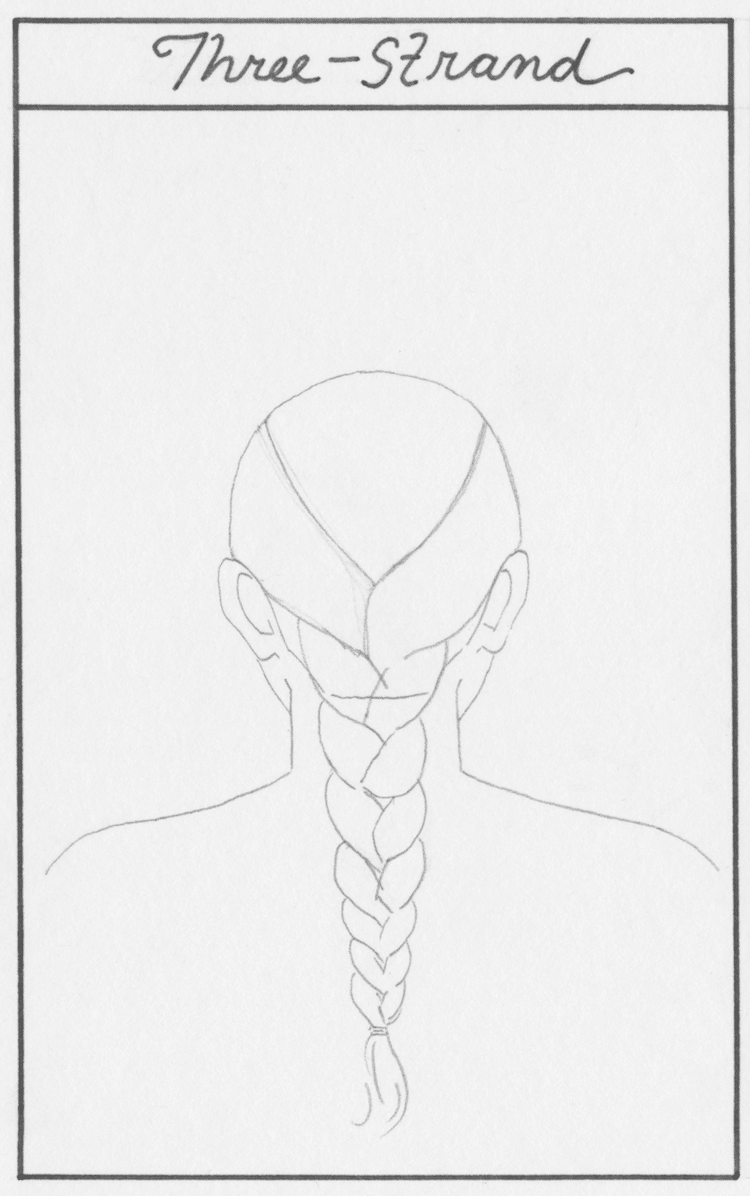
Photo & Art: Margherita Cole | My Modern Met
When you reach the end of the braid, it should be at its narrowest, so tie it off with a hairband. Then, add a wisp of hair popping out of it.
Step 5: Add detail to the hair
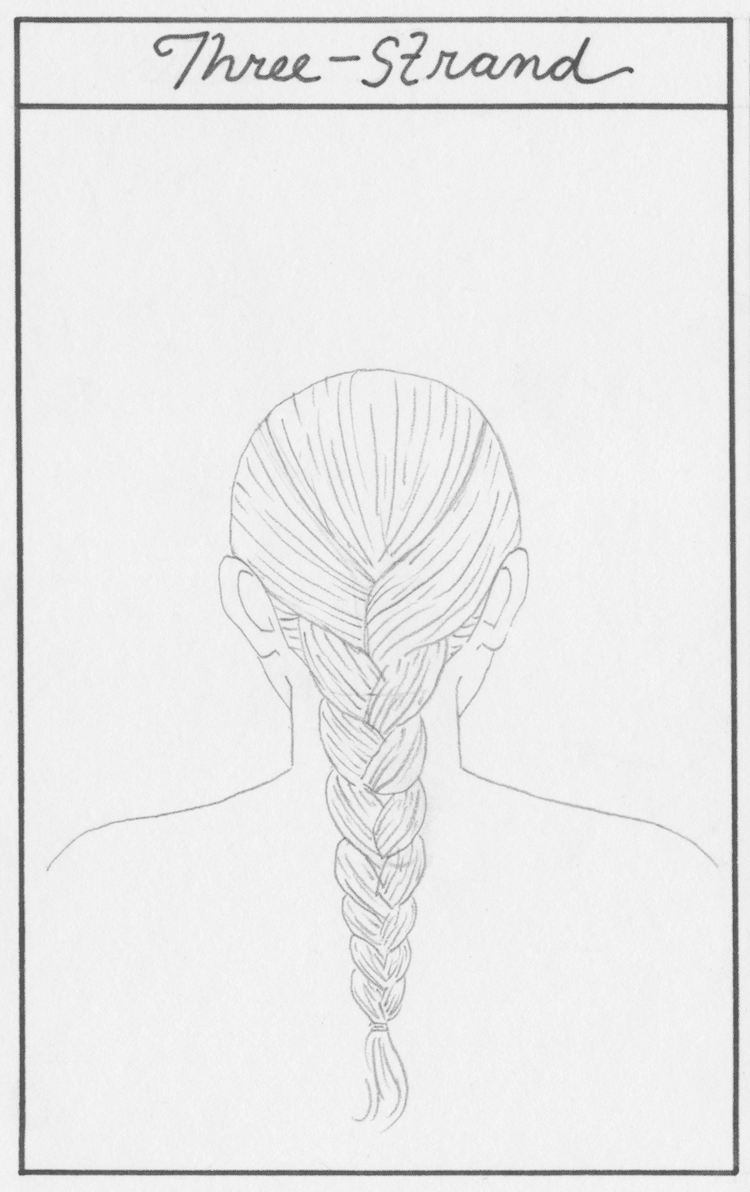
Photo & Art: Margherita Cole | My Modern Met
To make this braid look more realistic, you'll need to add some texture. So, sketch some lines in the same direction as how the hair is being pulled. Depending on how naturalistic you want your hairstyle to look, you may want to spend a considerable amount of time on this.
Step 7: Go over the drawing in ink

Photo & Art: Margherita Cole | My Modern Met
Finally, when you're done with your drawing, it's time to go over it in ink. Using your favorite pen, slowly trace over the pencil lines. To ensure that you don't accidentally smear any ink as you go, place a scrap piece of paper underneath your drawing hand. Then, after waiting ample time for the ink to dry, erase any remaining pencil marks.
Congrats! You've successfully drawn a three-strand braid.
How to Draw a French Braid
Step 1: Sketch three sections of hair

Photo & Art: Margherita Cole | My Modern Met
First, lightly sketch three sections of hair at the top of the head. Then, merge the two side sections at the center.
Step 2: Add more sections of hair
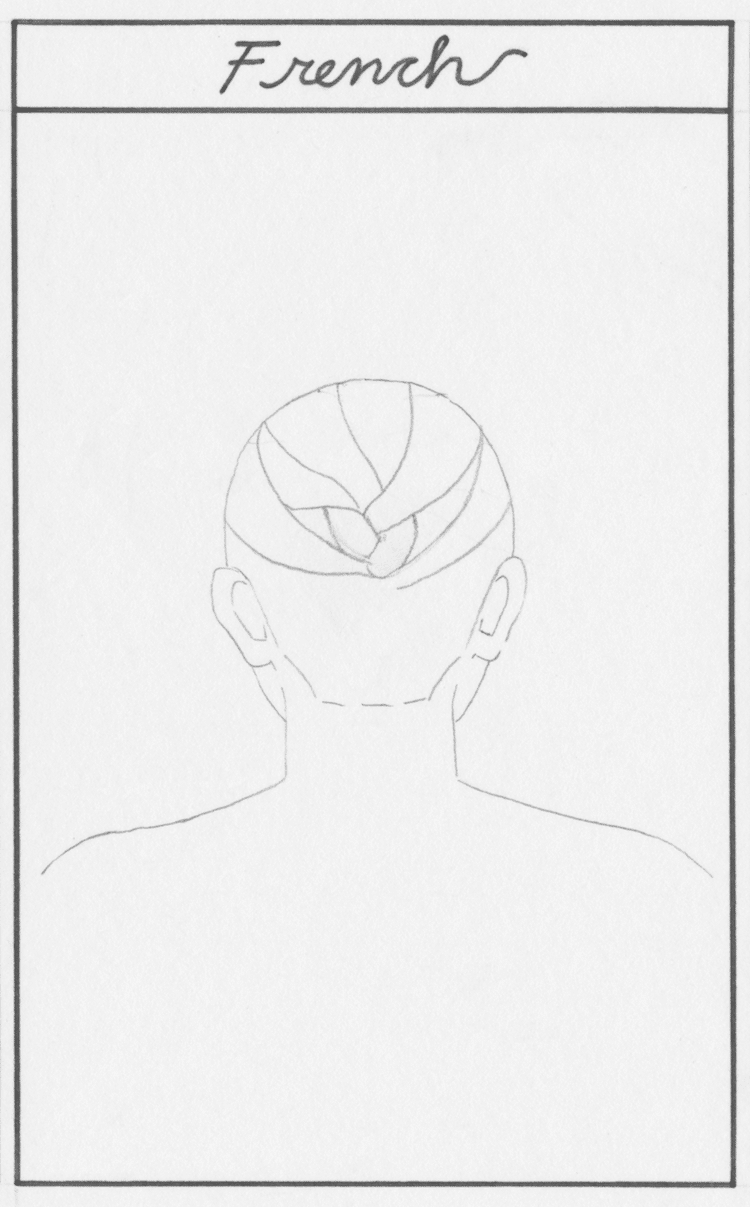
Photo & Art: Margherita Cole | My Modern Met
Next, add two intersecting sections of hair below, in the same style as the three-section braid. Afterward, pull two more sections of hair from the side as you did in Step 1. You will continue this process until you reach the end of the hairline.
Step 3: Continue building the braid
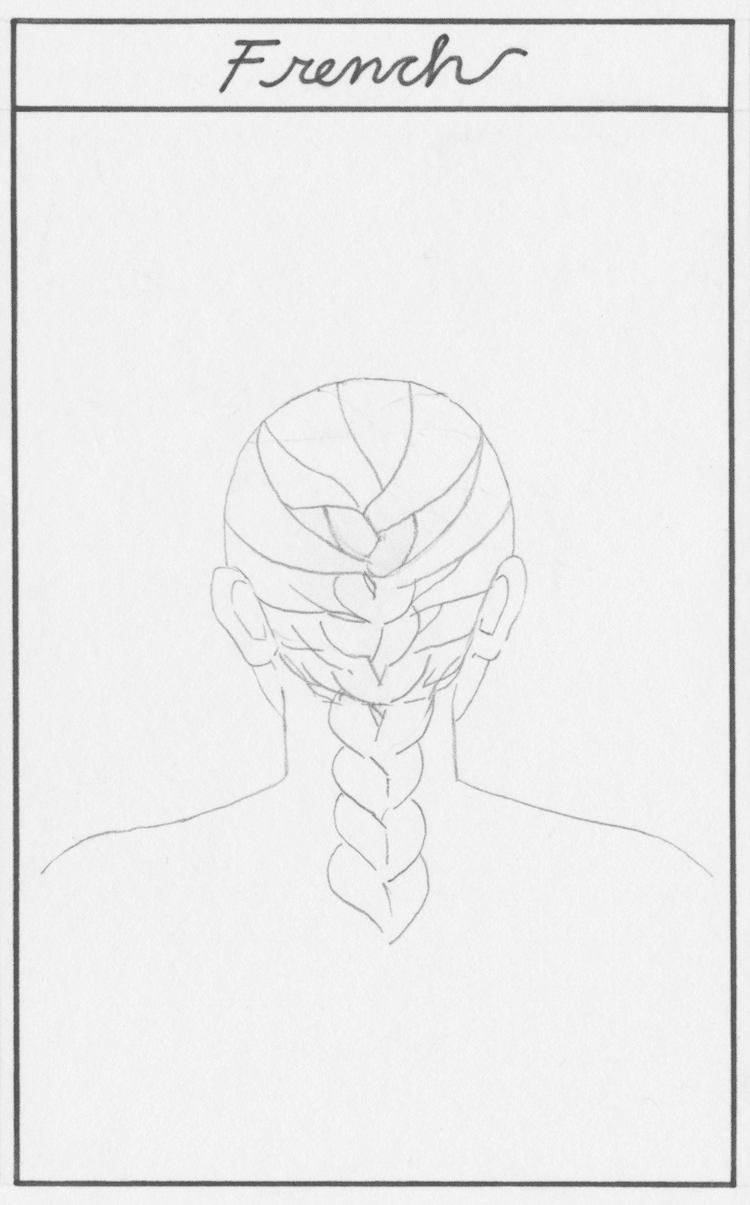
Photo & Art: Margherita Cole | My Modern Met
Once you finished pulling hair from the head, you will create a braid in the same way as you did for the three-strand style—drawing two thick sections of hair intersecting near the center.
Step 4: Finish the hairstyle

Photo & Art: Margherita Cole | My Modern Met
When you reach the end of the braid, it should be at its narrowest, so tie it off with a hairband. Then, add a wisp of hair popping out of it.
Step 5: Add detail to the hair
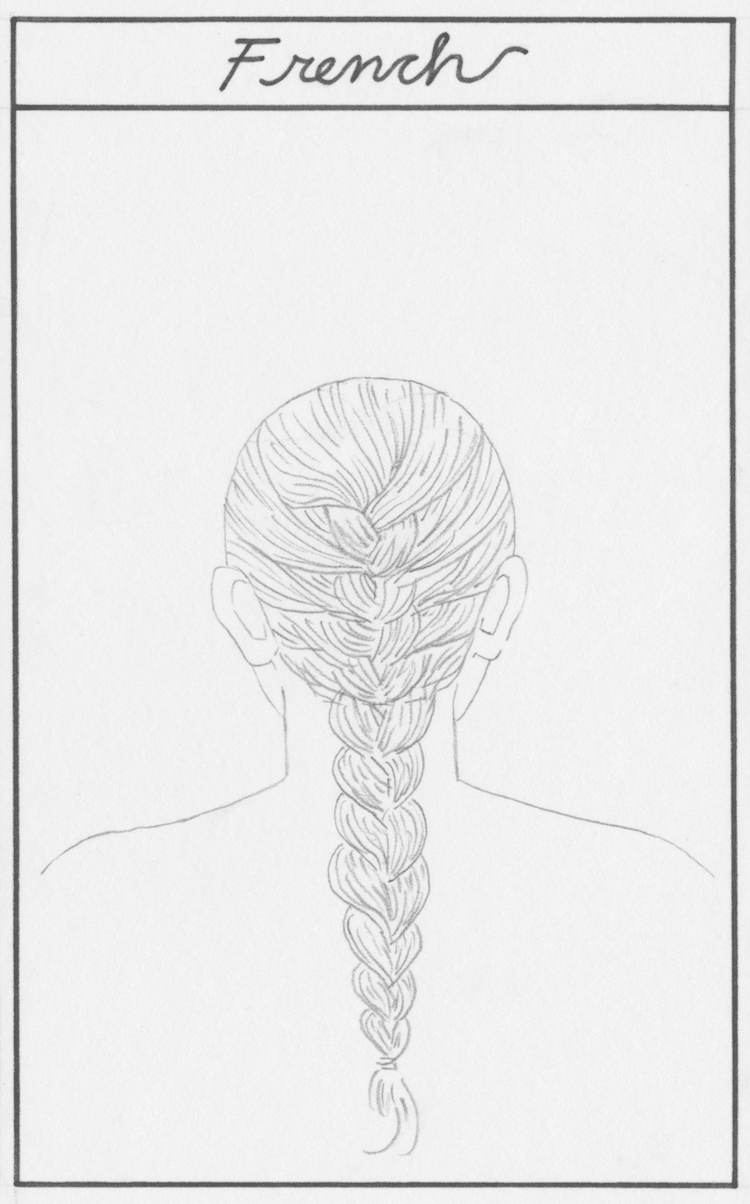
Photo & Art: Margherita Cole | My Modern Met
To make this braid look more realistic, you'll need to add some texture. So, sketch some lines in the same direction as how the hair is being pulled. Depending on how naturalistic you want your hairstyle to look, you may want to spend a considerable amount of time on this.
Step 6: Going over the drawing in ink
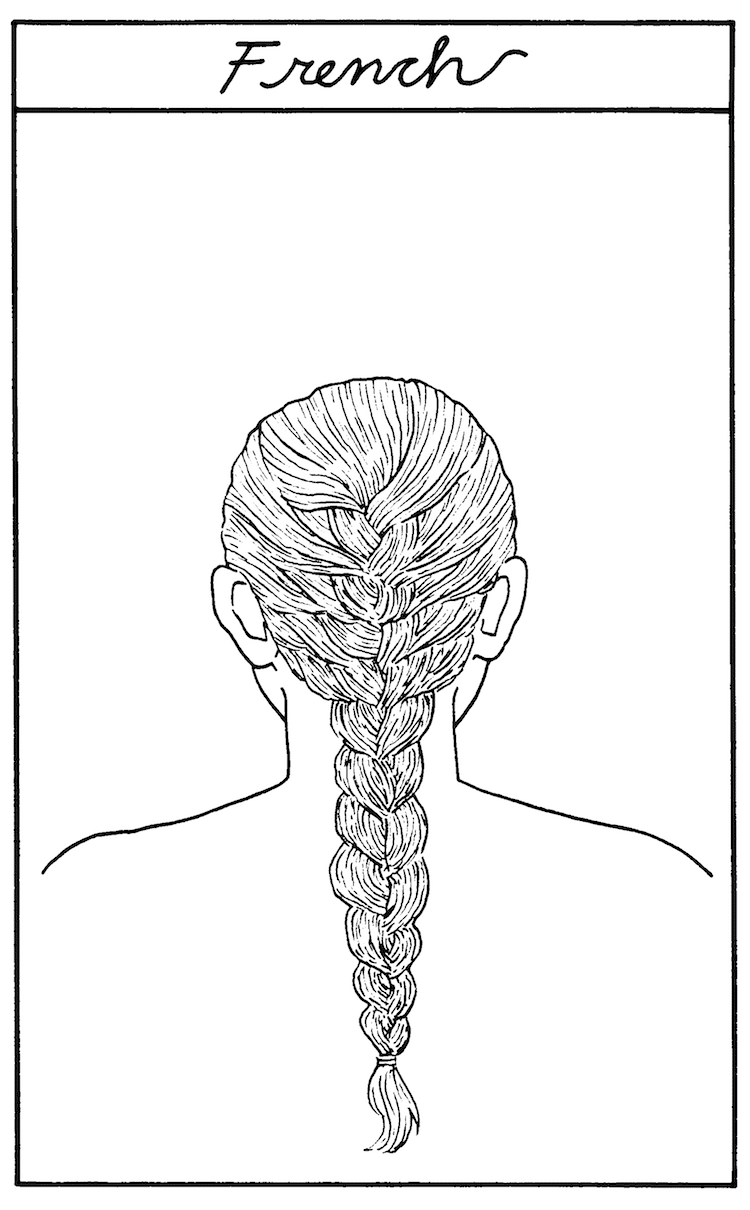
Photo & Art: Margherita Cole | My Modern Met
Finally, when you're done with your drawing, it's time to go over it in ink. Using your favorite pen, slowly trace over the pencil lines. To ensure that you don't accidentally smear any ink as you go, place a scrap piece of paper underneath your drawing hand. Then, after waiting ample time for the ink to dry, erase any remaining pencil marks.
Congrats! You've successfully drawn a French braid.
How to Draw a Fishtail Braid
Step 1: Draw two sections of hair

Photo & Art: Margherita Cole | My Modern Met
Begin by sketching two thin sections of hair above the ears. Merge these pieces together at the center
Step 2: Continue adding sections of hair

Photo & Art: Margherita Cole | My Modern Met
Using the hairline as a general guide, continue to create thin sections that unite at the center.
Step 3: Build the braid
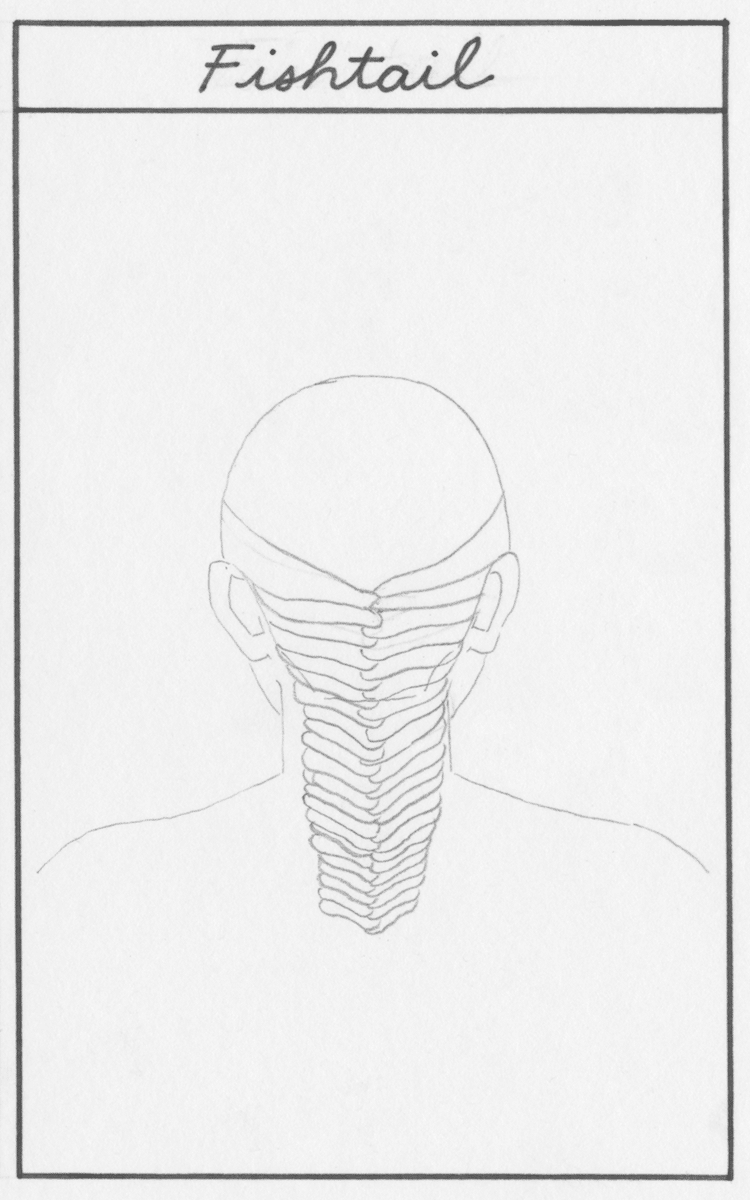
Photo & Art: Margherita Cole | My Modern Met
Continue adding sections to the braid in the same way to make it longer. As you go further down, these sections should start to look marginally smaller.
Step 4: Finish the hairstyle
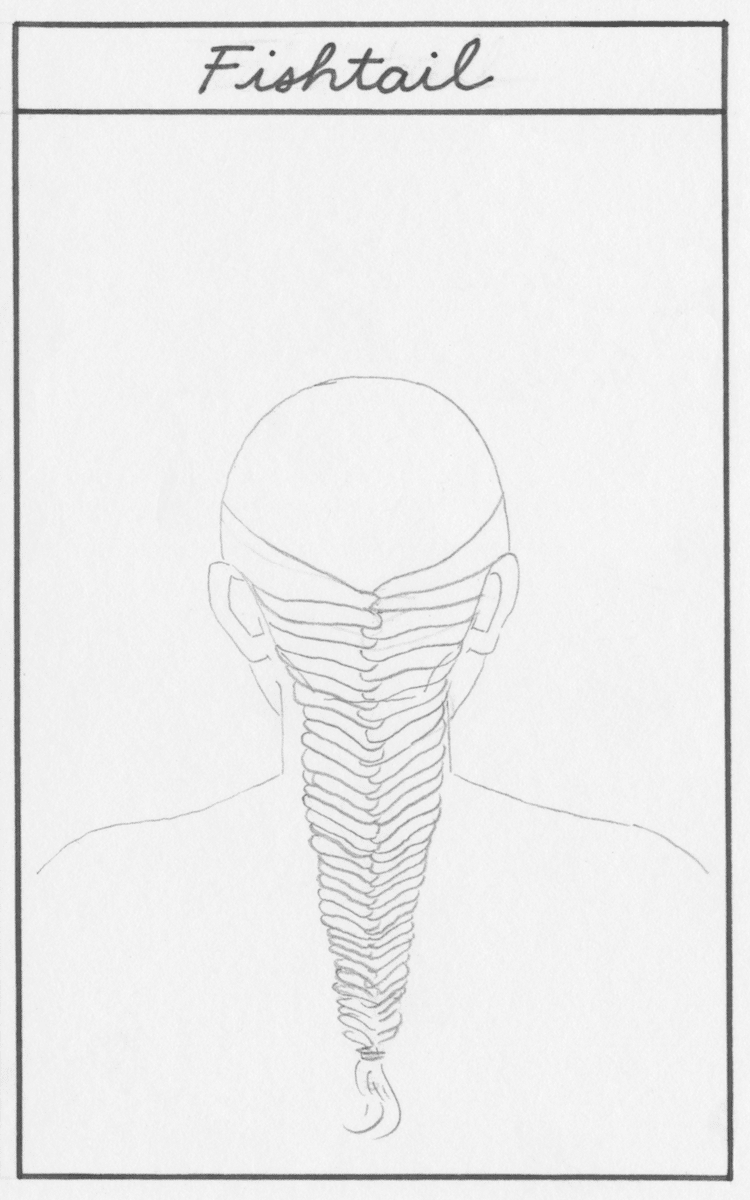
Photo & Art: Margherita Cole | My Modern Met
When you reach the end of the braid, it should be at its narrowest, so tie it off with a hairband. Then, add a wisp of hair popping out of it.
Step 5: Add detail to the braid
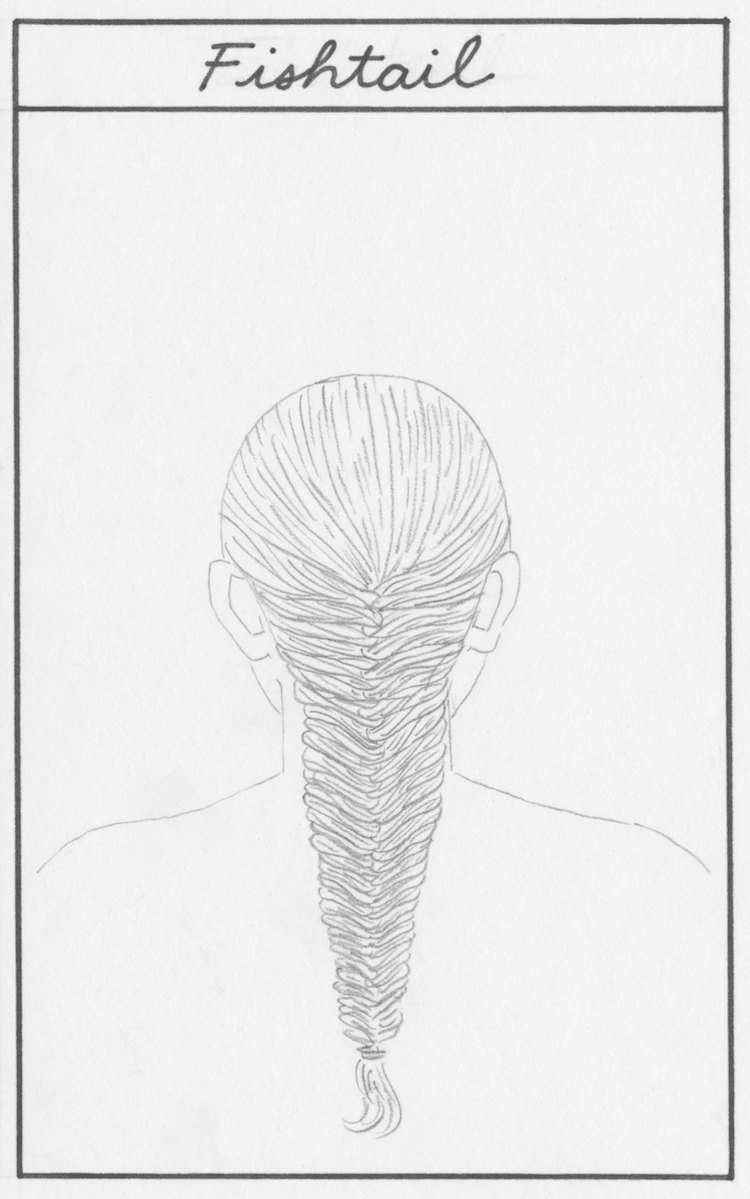
Photo & Art: Margherita Cole | My Modern Met
To make this braid look more realistic, you'll need to add some texture. So, sketch some lines in the same direction as how the hair is being pulled. Depending on how naturalistic you want your hairstyle to look, you may want to spend a considerable amount of time on this.
Step 6: Going over the drawing in ink
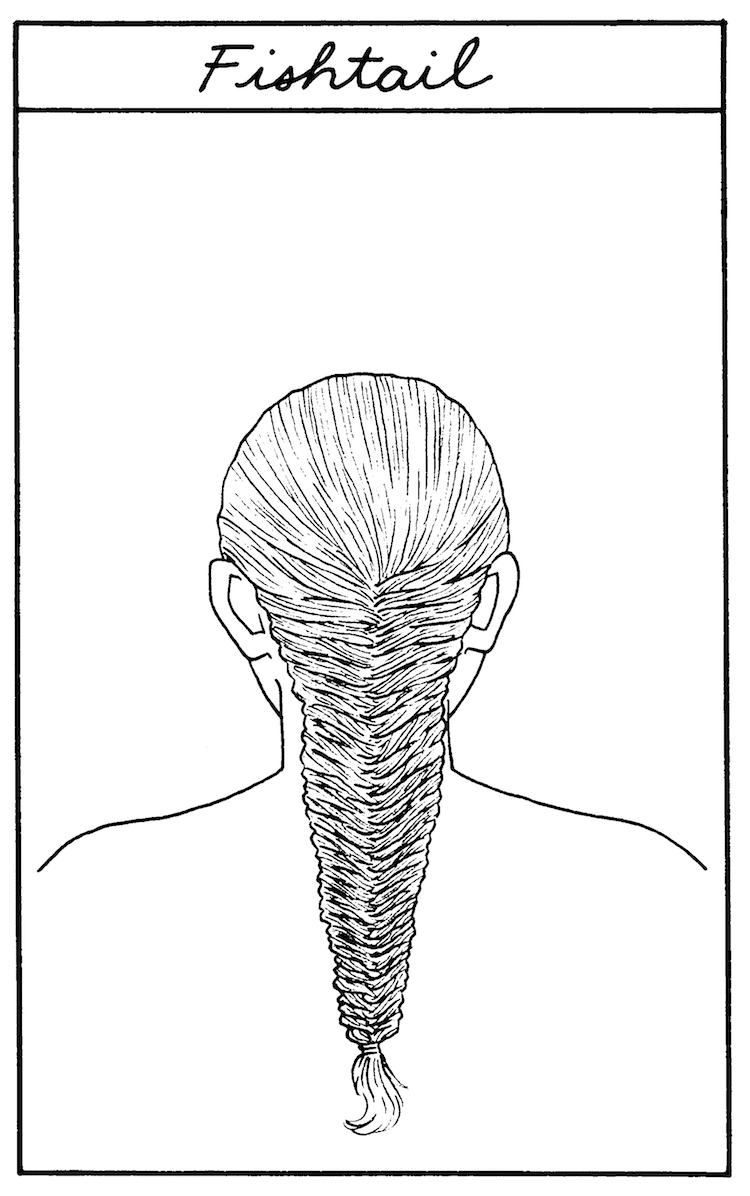
Photo & Art: Margherita Cole | My Modern Met
Finally, when you're done with your drawing, it's time to go over it in ink. Using your favorite pen, slowly trace over the pencil lines. To ensure that you don't accidentally smear any ink as you go, place a scrap piece of paper underneath your drawing hand. Then, after waiting ample time for the ink to dry, erase any remaining pencil marks.
Congrats! You've successfully drawn a fishtail braid.
Looking for others who love drawing? Join our Art, Design, Photography, and Drawing Club on Facebook!
Related Articles:
Let Your Drawing Speak for You by Learning How To Draw Lips Step by Step
Learn How to Draw a Monarch Butterfly in Five Easy Steps
Perfect Your Portraiture by Learning How to Draw a Face Step by Step