Stock Photos from Irina Alexandrovna/Shutterstock
No fairytale setting is really complete without the presence of a grand and monstrous dragon. As a popular character in both Western and Eastern mythologies, many versions of this creature have been illustrated. Some have wings, and others are sea-based; some are ferocious, and others more cuddly. With so many varieties it can be hard to pin down which one you want to draw. That's why it's important to settle the basics of a dragon first.
If you take the beast on step by step, you'll have a solid foundation to personalize the dragon to your liking. So set aside your doubts and pick up your drawing tools. Let's draw a dragon!
How to draw a dragon, step by step
Step 1: Sketch the basic shapes.
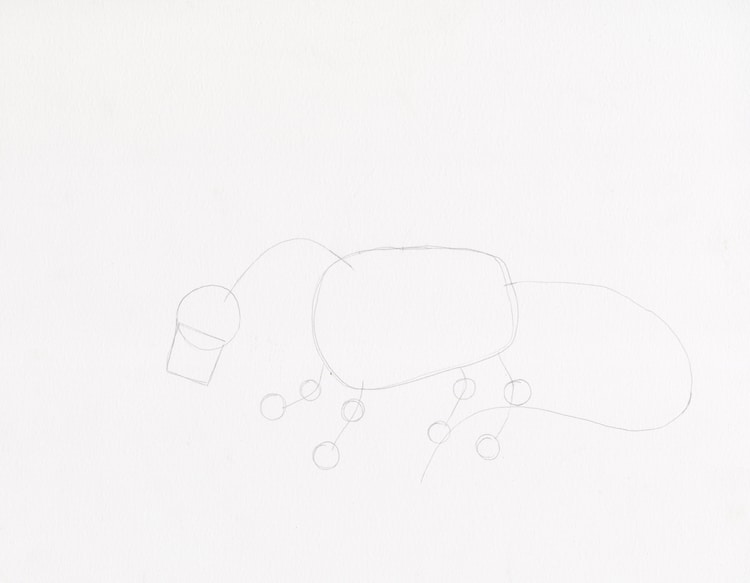
Photo & Art: Margherita Cole / My Modern Met
A blank page is daunting, so we first want to get an idea of how big our dragon will be. To do this, use basic shapes and lines to measure out the proportions of your dragon's body. If you want to add wings and other elements to your composition, make a conscious effort to keep enough blank space on the page.
It's important to get this step right, so it's okay if it takes a few tries. Just make sure you have a dependable eraser and keep sketching until you get it the way you want it to be.
Step 2: Connect your preliminary shapes.
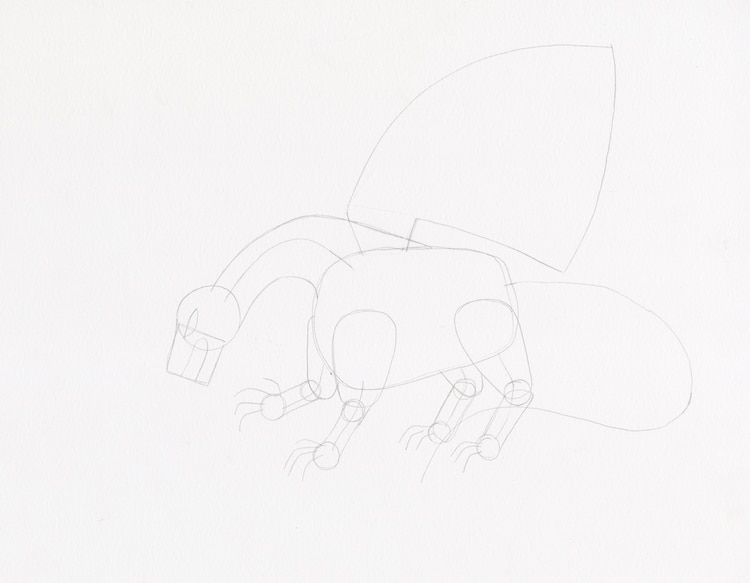
Photo & Art: Margherita Cole / My Modern Met
Next, we're going to connect the basic shapes and lines we laid out until we have a satisfactory outline of the dragon's form. Once you have the body mostly outlined, you can sketch a simple fan protruding from the upper body of the dragon—this will be its wing.
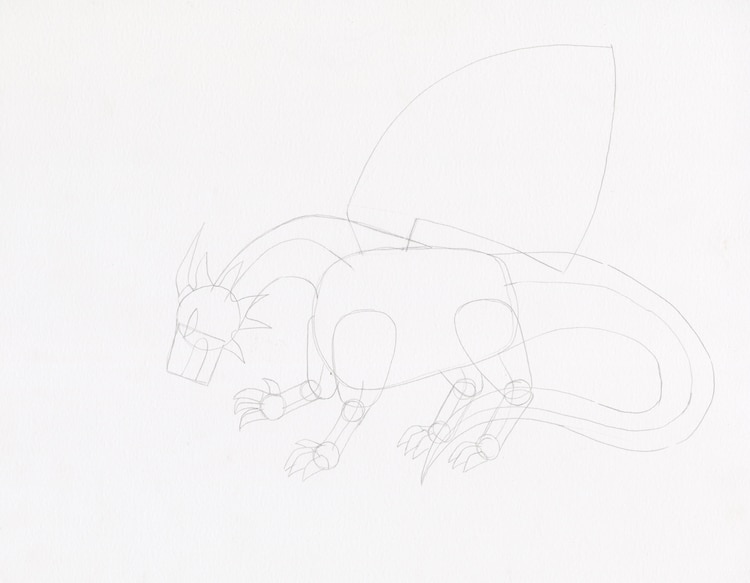
Photo & Art: Margherita Cole / My Modern Met
Now that you have the body and wing mostly sketched, focus on the tail. It should be fairly long, so if you want it to fit on the same page, it helps to curl it around the dragon's body.
As your dragon is coming together, it's a good idea to slowly start filling it in with more details, like the horn, and scales around the face. There are an endless number of dragon illustrations out there, so what details you decide to include is completely up to you.
Step 3: Refine the outline.
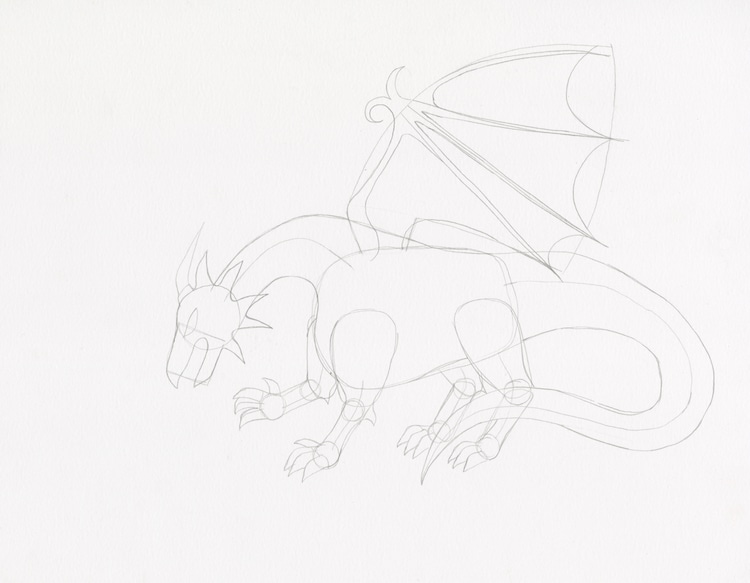
Photo & Art: Margherita Cole / My Modern Met
With the basics in place, you'll want to slowly add and edit as you see fit. It's a good tip to change your attention from one part of the drawing to another relatively frequently so you make sure the dragon makes sense as a whole. For instance, after refining the claws for a few minutes, check back in on the rest of the leg, and then the body, before going back to the claws again. It's easy to lose the balance of the proportions after focusing on one aspect of the drawing for so long. You might also want to look at your drawing from different angles every so often to see if you're happy with its progress.
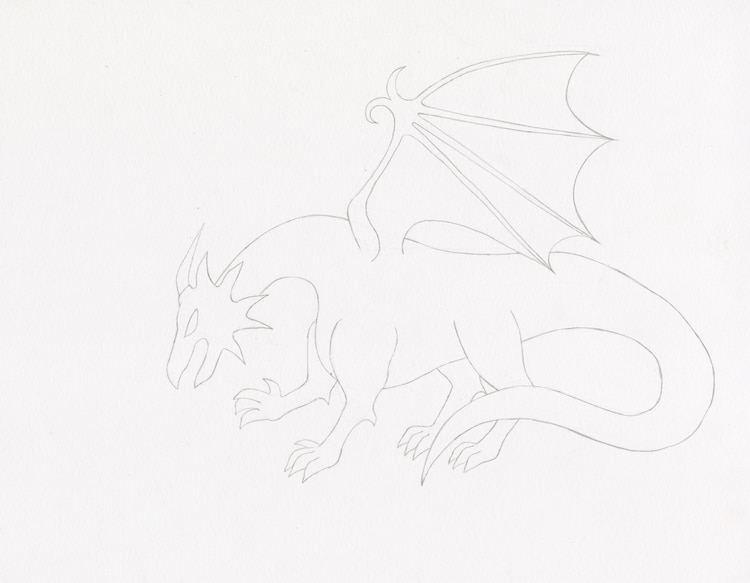
Photo & Art: Margherita Cole / My Modern Met
Once you have the outline more or less settled, erase the guidelines from earlier. Be gentle on the page, and slowly erase any unnecessary marks until you're happy with what's left.
Step 4: Pay attention to the details.
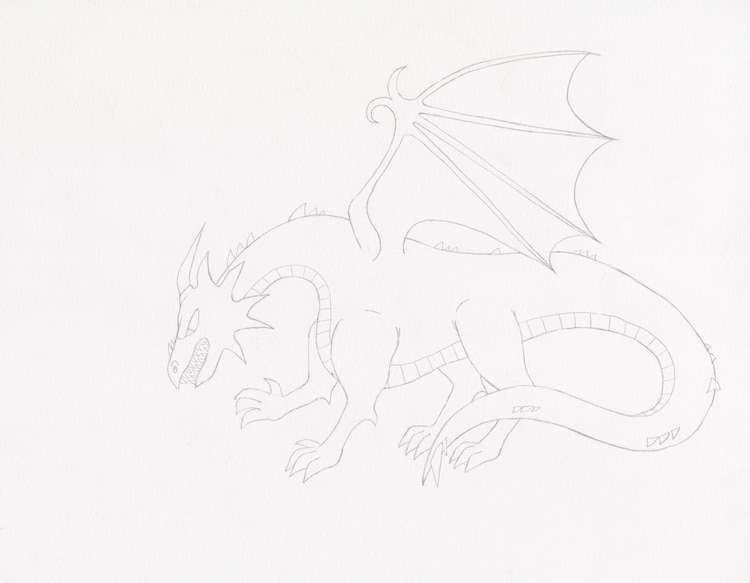
Photo & Art: Margherita Cole / My Modern Met
Now that you've done the grunt work, it's time for some fun! Think about what components you want your dragon to have, like horns, teeth, and scales. Depending on how you want to finish your drawing (in color, ink, graphite, etc.), you might add less detail at this stage. Still, it's good to have a few features in place to help with the last step.
Optional: Give the dragon a hoard of gold and a courageous foe.
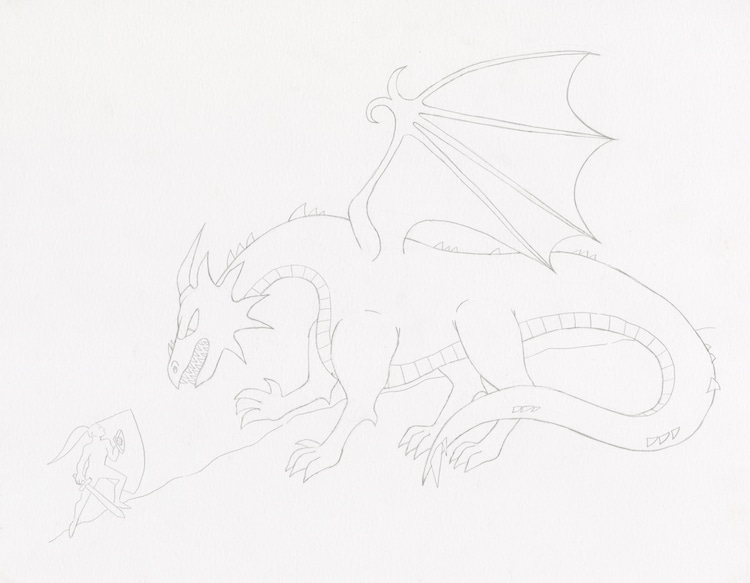
Photo & Art: Margherita Cole / My Modern Met
While you're getting ready to finish your drawing, you might want to think about adding extra elements to the composition. A dragon rider, a daring knight, or a hoard of gold are all neat ideas to complement the mythical creature.
Step 5: Go over the drawing in ink and/or add color.
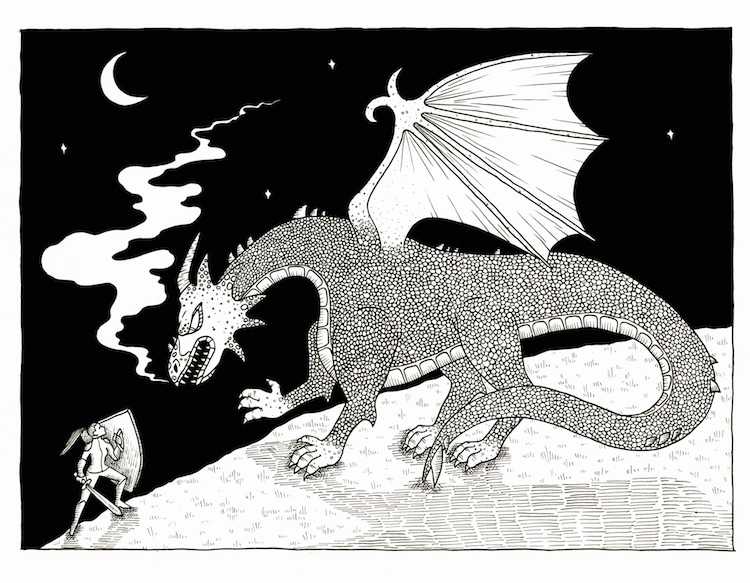
Photo & Art: Margherita Cole / My Modern Met
If you decide to finish your drawing in pen, you have the option to commit to a full-scale look. It takes a lot of time, but the effect can make it worth it if you want a very lizardy-looking dragon. To do it, you simply draw little circles over and over again, starting from the top of the neck. It won't look promising at first but keep going and it'll get better. It's also a good idea to add smoke or fire, hinting that your dragon is ready to fight.
Once you've finished, give yourself a pat on the back!
Looking for others who love drawing? Join our Art, Design, Photography, and Drawing Club on Facebook!
Related Articles:
Build Your Drawing Foundation When You Learn How to Draw a Skull
Learn How to Draw a Dog with This Simple Step-by-Step Sketching Guide
Set Your Sights on Realism by Learning How to Draw Eyes Step by Step


