There's a lot to love about ladybugs. Not only are they considered to be lucky charms—bringing good fortune to whomever they land on—but they're also a great insect to keep in your garden, as they eat some of the most common plant pests. So, why not celebrate the charm of this small, spotted beetle by drawing its likeness?
This tutorial will provide illustrated instructions that will help you render a ladybug in pencil, before going over it in pen and ink. Ready to get started? Then get some reference photos, drawing supplies, and paper, and get ready to draw a ladybug!
Learn How to Draw a Ladybug Step by Step
First, familiarize yourself with ladybug anatomy…
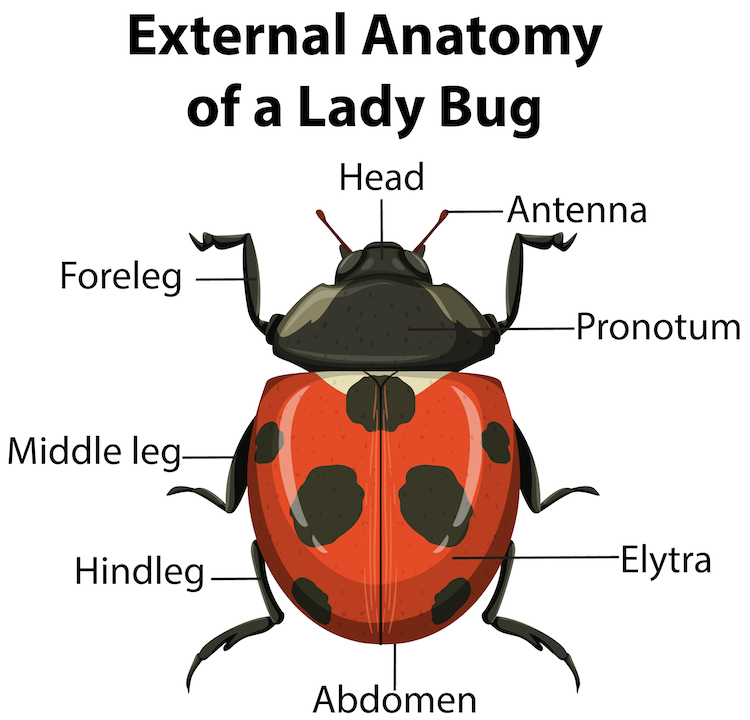
Before you start drawing, it might be helpful to familiarize yourself with a couple of basic anatomy terms. This will help you identify and understand what you need to draw. For instance, ladybug bodies feature three distinct sections: the head, the pronotum, and the abdomen. On top of the abdomen is a protective shell called the elytra. This is the red-and-black part of the ladybugs that they are famous for.
Additionally, since ladybugs are insects, they have three pairs of legs. One pair is attached to the pronotum, and two pairs are attached to the abdomen.
Feel more prepared? Then, you can move on to the next section!
Step One: Sketch an oval

Photo & Art: Margherita Cole | My Modern Met
Begin by drawing a large oval at a slight angle. This will be the abdomen and elytra of the ladybug.
Step Two: Draw a line in the middle

Photo & Art: Margherita Cole | My Modern Met
Next, draw a line down the middle of the oval.
Step Three: Add a trapezoidal shape (the pronotum)
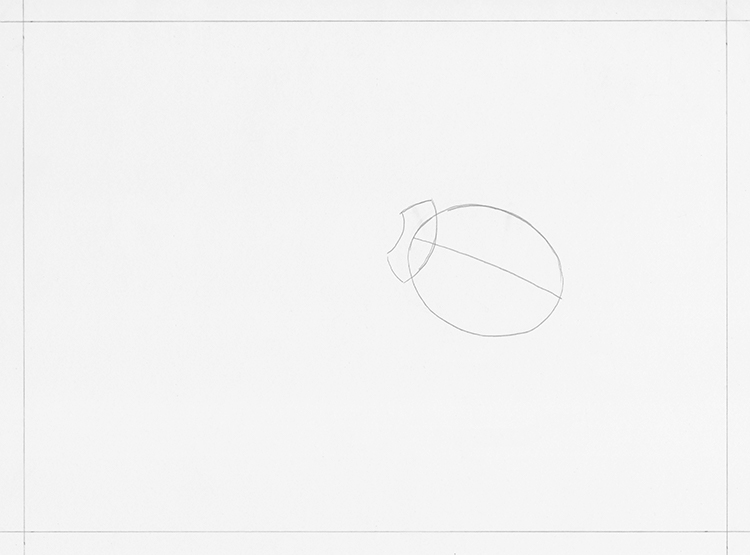
Photo & Art: Margherita Cole | My Modern Met
Then, sketch a curved trapezoidal shape at the top of the oval to create the middle section of the ladybug—called the pronotum.
Step Four: Draw the head

Photo & Art: Margherita Cole | My Modern Met
Continue building the body of the ladybug by adding a small, rectangular-shaped head on top of the pronotum.
Step Five: Refine the shell

Photo & Art: Margherita Cole | My Modern Met
Now that you have the basic shapes of the body, you can refine the shape of the abdomen and elytra. To do this, erase the part of the oval that could be seen inside of the pronotum, and draw a new, slightly curved, line.
Step Six: Add the antennae and front legs
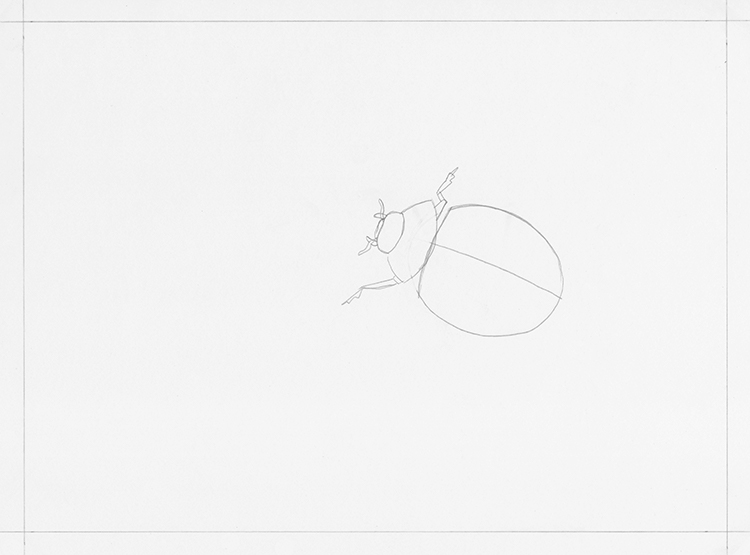
Photo & Art: Margherita Cole | My Modern Met
Afterward, return your attention to the upper section of the ladybug. Add a pair of wobbly antennae and two mandibles to the top of the head. The mandibles should be significantly thicker and shorter than the antennae.
Then, sketch the front legs at the bottom of the pronotum. Like many insects, ladybugs have thin, rectangular legs so you'll want to build them in several sections—each one gradually thinner than the last. Reference photos will be especially helpful here.
Step Seven: Draw the middle legs
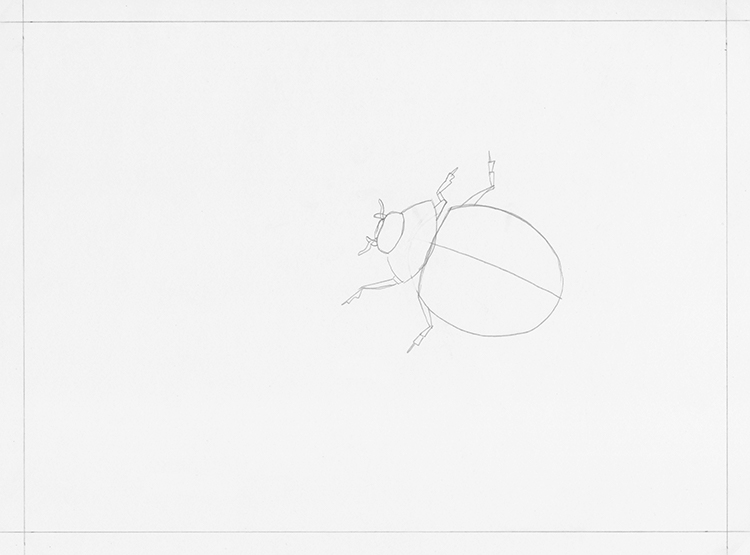
Photo & Art: Margherita Cole | My Modern Met
The middle legs will be placed at the top of the abdomen and elytra, and you can create these using similar shapes—except instead of the joint bending forward like the front legs, it should bend inwards. If it helps, you can compare the front legs to human knees and the middle legs to human elbows.
Step Eight: Draw the hind legs
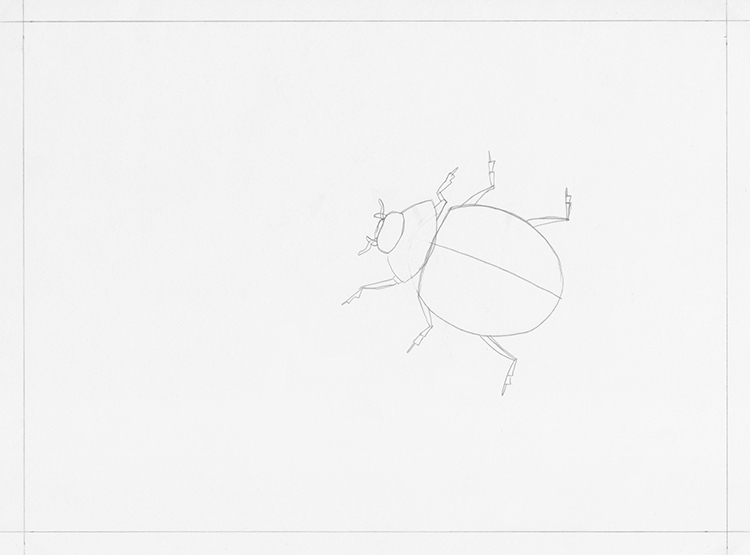
Photo & Art: Margherita Cole | My Modern Met
Finally, you can add the hind legs about three-quarters down the abdomen of the ladybug. These should look more or less the same as the middle legs, including the direction of the joint.
Step Nine: Add the pattern
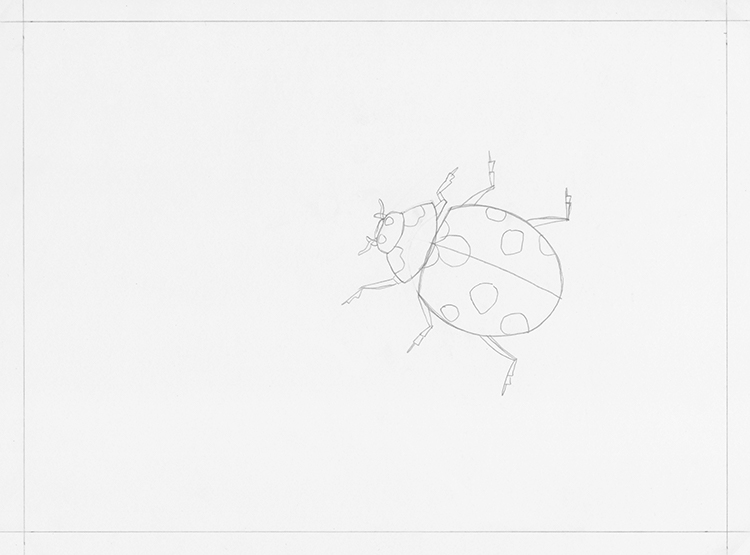
Photo & Art: Margherita Cole | My Modern Met
Next, it's time to draw the characteristic ladybugs are known for: their striking pattern! So—using some reference photos—begin sketching some wobbly circles on the shell. Ladybugs have between two and seven black spots on average, so you'll probably want to stay in that range.
In addition to the black spots on the shell, ladybugs have a couple of other markings as well. At the top of their shell are also a pair of white half-circle markings. Then, they have two more white blotches at the top of the pronotum, and two small white dots on the head.
Step Ten: Sketch a background
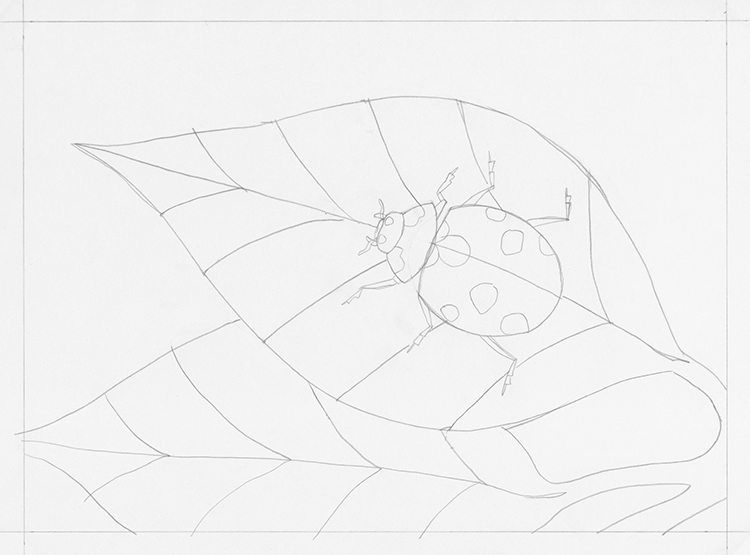
Photo & Art: Margherita Cole | My Modern Met
Now that you've finished sketching your ladybug, consider adding a background. Not only will this give your beetle a narrative, but it will also enhance your drawing by creating an interesting composition.
Some background ideas for a ladybug could be walking on a leaf, a flower petal, or a small branch. Feel free to get creative!
Step 11: Go over the drawing in ink
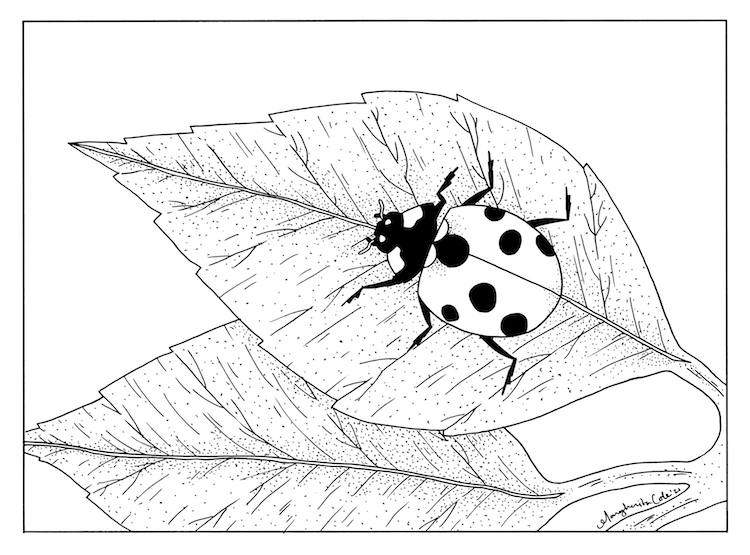
Photo & Art: Margherita Cole | My Modern Met
Lastly, it is time to complete your ladybug illustration by going over it in ink. So, grab your favorite technical pen and carefully trace your pencil lines. To avoid unintentional smudging, be sure to keep a scrap of paper under your drawing hand.
After you've gone over the entire drawing with ink, you can either add color to the ladybug and leaves, or add texture using stippling or hatching—or, if you want, do both!
Congratulations on your finished ladybug drawing!
Looking for others who love drawing? Join our Art, Design, Photography, and Drawing Club on Facebook!
Related Articles:
Learn How to Draw a Monarch Butterfly in Five Easy Steps
Learn How to Draw a Sunflower in 9 Simple Steps
How to Draw a Beautiful Rose in 10 Simple Steps [Infographic]