View this post on Instagram
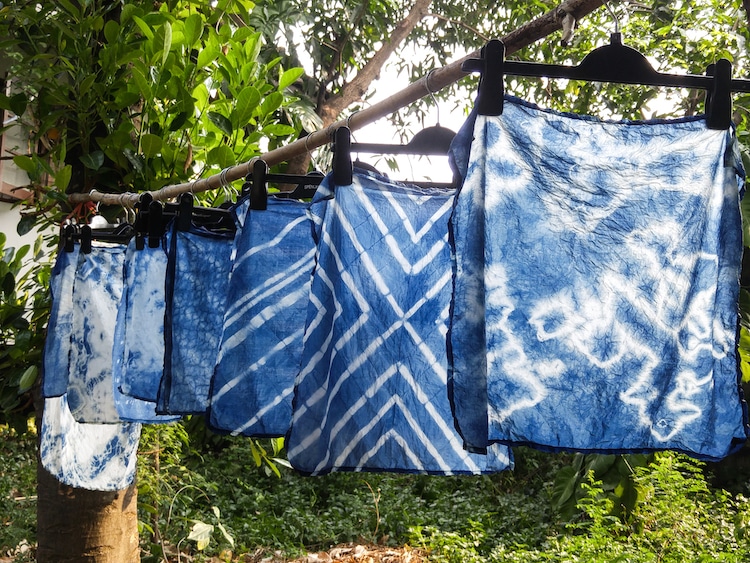
There are many ways creative ways to customize cloth. You might be familiar with tie-dye, a technique that involves tying fabric and dipping it into a vat of liquid pigment. There’s another approach, however, that is similar to tie-dye but concentrates only on indigo dye. This process is called Shibori.
Wondering what Shibori means? It’s a Japanese word that has no equivalent in the English language. The term originates from the Japanese verb root shiboru, which means to “wring, squeeze, and press.” This is fitting, considering the ways in which you manipulate the fabric are through these actions.
On the surface, Shibori dyeing is similar to tie-dye. But when you really examine the two, you’ll notice that tie-dye is a small part of the Shibori practice. The Japanese art is much more expansive with a rich history that dates back to the eighth century. Tie-dye uses twisting and pinching, but the tie-dye approach represents just a fraction of what’s possible with Shibori. Additionally, tie-dye has a Western association—particularly with the 1960s hippies—and is done in an array of vivid colors.
How to Do Shibori Dyeing
There are many ways in which to approach Shibori dyeing—that’s part of what makes it so appealing. Depending on how you fold and twist the fabric, you’re going to get different patterns. Here’s a general idea of the Shibori dyeing process.
View this post on Instagram
These are some of the basic materials used. Yours might vary depending on the project and techniques you’re trying to achieve.
Indigo dye — An indigo kit will make it easy to set up a vat of dye.
Natural cloth — You’ll want to pick something with natural fibers, as they will hold the dye the best. Look for cotton or linen. The higher the percentage of cotton, the more vibrant the indigo will appear.
Five-gallon bucket — Because dye will stain, get a five-gallon bucket that will be used only for Shibori dyeing. Five gallons will allow you to fill the container with an indigo vat and have enough room for your garments, too. It’s best to have two buckets on hand—one will be for the indigo and the other for clean water.
Rubber gloves — These are a must in order to protect your skin from the dye.
Rubber bands — Rubber bands have two purposes. They will keep your fabric secure as you fold and twist it. They also act as a resist, meaning that wherever the rubber bands are, the dye will not be there.
Cotton twine — Like rubber bands, cotton serves the same intention, but it offers another way to make designs.
Wooden squares — Wooden squares aid in creating surface designs. Fold the fabric over them to create another resist-based pattern.