Photo: photostockman/DepositPhotos This post may contain affiliate links. If you make a purchase, My Modern Met may earn an affiliate commission. Please read our disclosure for more info.
People are some of the most fascinating and difficult subjects to draw. From rendering the complexity of eyes to the shapes of lips, there are many different nuances involved. And, while facial features capture the likeness of a person, hair can say a lot about their personality and style.
Here we will learn how to draw five different kinds of hair: short, long, straight, wavy, and curly. All you'll need to get started is a pencil, an eraser, a pen, and some paper. Ready to give it a shot? Then let's get started!
Learn how to draw different kinds of hair in this step-by-step tutorial.

How to Draw Short Hair
Step One: Sketch the hairline
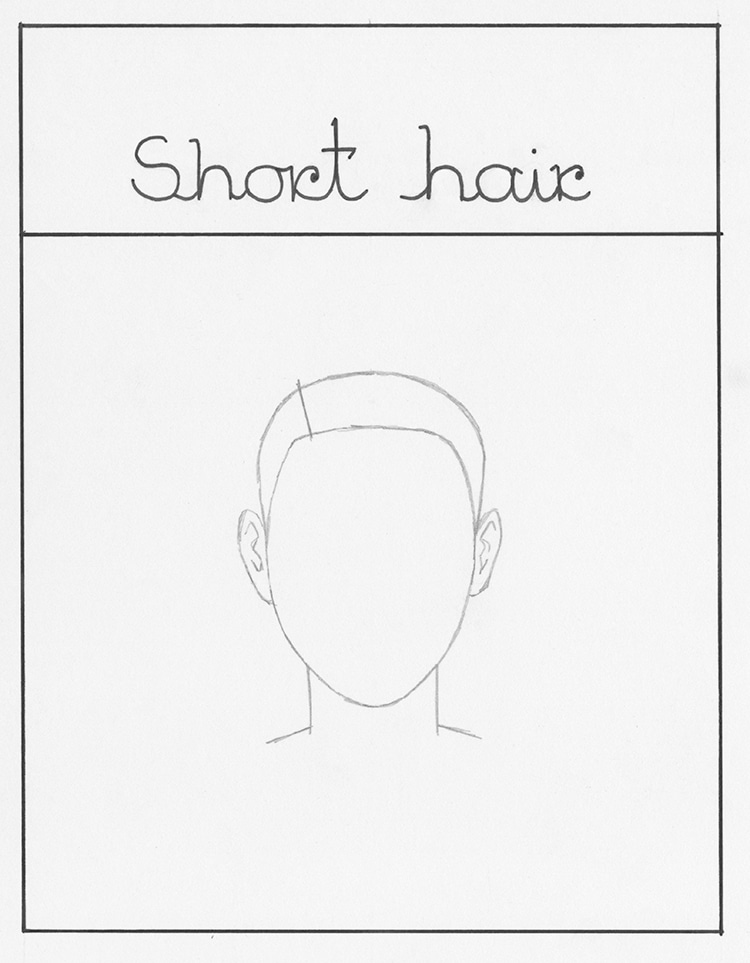
Photo & Art: Margherita Cole | My Modern Met
Begin by creating the hair part. This can be anywhere (left, right, center), but it may help to look at a couple of photo references first.
Step Two: Create the shape of the hair
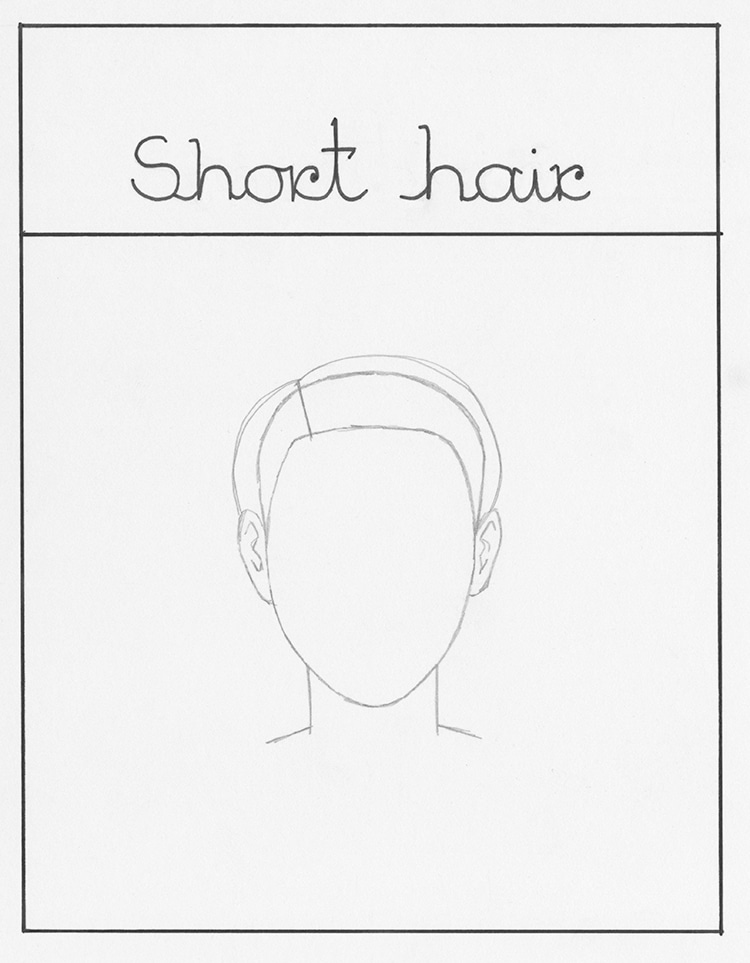
Photo & Art: Margherita Cole | My Modern Met
Next, draw the basic shapes of the hair. Since this is a short hairstyle, keep them closer to the shape of the head, adding just slightly more volume to the outline of the skull.
Step Three: Add texture to the hair

Photo & Art: Margherita Cole | My Modern Met
Now, fill in the hair with texture. To do this, move your pencil to the hair part and draw several lines in the direction of where the hair grows. These lines can vary in length, from long to short, just so long as they follow the hairstyle.
Step Four: Continue adding lines to the hair
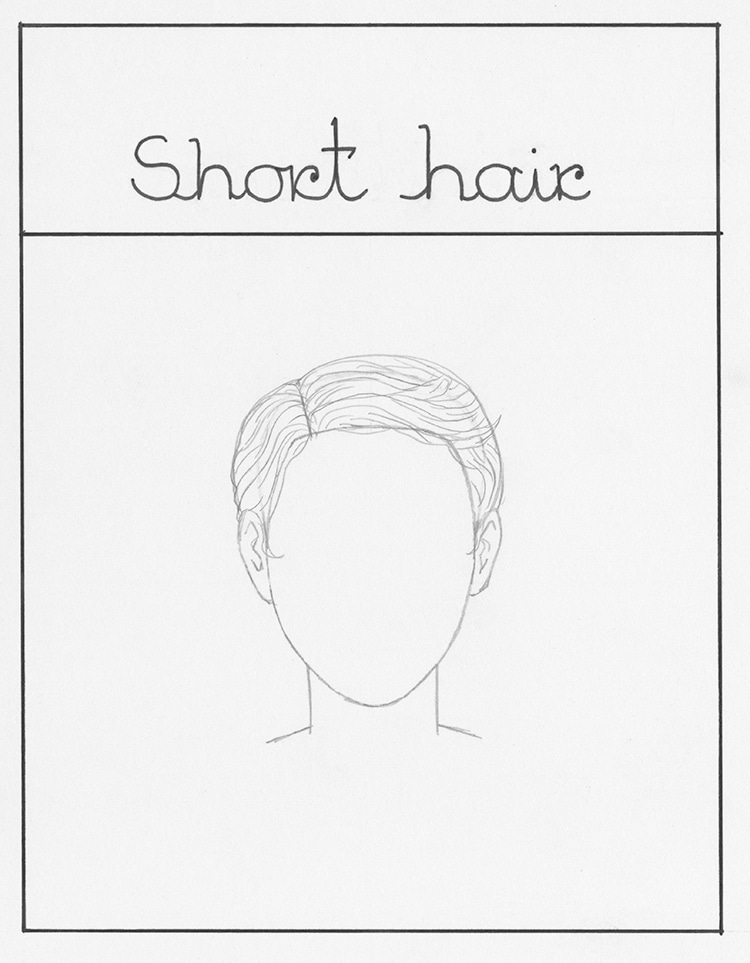
Photo & Art: Margherita Cole | My Modern Met
Continue to fill in the hair with texture, adding more lines to the hairstyle to indicate volume.
Step Five: Go over the drawing in ink
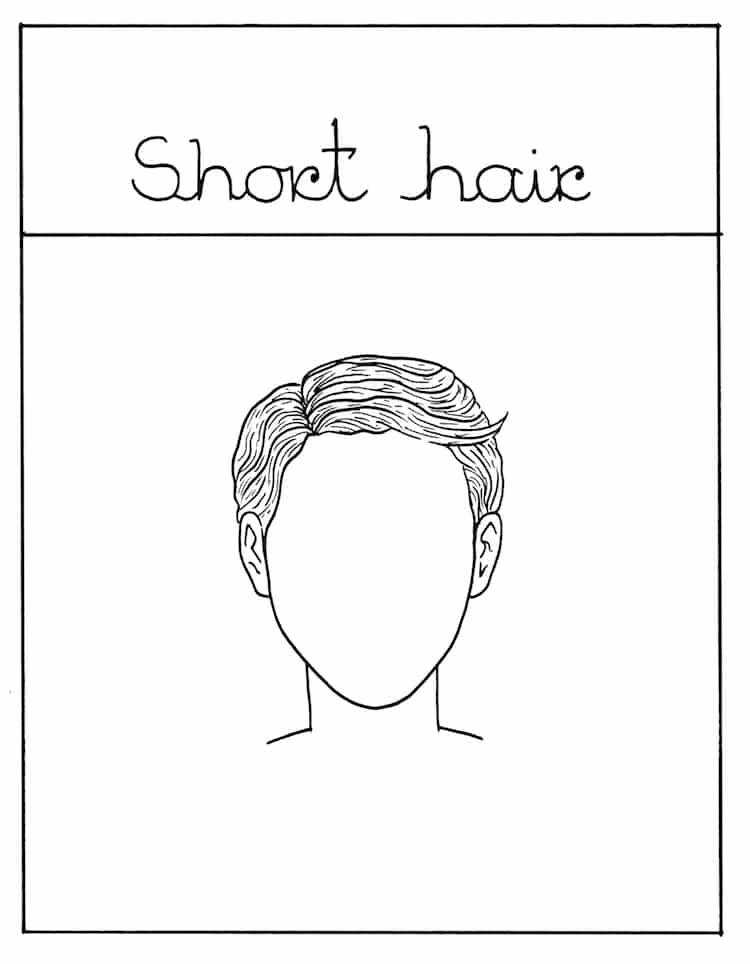
Photo & Art: Margherita Cole | My Modern Met
Finally, when you've fleshed out your sketch enough, it is time to go over it in ink. So, using your pen of choice (we recommend a technical pen, like Sakura Pigma Microns), slowly go over the lines. If you want to add some variation to the hair texture, then try mixing up your pens with broader and finer types. All that's left is to erase the pencil marks.
Congrats! You've finished drawing short hair.
How to Draw Long Hair (With Bangs)
Step One: Part the hair
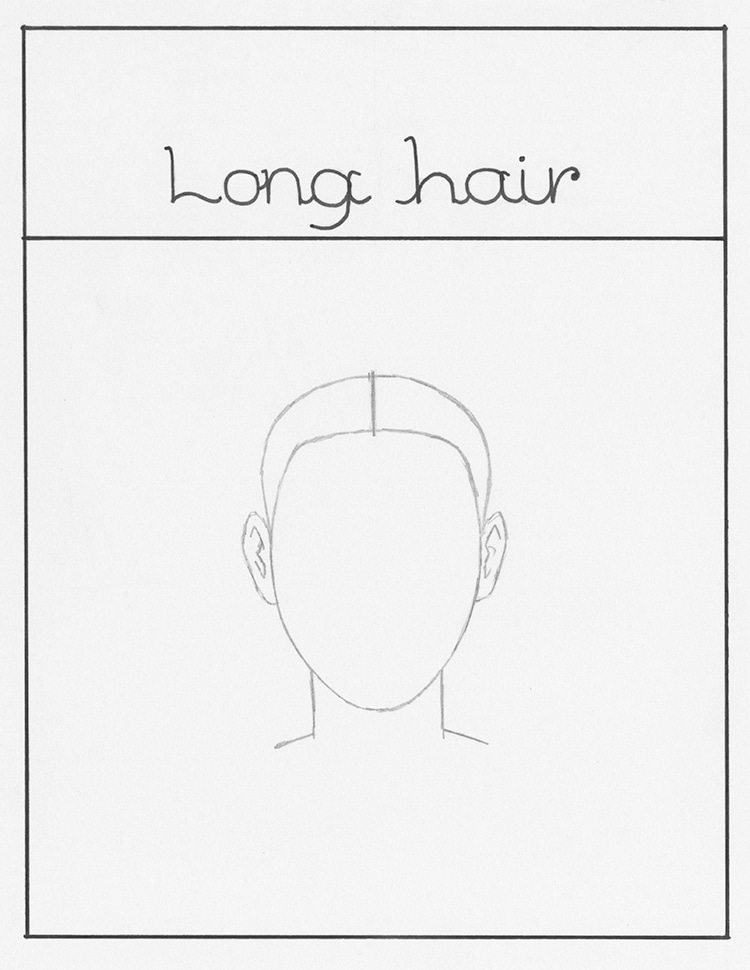
Photo & Art: Margherita Cole | My Modern Met
Begin by adding the part to the hairline. In this case, we will be starting at the center.
Step Two: Sketch the bangs
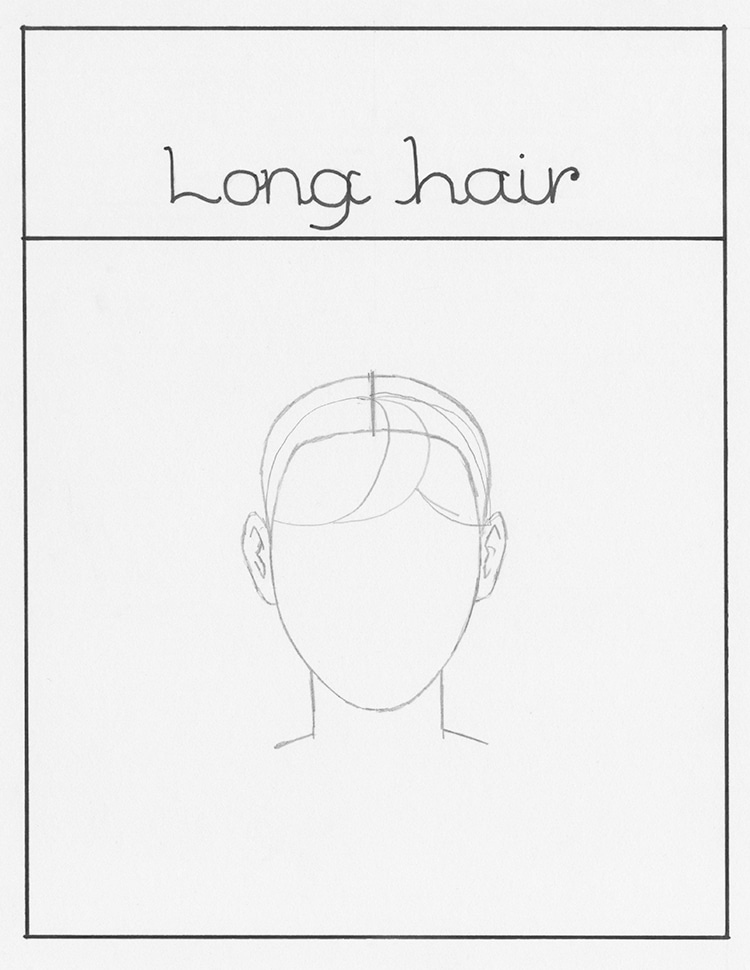
Photo & Art: Margherita Cole | My Modern Met
Starting a little above the hairline (or forehead), draw large petal-like shapes to create the bangs.
Step Three: Draw long locks of hair
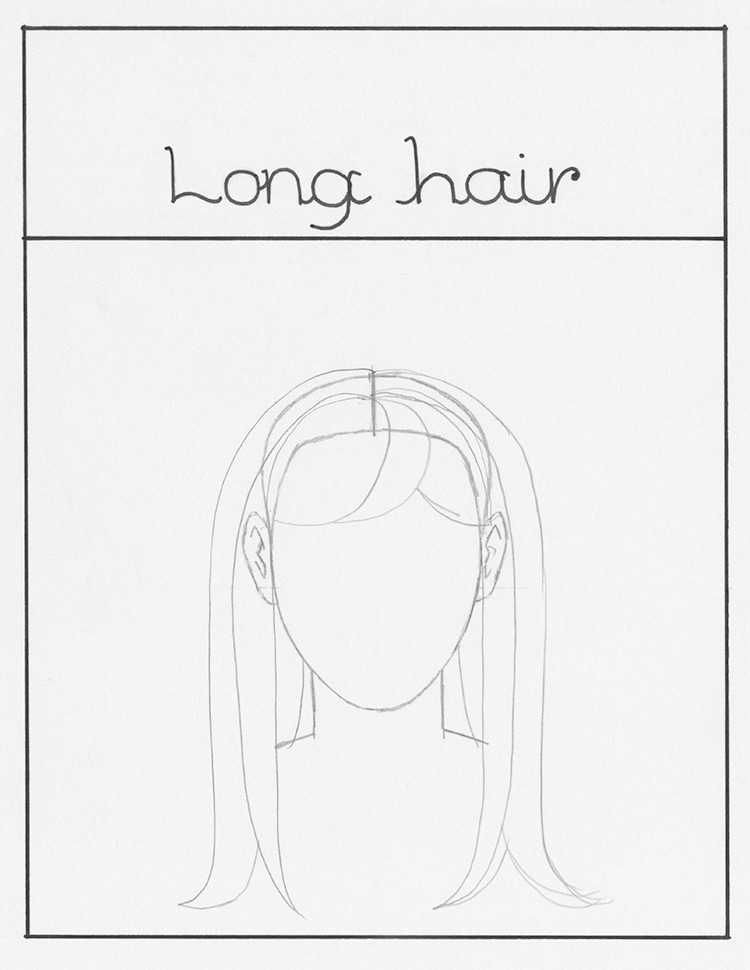
Photo & Art: Margherita Cole | My Modern Met
Next, construct the rest of the hairstyle by sketching long thick locks of hair, starting from the top of the head and going down past the shoulders (or as long as you want). It's important to keep in mind that the longer the hair is, the closer it tends to sit on the head.
Step Four: Add texture to the hair
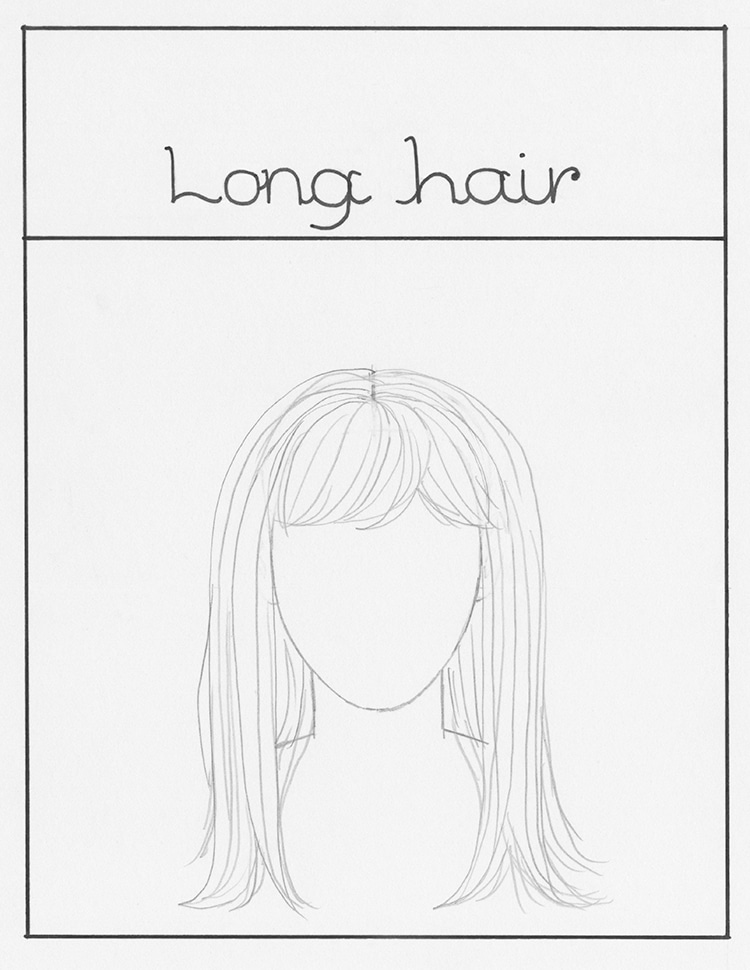
Photo & Art: Margherita Cole | My Modern Met
Now, fill in the locks of hair with more lines. The more you add, the denser the hairstyle will look.
Step Five: Go over the drawing in ink
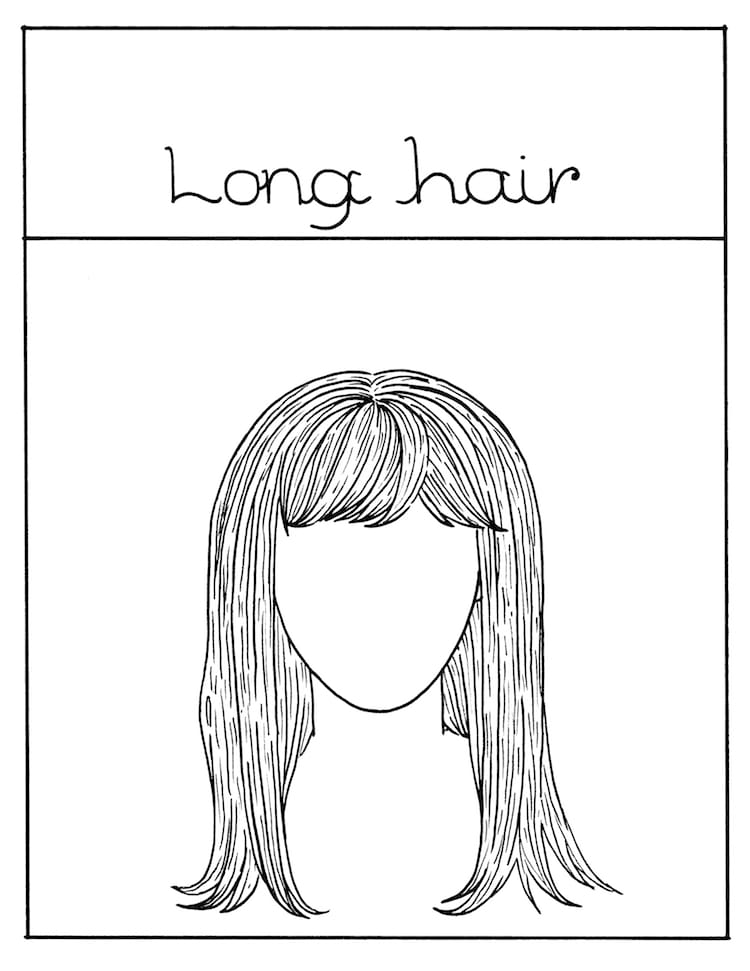
Photo & Art: Margherita Cole | My Modern Met
At last, it is time to go over the illustration in ink. Pick out a fine-tipped pen and trace all of the graphite lines. Once you're sure the ink has dried, erase any visible pencil marks.
And voilà! You've now drawn long hair.
How to Draw Straight Hair
Step One: Part the hair
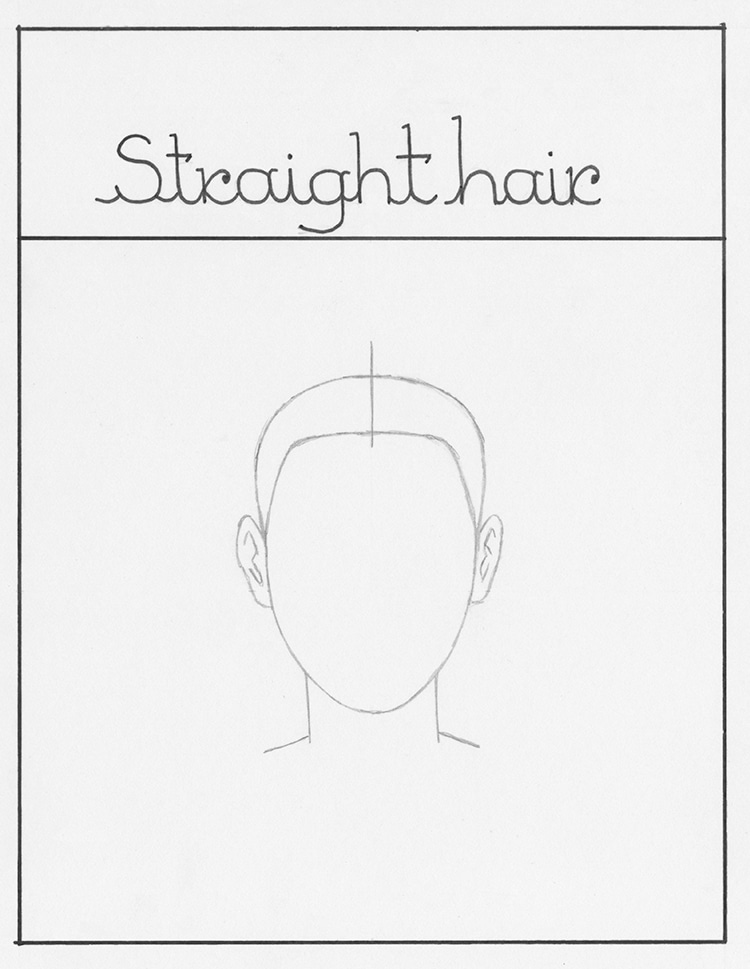
Photo & Art: Margherita Cole | My Modern Met
Starting at the hairline, add a part in the center or to the side.
Step Two: Sketch locks of hair
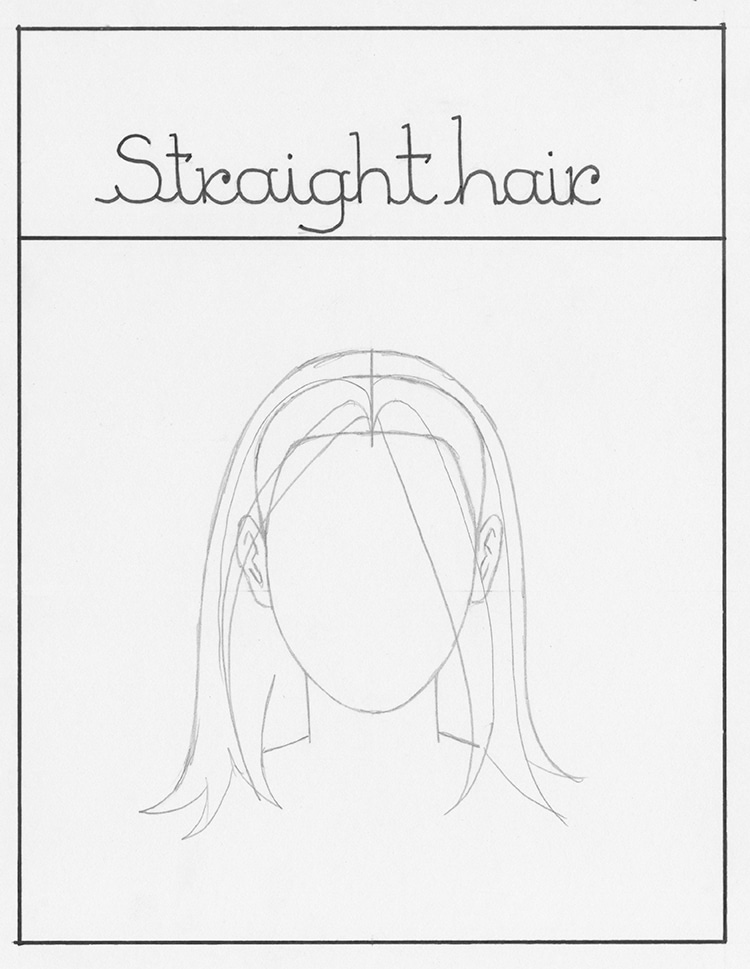
Photo & Art: Margherita Cole | My Modern Met
Next, sketch several thick, long locks of hair extending from the top of the head to the shoulders (or wherever you prefer).
Step Three: Add texture to the hair
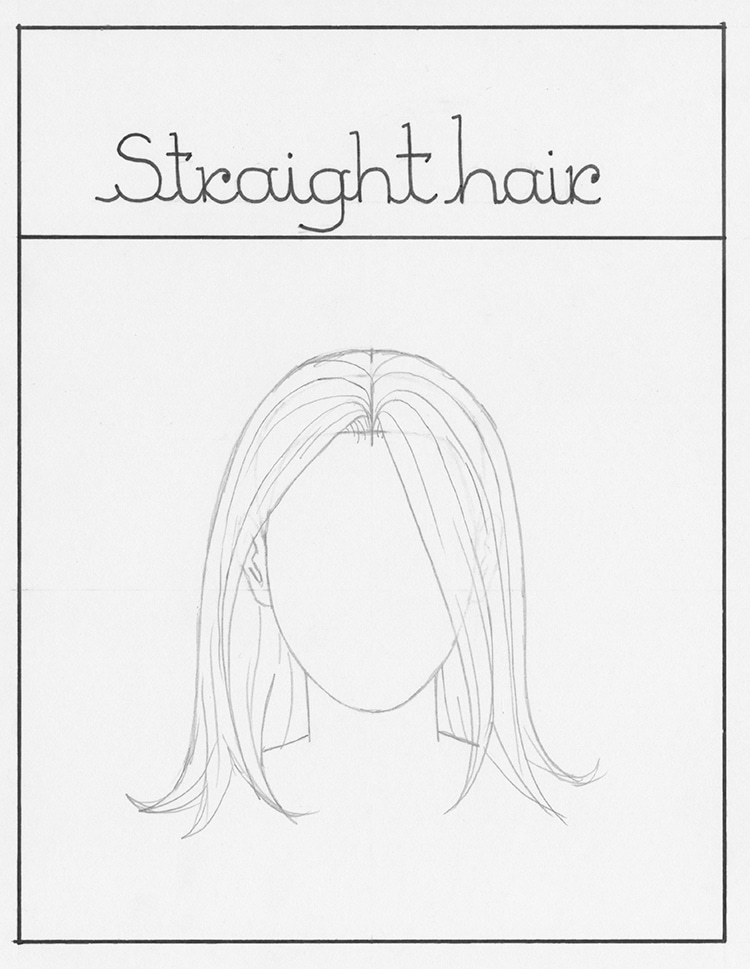
Photo & Art: Margherita Cole | My Modern Met
Afterward, it is time to fill in the hair with more texture, so add long and short lines throughout the hairstyle.
Step Four: Fill in the hair with texture
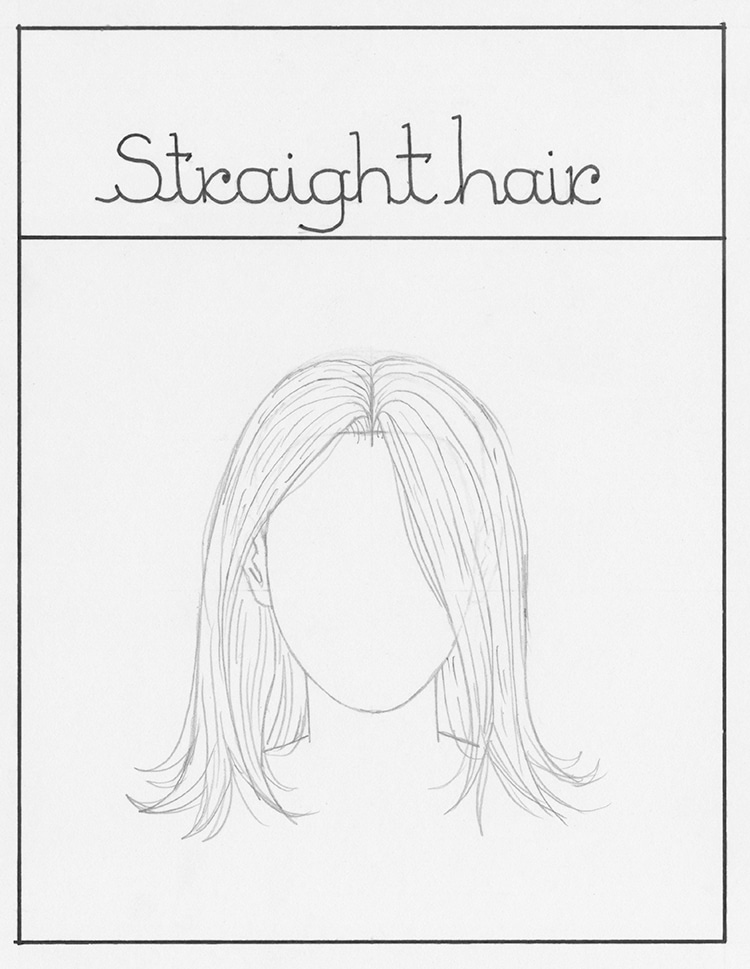
Photo & Art: Margherita Cole | My Modern Met
Continue adding more lines to the drawing so that it looks more realistic.
Step Five: Go over the drawing in ink
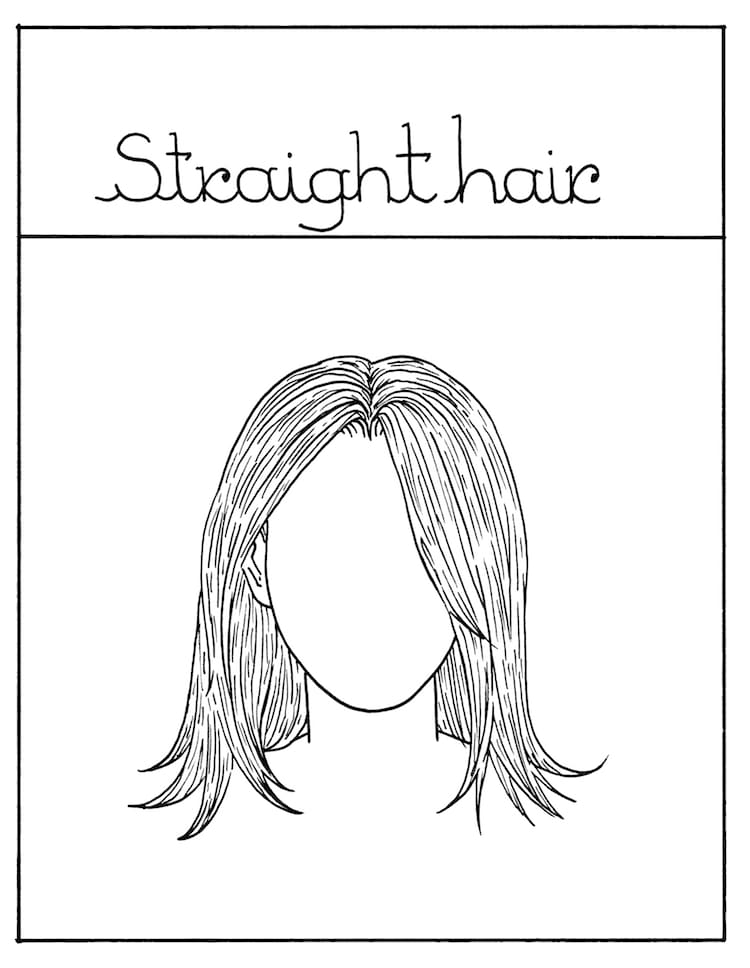
Photo & Art: Margherita Cole | My Modern Met
Finally, using your favorite pen, go over the illustration in ink. Take your time tracing over the graphite lines, and consider mixing up your pens to create more line variation in the drawing. (If you need recommendations, then check out our guide to the best drawing pens.)
Give yourself a pat on the back! You've learned how to draw straight hair.
How to Draw Wavy Hair
Step One: Part the hair
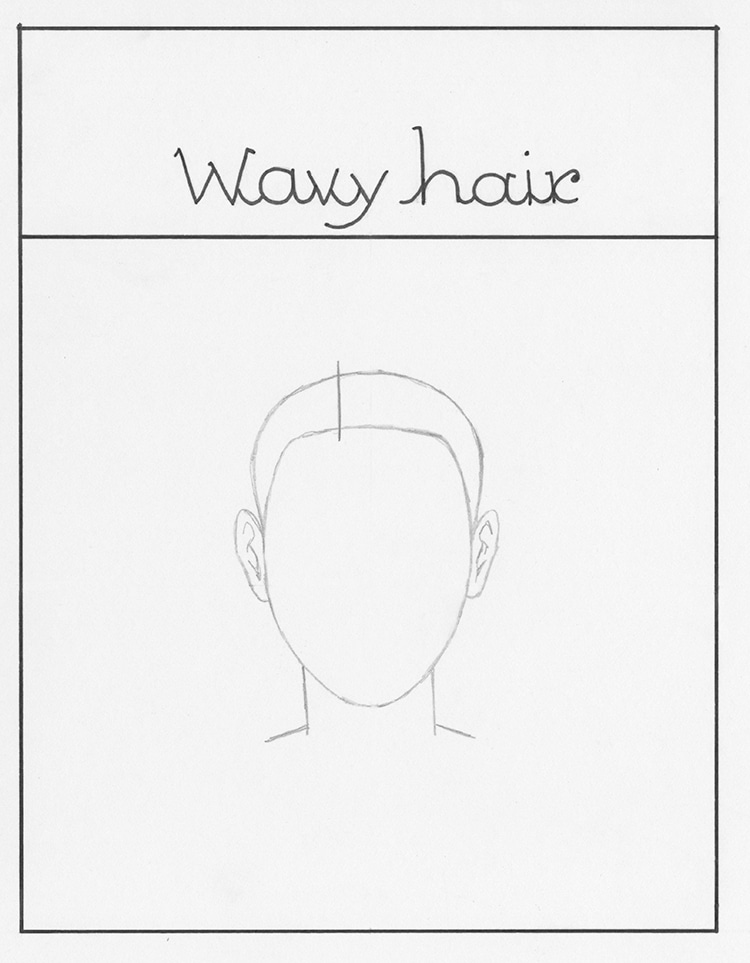
Photo & Art: Margherita Cole | My Modern Met
Starting at the hairline, sketch a line to indicate the parting of the hair (whether it is in the center or to the side).
Step Two: Frame the face
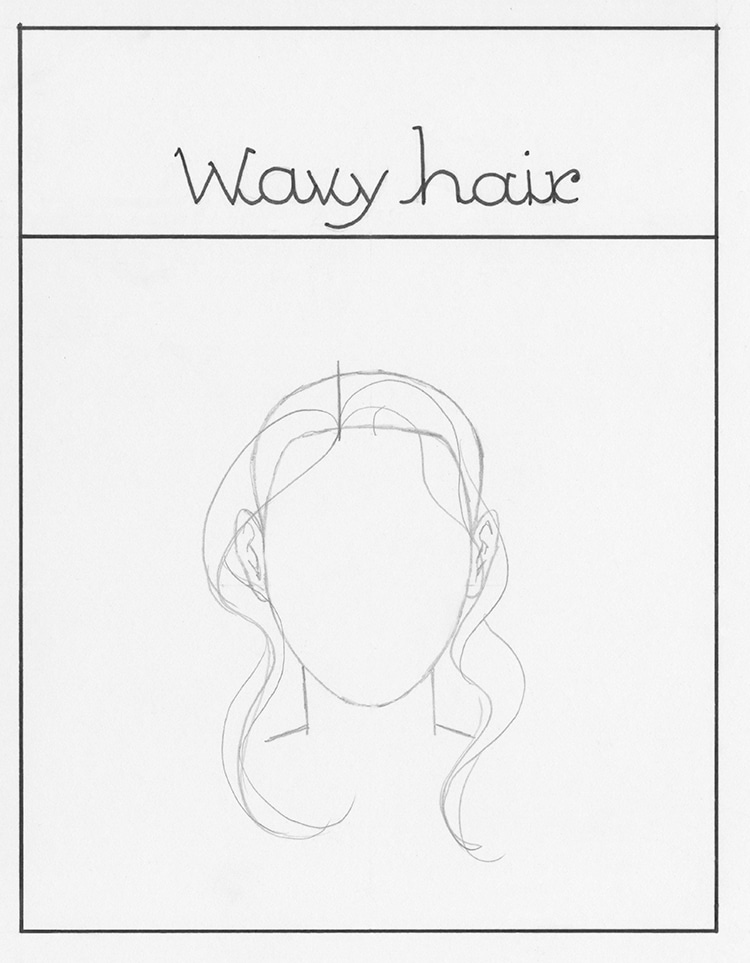
Photo & Art: Margherita Cole | My Modern Met
Next, add two thick locks of hair to frame the face. Start these voluptuous shapes at the hair part and move downwards in undulating, ribbon-like shapes.
Step Three: Draw locks of hair
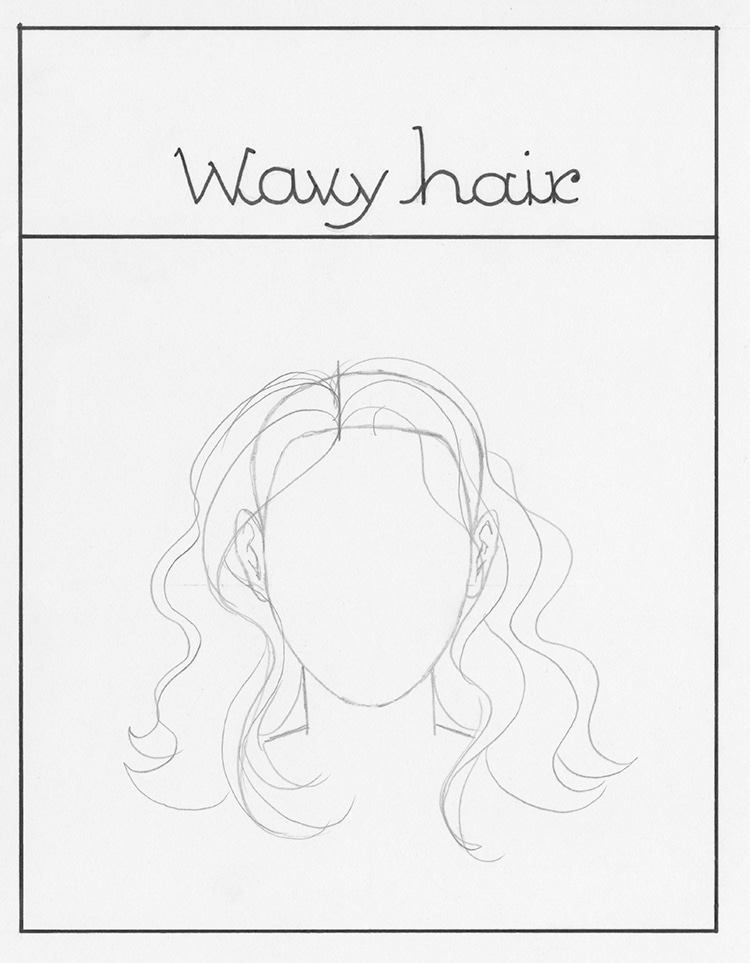
Photo & Art: Margherita Cole | My Modern Met
Using the same rolling shapes as before, fill out the rest of the hair until you reach the back of the head.
Step Four: Add texture to the hair
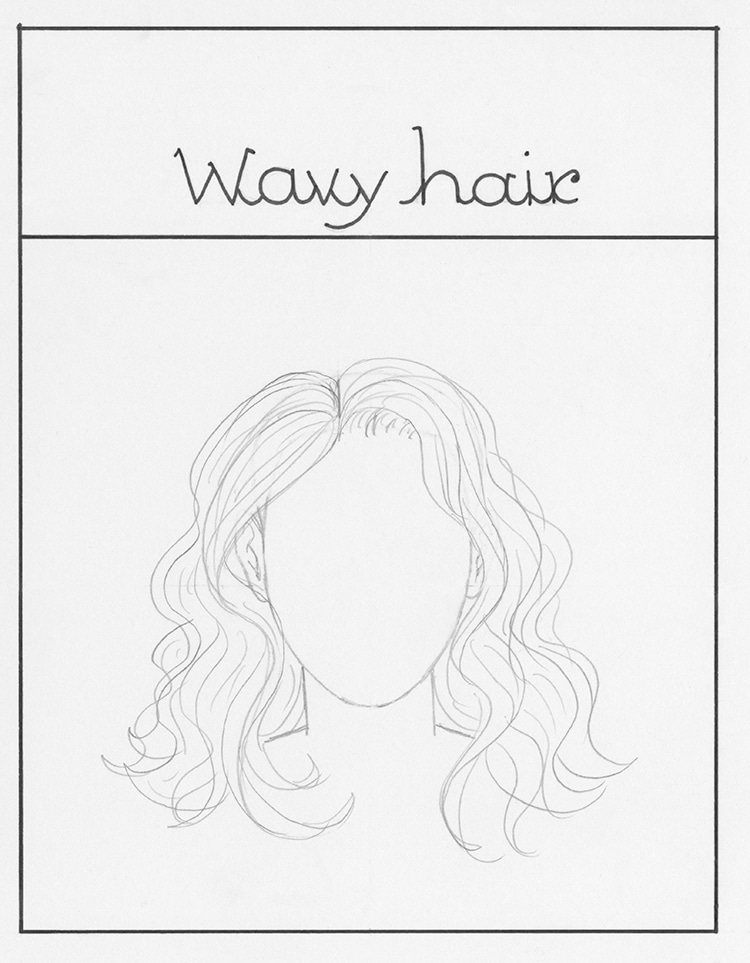
Photo & Art: Margherita Cole | My Modern Met
Afterward, fill in the shapes of the hair with varying lines to give it texture, volume, and depth.
Step Five: Go over the drawing in ink
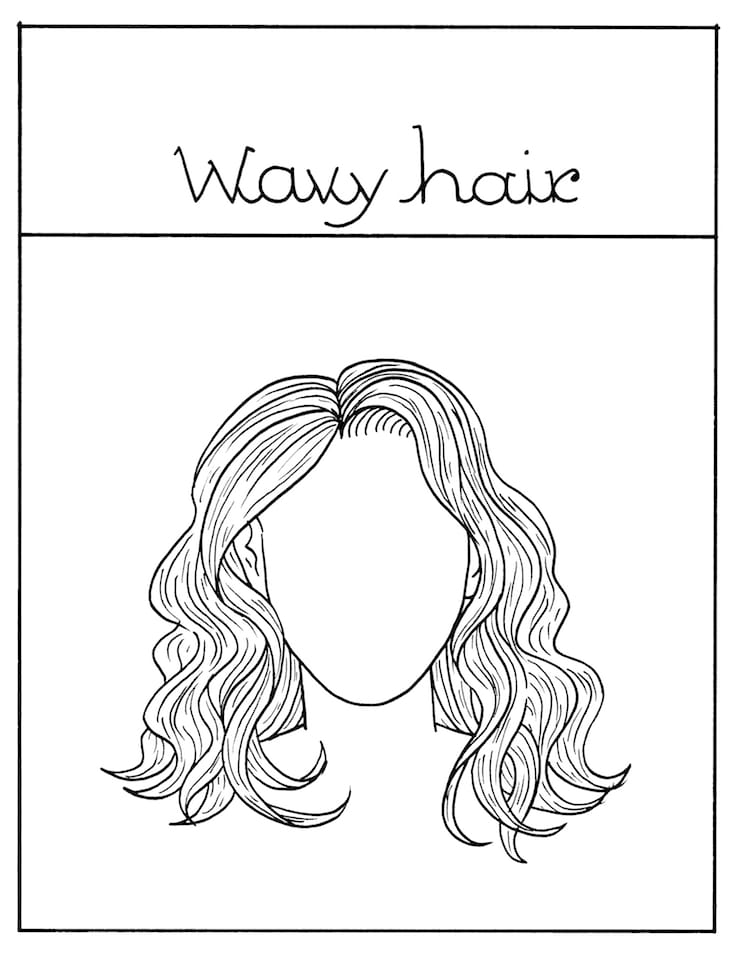
Photo & Art: Margherita Cole | My Modern Met
Finally, you can go over the drawing in ink. So, choose a pen (or a couple of different ones) and trace over the graphite sketch. Once, the ink is dry, erase the pencil marks.
Good job! You've learned how to draw wavy hair.
How to Draw Curly Hair
Step One: Part the hair
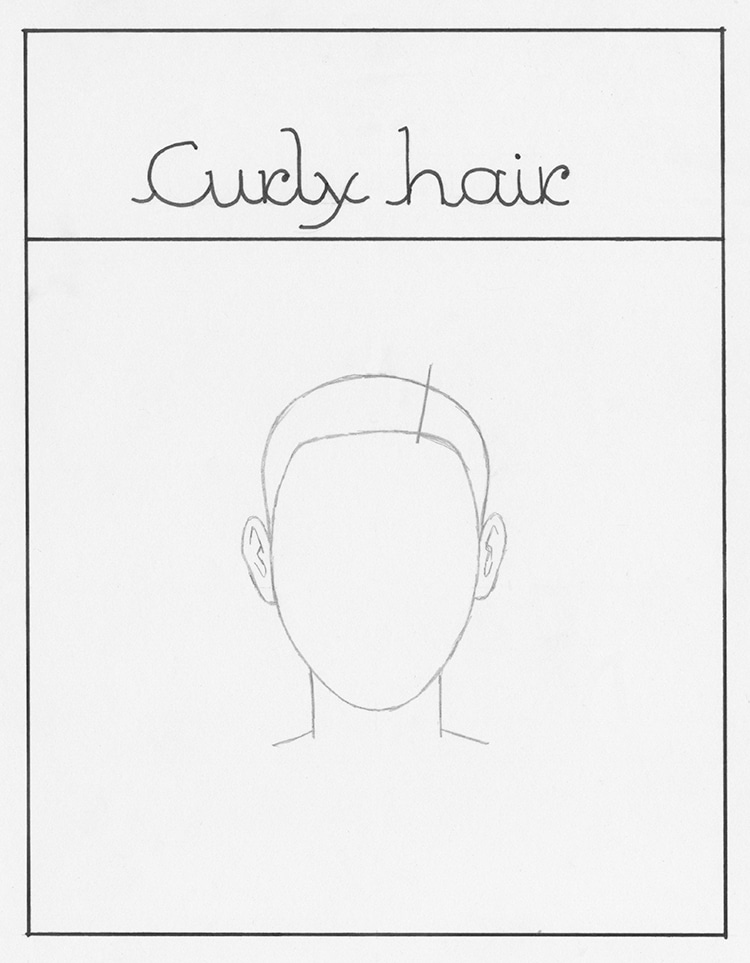
Photo & Art: Margherita Cole | My Modern Met
Draw a line from the hairline to the back of the head to create the hair part (this can be center or to the side somewhere).
Step Two: Sketch the hairstyle

Photo & Art: Margherita Cole | My Modern Met
Next, make a rough sketch of the curly hair. Move your pencil to the hair part and sketch bouncy, cloud-like patterns until you are just above the shoulders (or wherever you prefer).
Step Three: Draw locks of hair
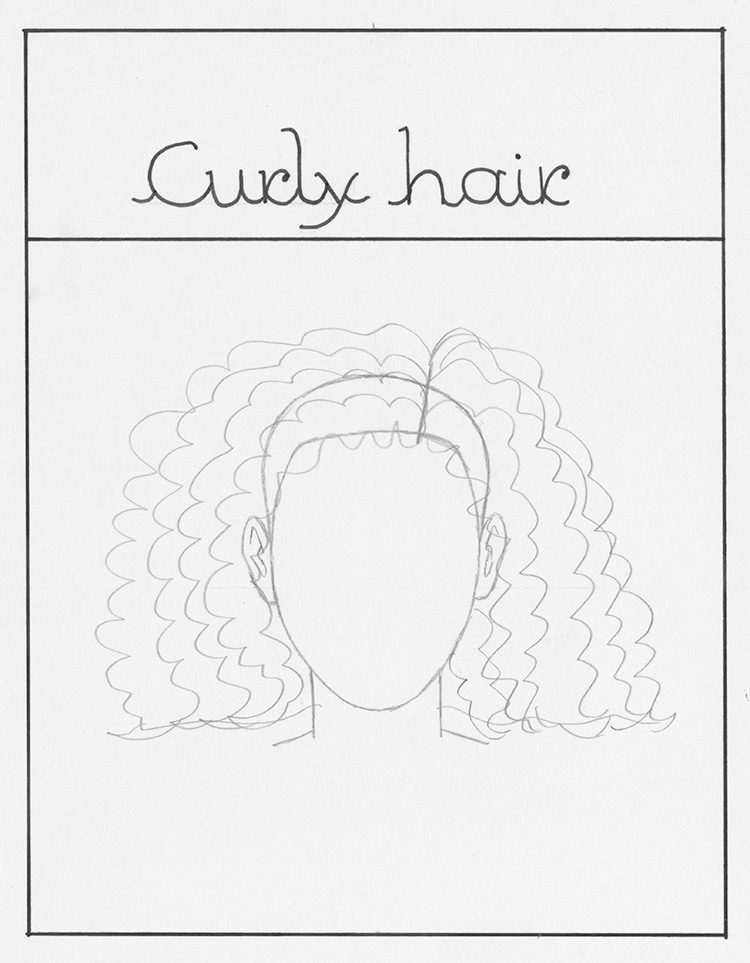
Photo & Art: Margherita Cole | My Modern Met
Divide this hairstyle into several curly locks of hair by drawing the same bouncy line as before as many times as needed.
Step Four: Add texture to the hair

Photo & Art: Margherita Cole | My Modern Met
Afterward, add depth to the hair by adding numerous lines to each lock of hair.
Step Five: Go over the drawing in ink
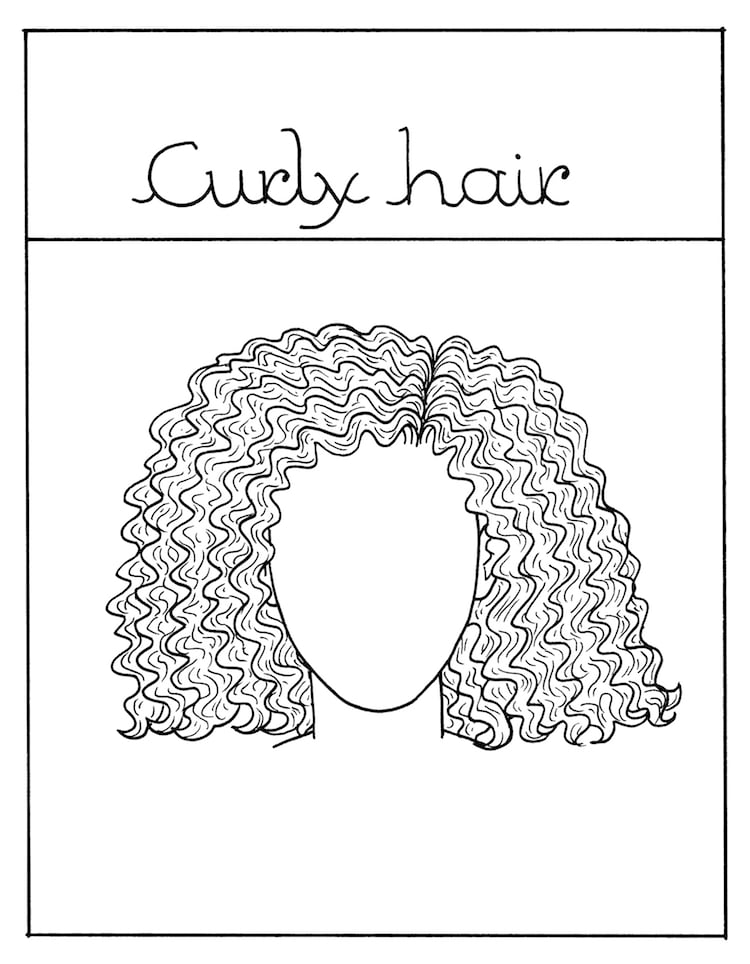
Photo & Art: Margherita Cole | My Modern Met
Lastly, it is time to go over your drawing with ink. So, using the pen of your choice, trace over the graphite marks. If you want line variation then use a couple of technical pens with different-sized nibs or a brush pen.
Congratulations! You've learned how to draw curly hair.
Now that you've mastered drawing hair, try taking it to the next level by learning how to draw different types of braids.
Looking for others who love drawing? Join our Art, Design, Photography, and Drawing Club on Facebook!
Related Articles:
Learn How to Draw Three Different Types of Braids: Three-Strand, French, and Fishtail
Let Your Drawing Speak for You by Learning How To Draw Lips Step by Step
Learn How Geometric Shapes Can Help You Draw Cartoon People
Perfect Your Portraiture by Learning How to Draw a Face Step by Step