Photo: Giulia Bertelli
This post may contain affiliate links. If you make a purchase, My Modern Met may earn an affiliate commission. Please read our disclosure for more info.
For millennia, crafters have continuously found ways to turn everyday objects into works of art. While this interest has culminated in a myriad of decorative art forms, none has resonated quite as strongly as embroidery.
The story of embroidery is the story of the world. Embroidery has existed, in some form, in every population across the globe. Whether it’s displayed on clothing, home goods, or as an artwork, it’s a timeless craft that is an integral part of our material culture.
Prevalent in cultures across the globe, embroidery has developed into one of the world’s most beloved crafts. Today, many contemporary creatives continue to carry out the age-old practice, making it a popular choice for experienced crafters and aspiring artisans alike.
If you’re interested in mastering this ancient handcraft, our ultimate guide to embroidery has all of the information and resources you need to become an embroidery expert—beginning, of course, with the most basic question: what is embroidery?
What is Embroidery?
You're already familiar with embroidery—even if you had never realized it. Simply put, the definition of embroidery is the art of applying decorative designs onto fabric using a needle. These motifs are traditionally rendered in thread and are composed of different kinds of stitches.
Embellishments like beads, sequins, and pearls can also be incorporated into the composition, which is oftentimes circular in shape due to the special hoops typically used to keep the fabric taut. However, some artists go beyond the hoop to embroider in places you’d never expect, such as metal surfaces or even tennis rackets.
History of Embroidery
Embroidery has been around forever—and that's not an exaggeration. You can also thank the Greek goddess Athena for embroidery's legacy. She's credited with passing it down, in addition to weaving. With such a high-and-mighty figure associated with embroidery, it should come as no surprise that the practice was associated with wealthy people. In medieval England, for instance, professional workshops and guilds produced garments made of fine silks for high society families. But they weren't all for the upper crust; there were folk art movements in eastern Europe, the UK, East Asia, and South America that catered to nonprofessionals.
Much like the aesthetic capabilities of the craft itself, the history of embroidery is varied. It's an ancient craft that first had a practical purpose of repairing clothing. Because garments were so expensive to produce, items of clothing were rarely thrown out; they were mended instead. Over time, this practicality evolved into more of an expression through decorative arts. Here, we trace its evolution by exploring many of the cultures that have shaped it.
Cro-Magnon Russia
The practice of embroidering textiles can be traced as far back as 30,000 BCE.
In 1964, archaeologists excavated the fossilized remains of a hunter clad in embroidered garments in Sungir, a late Paleolithic burial site in Russia. The huntsman’s fur clothing and boots were decorated with hand-stitched rows of ivory beads, serving as the oldest known evidence of the craft.
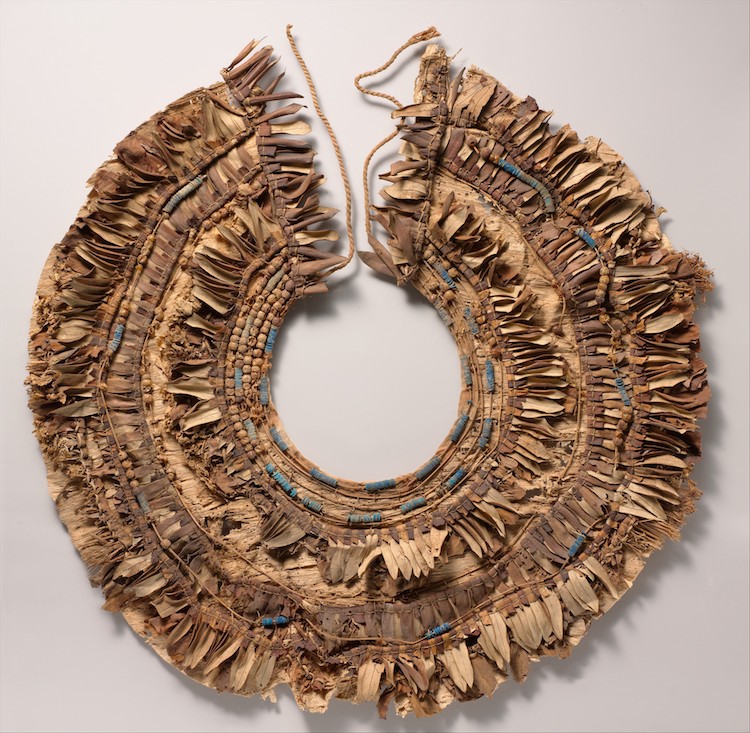
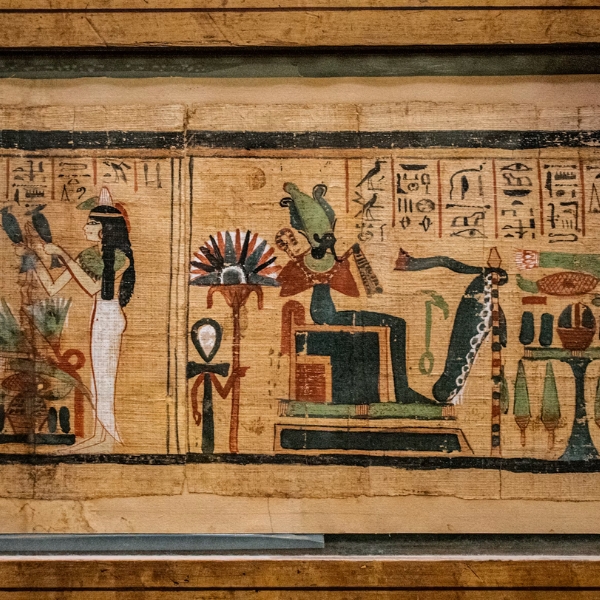
Floral collar from Tutankhamun’s Embalming Cache (ca. 1336–1327 BCE) (Photo: Met Museum Public Domain)
18th Dynasty Egypt
By the 14th century BCE, the artistic practice was also prominent in ancient Egypt. The most well-known examples of embroidery from this period are King Tutankhamun’s hand-stitched treasures. Buried along with the pharaoh, these pieces include ceremonial tunics, a decorative leopard skin, and a particularly well-preserved floral collar featuring “alternating rows of flower petals and blossoms, leaves, berries, and blue faience beads sewn to a papyrus backing.”
China in the Warring States Period
Embroidered textiles have also been uncovered in 4th-century BCE tombs in China. The oldest examples of embroidery from this period were found in a burial chamber in Mashan in the Hubei province.
Described as “a treasure house of silk,” the site housed well-preserved ritual garments decorated with colorful, stitched patterns and mythical motifs like dragons and phoenixes.
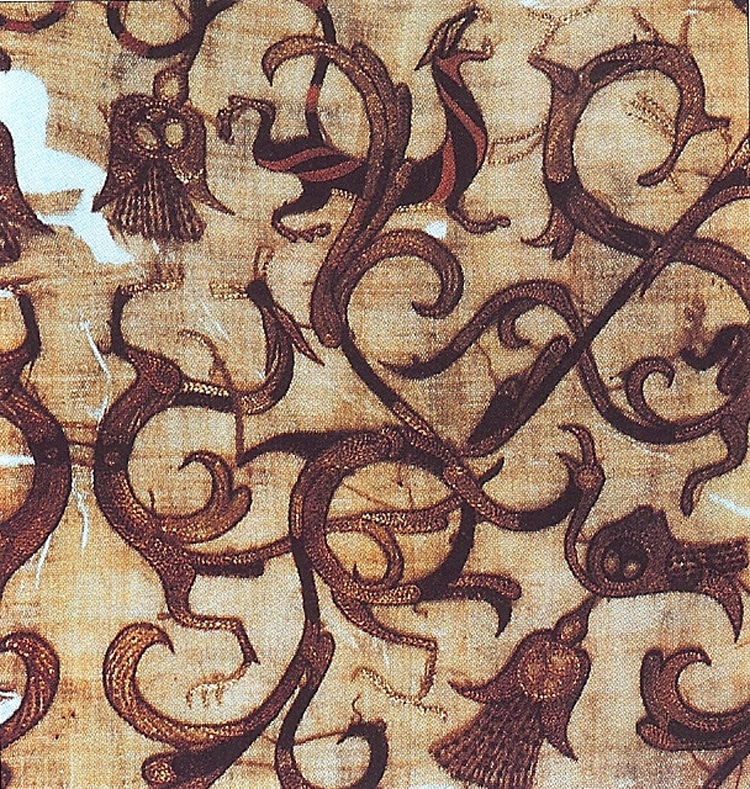
Photo: PericlesofAthens [Public domain], via Wikimedia Commons
Detail of an embroidery from 4th century BCE, Zhou-era tomb at Mashan, Hubei province, China
Japan During the Kofun Period
In the 7th century, embroidery emerged in Japan. Adopted from its Chinese equivalent, nihon shishu (Japanese embroidery), was first used exclusively for religious depictions—namely, to portray Buddha. However, from the 14th century onward, embroidery techniques were used to decorate everyday textiles, including traditional Bugaku dance costumes and other secular garments.
Medieval Normandy
Crafted in the 11th century and famous for its scale and craftsmanship, the Bayeux Tapestry is arguably the most famous work of embroidered art in the world. Featuring wool yarn on a linen backdrop, the 230-foot-long linen textile colorfully details the Battle of Hastings in 1066 and the Normans’ consequent conquest of England.
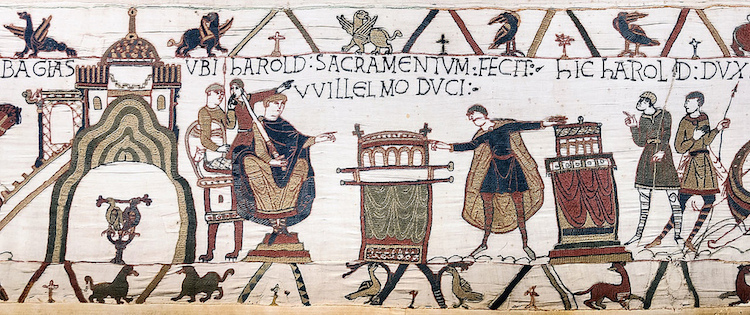
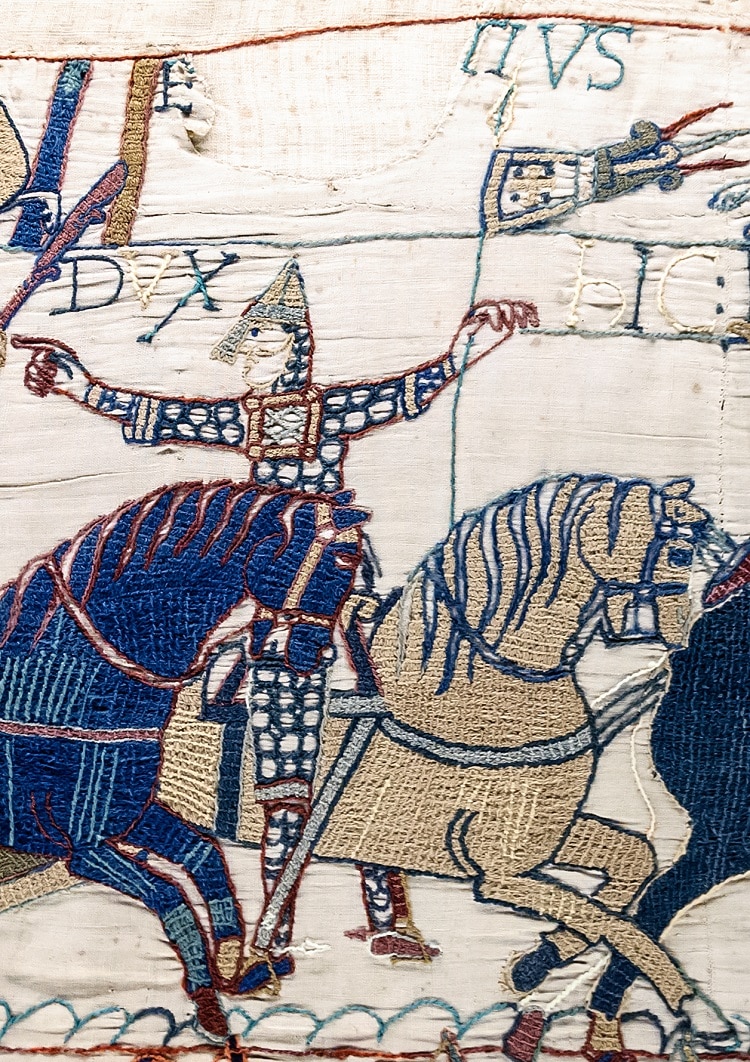
Photo: By Myrabella (Own work) [Public domain or CC0], via Wikimedia Commons
Bayeux Embroidery, created in the 11th century. Measuring about 230 feet long, this section is of scenes 55 and 56.
India in the Mughal Period
In the 16th century, embroidery flourished in India. Ari, or “hook,” needlework proved particularly popular, as its delicate aesthetic was favored by Mughal royalty. Initially used to embellish leather, this style of embroidery was eventually adapted for wall hangings and garments, including saris.
By the 18th century, ari work was “identified as among the most lucrative goods for export,” as the hook-stitch style (known in Europe as “tambour stitching”) became increasingly popular in Britain and France.
Industrialized France
The Industrial Revolution of the late 18th and early 19th centuries changed the face of embroidery. Automation brought on by machines allowed for textiles, including embroidery, to be produced en masse. In the mid-1800s, France paved the way for a future of machine-made embroidery. In doing this, it made the technique cheaper and easier to produce. This innovation radically altered the craft, as it lowered production costs and, consequently, made it available to the masses.
How is Embroidery Used Today?
Embroidery has experienced a resurgence over the past 10 years. Some, like author Rozsika Parker in her book The Subversive Stitch, say that its boost coincides with the Great Recession that happened in the late aughts.
The desire to return to things that were handmade was bolstered by the economic downturn. DIYing what you couldn't afford was a major trend at this time—and it still exists today. But beyond the practicality of embroidering as decoration, individual artists create highly collectible works that people love to display in their homes.
Different Types of Embroidery
There are an increasing number of machine-driven embroidery methods; however, hand embroidery continues to provide a whole world of creative possibilities. With combinations of stitches, fabric, and thread to work with, each hand-embroidered project has its own unique charm and ability to reflect your personal style.
With so many different types of hand embroidery styles out there, it can often get confusing as to what the difference is between each one. But there’s no need to get your stitches in a twist—we’re here to explain how each technique is different from the next.
Here are several popular techniques:
- Cross-Stitch
- Crewel Embroidery
- Blackwork Embroidery
- Stumpwork Embroidery
- Needle/Thread Painting
- Surface / Freestyle
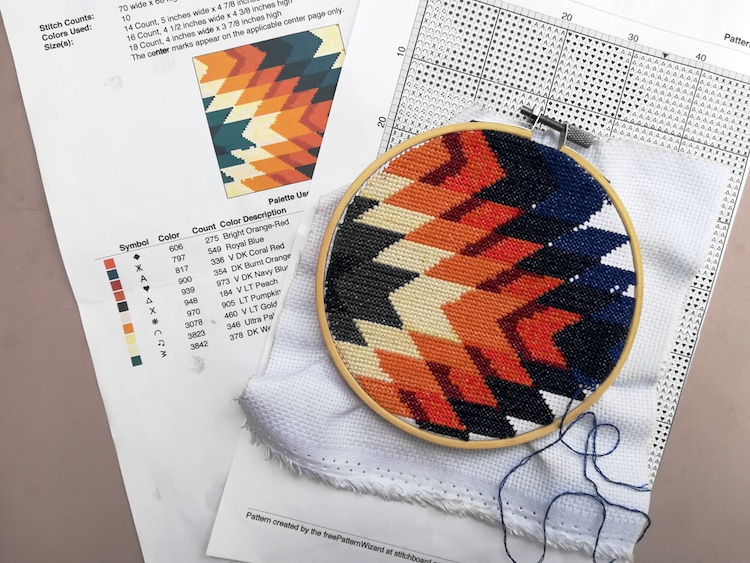
Cross-Stitch
If you’re just beginning to learn embroidery, cross-stitching is an easy style to master due to its simple x-shaped stitches. One of the oldest embroidery techniques, cross-stitch designs are usually applied to woven, grid-patterned fabrics (such as Aida cloth, Jobelan, and jute-style linen), providing a guide for even stitches. You can count the threads on the piece of fabric in each direction so that the stitches are of uniform size. For this reason, designs often appear less fluid and boxier than regular embroidery. However, this angular quality makes cross-stitch a great style for embroidering words and phrases.
Crewel Embroidery
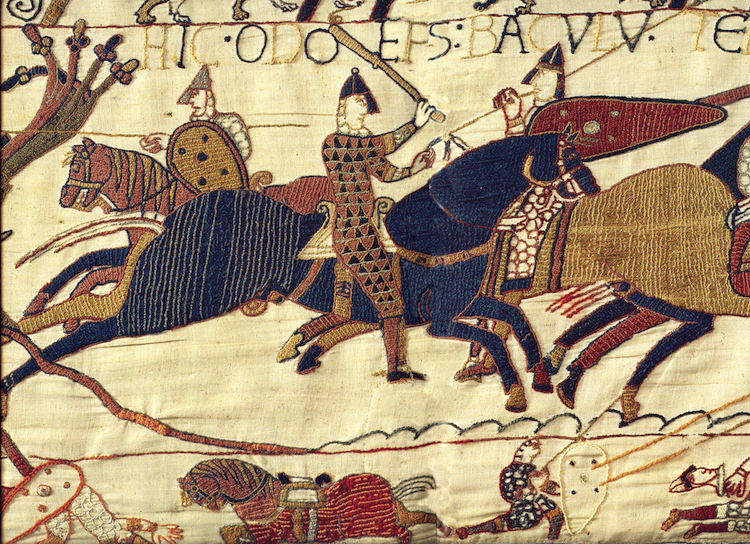
The Bayeux Tapestry. Odo, half-brother of William, Duke of Normandy, cheering his troops on (detail).
Crewel embroidery, or crewelwork, is a type of surface embroidery that uses two wool threads at once. This technique is usually used to follow a design outline, and can be rendered using variety of stitches.
Crewel embroidery has a long history that dates back as far as the Medieval period, with The Bayeux Tapestry (created in the 11th century) being one of the earliest examples. The impressive 230 feet of embroidered linen cloth illustrates England’s historical battle that ended with the Battle of Hastings in 1066.
During 17th century England, crewel work was widely used to embellish Jacobean-style household textiles, such as curtains and bed covers. The technique was particularly suitable for decorative upholstered items due to the strong wool (called crewel wool) used for its stitches.
While many modern embroidery artists create work inspired by early crewel designs, it’s not uncommon to see them use a mix of fibers. From wool blends to hand-spun yarns, there’s a huge variety of embroidery threads available for crewel work. Common surface stitches include line stitches such as the stem, chain, and split stitch, as well as the classic satin stitch and French knots. If you want to achieve a traditional look, we recommend using a linen twill as your fabric.
Blackwork Embroidery
Don’t be fooled by the name, blackwork embroidery doesn’t necessarily lack in color! The term comes from its traditional roots, when artisans would have used black thread to stitch their designs. The style was popularized in England during the reign of King Henry VIII, whose first wife Catherine of Aragon brought blackwork clothing with her from Spain. This is why you might hear the same style referred to as Spanish blackwork.
The counted-thread technique is best suited to those who want to achieve a traditional look and allows embroiderers to fill outlined motifs with elaborate, geometric patterns. Similarly cross-stitch, Blackwork can be done on just about any type of material but works best on an even-weave cloth so that you can follow a grid. However instead of cross-shaped stitches, the primary stitches used in blackwork embroidery are backstitch and Holbein stitch, which is also known as a double running stitch.
Unlike other traditional styles of surface embroidery that use needles with sharp tips, blackwork requires a tapestry needle with a blunt tip, making it easier to create back-stitches and double-running stitches.
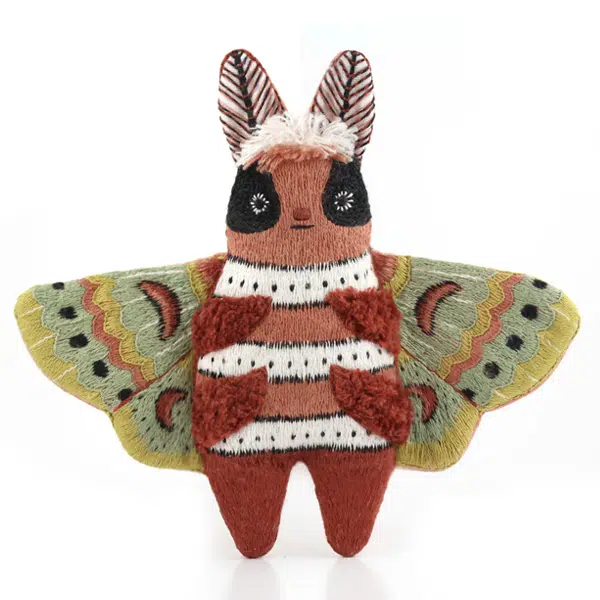
Stumpwork Embroidery
Also known as raised embroidery, stumpwork originated in mid-1600s England. The technique takes hand embroidery to the next level (literally) by building on basic stitches to create three-dimensional designs. Using fabric as a base, stumpwork embroidery artists create their work by layering stitching, adding 3D embellishments such as beads, or stitching around shapes, wires, and padding.
Nature is a particularly popular subject for stumpwork artists. One craftswoman known on Instagram as Stitch and Bone uses beads and thick fabrics to create beautiful textile insects, while French artist En Avril turns her animal illustrations into incredible textural brooches.
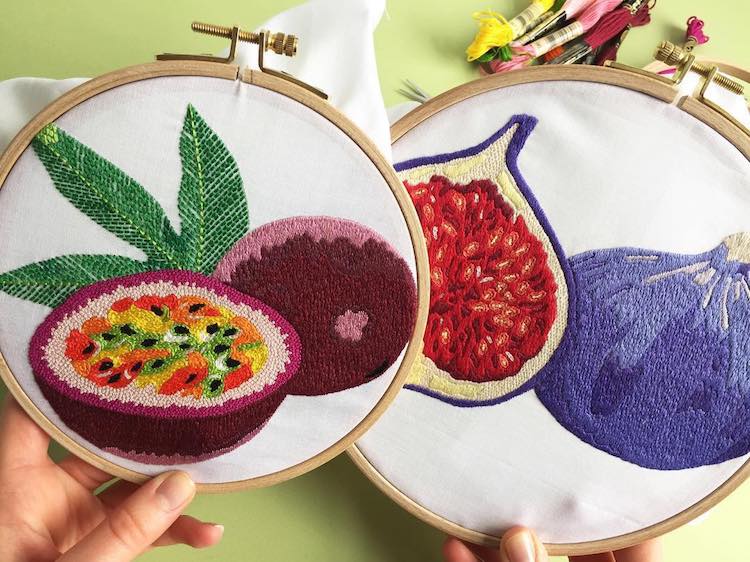
Thread Painting
Sometimes called needle painting, thread painting is a type of embroidery that uses a combination of long and short stitches and a variety of colors to produce images that look like textile paintings. Using multiple hues and tones of embroidery floss, each stitch is like a brush stroke that merges into the next. Depending on the fabric and thread used, thread painting pieces can look visually similar to an Impressionist painting or a photorealistic work of art.
Many contemporary artists have adopted this particularly expressive approach. For example, Cape Town-based artist Danielle Clough uses thick, vivid yarns to create incredibly detailed portraits. When asked what inspires her to “paint with thread,” she tells My Modern Met: “I found embroidery through a sequence of mistakes and opportunities. I almost stumbled upon it, initially doodling on a piece of felt with thread and slowly adding colors. This combined with photography developed into my technique, which to some is thread painting or freestyle embroidery. It’s even been called chicken scratch! I never had a moment that inspired me, but just a process of doing, loving, and making that grew into what it is today.”
Surface or “Freestyle”
This style encompasses embroidery that doesn't fall into a specific category. For contemporary stitchers, this is the most common approach today—they aren't limited to one style. Instead, they can pick and choose the stitches they use.
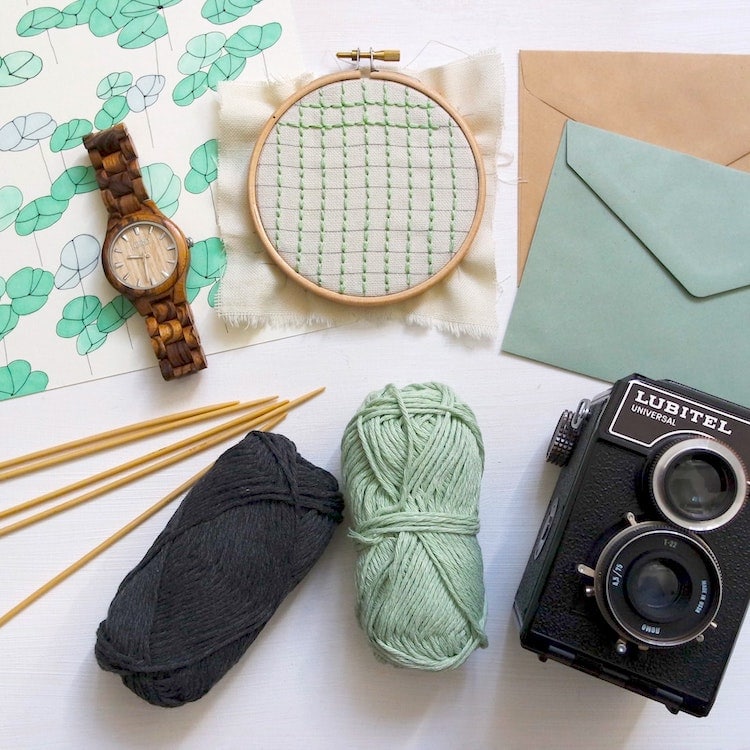
What do you need to start embroidering?
One of the nice things about hand embroidery is that the supplies needed to start the craft are limited. This means it’s easy to get your feet wet without investing in a huge amount of items. And, over time, you can add diversity to what you work with.
Many beginners start with embroidery kits, which often supply everything you’ll need to get started. But if you are looking to start from scratch—whether you’ thread painting, counted cross-stitching, or doing needlepoint—you’ll want to stock up on embroidery supplies.
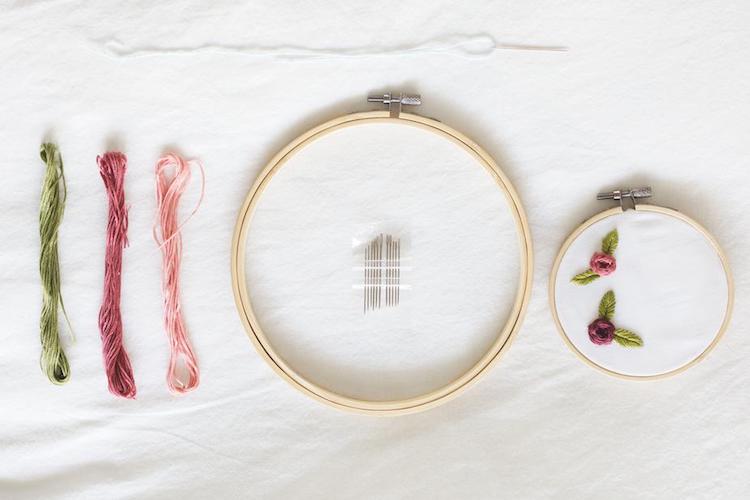
Here are the basic supplies needed to start embroidering:
- Fabric – Depending on what type of embroidery you are doing, you’ll select a fabric that either has loose or tight threads. And once you get the hang of things, there’s no shortage of materials your can embroider. Many people start out with Aida fabric if working with counted cross-stitch or needlework, as the weave is loose and in a grid system. Cotton works well for freehand techniques like thread painting and is an inexpensive material to start. Specialty shops will also sell linen made specifically for embroidery. Silk is also a popular choice if used with a sharp needle and short threads.
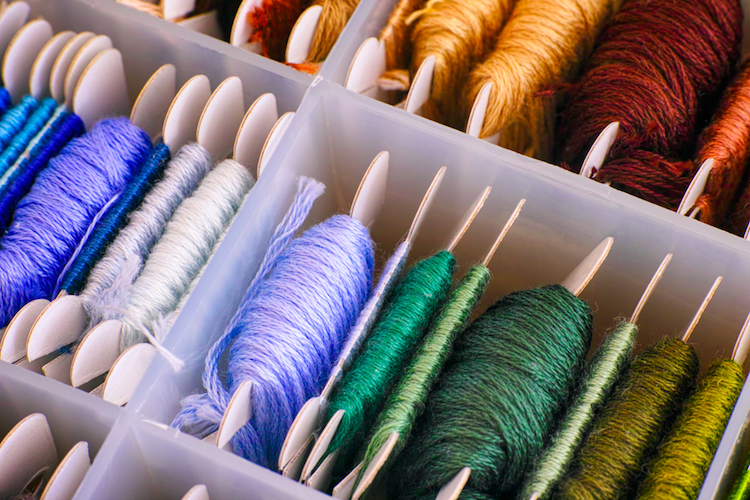
- Thread – Embroidery threads come in a wide variety of weights and colors depending on the type of hand embroidery. Many people begin with stranded cotton threads known as embroidery floss. They are sold in skeins and can be separated into six fine threads. DMC is the most commonly used brand, with a huge array of colors available and coded with numbers. Most threads are colorfast, meaning they won’t bleed underwater, but you’ll want to look at the packing to be sure. Other types of threads used in embroidery include pearl cotton, rayon floss, metallic thread, crewel yarn, Persian yarn, and silk thread. For a uniform look, use the same type of thread by the same manufacturer for a single project, as finish and thickness will vary.
- Needle – Different needles will be required according to the weight of the thread and the weave of the fabric you are working with. Embroidery needles, or crewel needles, often come in packs with different widths to be used according to the fabric of the project. They have a sharp point to move smoothly through the fabric and a large eye to make it easy to thread. Tapestry needles, which have a blunt point, are used for needlepoint and cross-stitch.
- Scissors – A sharp pair of scissors to cut your threads without fraying them is a must-have.
- Hoop – This is where you’ll place your fabric to keep it taut in order for the final design not to be stretched or warped. Both plastic hoops and wood hoops are available in a range of sizes. Clip frames and scroll frames are other options for working on your design. Just be sure not to leave the unfinished project stretched when not working on it, or you may leave marks that will be difficult to get rid of when you are finished.
- Good lighting and magnification – You’ll want to have a good lighting source and magnification to help you see all the details of your work and where you are placing the thread. If you don’t have anything that works, sitting by a sunny window can do the trick.
If you are looking to level up on your embroidery supplies, here are some other essentials you will find useful:
- Water soluble marker – This can be used to draw your own designs on your fabric or mark starting points.
- Needle minder – No more lost needles with this clever gadget that stays attached to your fabric with a magnet and holds the needle in place.
- Thread conditioner – This will help you avoid tangles and protect the floss.
- Waste canvas – If you are working in counted cross-stitch or any embroidery that requires a grid, waste canvas allows you to place a grid on any type of fabric.
- Needle threader – Tired of those pesky threads getting away from you? A needle threader will make your life much easier.
- Fabric stabilizer – This can help delicate fabric stay taut when adding a lot of stitches and embellishments so the final design won’t warp or tear. Some stabilizers tear away, while others dissolve in water.
Once you get started, you’ll want a way to keep yourself organized. Here are some supplies to keep your embroidery supplies neat and tidy:
- Floss bobbins or cards – Used to wrap your extra floss once you’ve opened a skein and are done with a project. Make sure to label each card with the color code of the skein so you’ll remember it later. Don’t want to invest the money? One DIY trick is to use clothespins to wrap up your floss.
- Storage box – There are specialty boxes made to perfectly organize your threads, sized to fit your floss cards. This will allow you to come back and easily pick out what you need as you start your next project.
- Floss organizers – If you have a large project with a lot of colors, an organizer will allow you to keep all the floss tangle-free and accessible while working.
- File folders – If you’re working with printed patterns, keep them neat and tidy inside a file folder in case you want to come back and use them another time.
- Project pouch – While you have a project underway, sometimes it’s handy to have all the threads you need in one pouch so you can pick up and go at any time.
Now that you have everything you need, you can start stitching away!
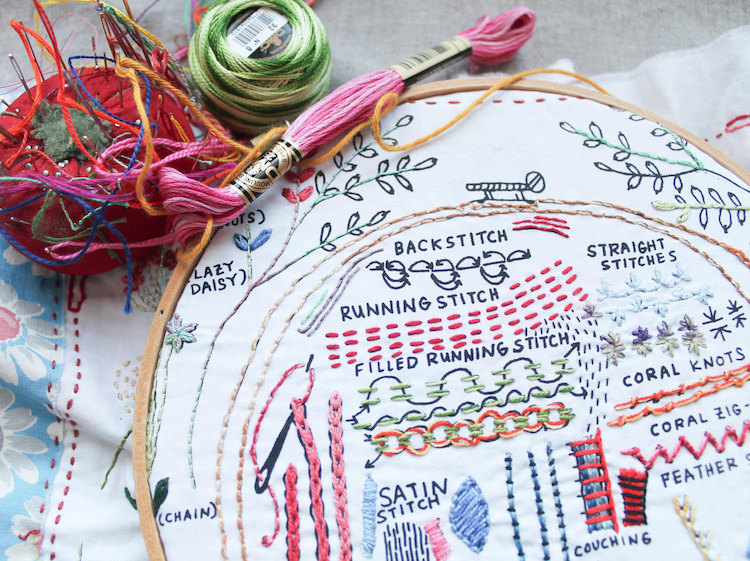
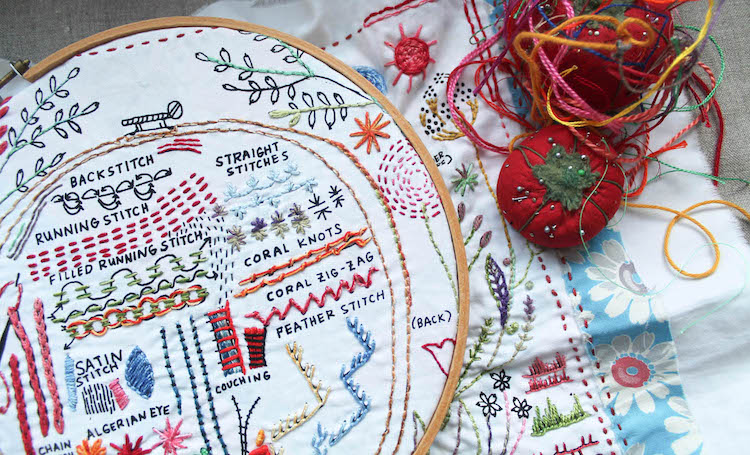
Basic Stitches of Hand Embroidery
Embroidery is a craft that looks deceptively simple; but if you take a peek at any stitch sampler, you’ll find that it can quickly result in complex techniques. While that sounds intimidating, have no fear—many patterns can be completed by having knowledge of the most basic embroidery stitches.
Knowing a variety of stitches isn’t a requirement for embroidery. Artist Sarah K. Benning, for instance, creates her visually complex compositions using variations on the satin stitch. Keep in mind that though you might pick your favorite technique (or two), it’s always best to have at least a few stitches up your sleeve. In doing so, you can use them as a way to build texture and visual interest in your embroidered composition.
To further illustrate this point, think about your fabric as you would a drawing. Creating a compelling artwork often requires you to use multiple drawing techniques; you might drag your pen back and forth over the paper as well as use cross-hatching and stippling (dots) to help build form. If you were to only use the back-and-forth technique, chances are your image might feel a little stale. It’s the same with embroidery. Coupling the satin stitch with tiny French knots is sure to excite the eye more than the same straight stitch over and over again.
How do you start an embroidery stitch?
No matter the type of embroidery stitch you intend to make, each starts the same way—with a threaded needle that’s passed through the material of your choice. The thickness of your stitch will depend largely on what you’re using to sew. DMC thread, a popular choice for embroidery artists, makes skeins of floss that comprise six smaller strands. You can sew with all six threads for an ultra-thick stitch, or separate the strands into smaller portions. Using between two to four threads is common, but it’s based on personal preference and the look you’re trying to achieve. Some artists will use a single strand of the thread as a way to add accents to the subjects they’ve stitched; it’s akin to a very fine line drawing.
What are the basic hand embroidery stitches?
There’s no governing body that decides on what are the most basic hand embroidery stitches, but there are many that are recommended for beginners.
Amanda Rolfe gives an easy to follow demonstration of seven stitches. Watch how she does it below:
These are the stitches Rolfe covers:
- Backstitch – As the name implies, the backstitch has you working backward. Begin by pulling the thread from the back of your fabric to the front. Once you’ve done this, move your stitch behind the hole you just made and poke it through to the opposite side. Then, when you come up again, take your needle in front of the stitch you just made. When you are ready to pull your needle in the back of your fabric, insert it into the previous stitch.
- Split stitch – Now that you know the backstitch, you can complete the split stitch. After you’ve created one full stitch, bring the needle through the fabric and insert it in the middle of the stitch you just made. It will “split” the stitch and give a decorative, chain-like effect.
- Stem stitch – The stem stitch lives up to its name and looks like something you’d find on a plant. Again, start by making a backstitch. When you are making your second stitch, bring the thread up and place it halfway between the previous stitch. Then, take your needle to the front of the line. Each of the stitches will be slightly angled inward, making the stem stitch a great option for curved outlines.
- Chain stitch – A chain stitch represents the beginnings of a more advanced technique, and it requires a few steps to making a single link in the chain. It starts by bringing the thread through the back and then inserting the needle next to the stitch that you just brought up. But instead of taking the needle straight through the back, you will angle your needle so that it goes in and then comes out in front of the two stitches—the needle, at this point, will be laying horizontally on your fabric. Then, pull the needle through, making sure that the thread runs under it. Pull the thread and it should reveal a link in a chain.
- Blanket stitch – Start by bringing the thread through the back of your fabric and making a new stitch to the right of it. Like you did with the chain stitch, insert the needle so that it goes into the fabric and then out again—without bringing the thread all the way through the back. Once you’ve inserted the needle twice, now pull it, and again making sure that the thread runs under the needle. Repeat this to create an L-shaped stitch that’s good for finishing edges.
- Satin stitch – This is a stitch meant for filling areas of a design. To produce the stitch, start from one end of the shape and pull your needle to the front of the fabric. Then, find the other end of the shape and insert the needle there, moving toward the back.
- French knot – The French knot is the most basic of the knotted stitches that begins by bringing your needle through the fabric. Once that’s done, wrap the thread around the needle once and then guide the needle next to the hole you just made. Make sure you do this slowly or else you might pull the entire thing through to the back of the fabric and have to start over again.
For extra guided practice, Dropcloth Samplers sells a cloth sampler that allows you to practice more than a dozen basic embroidery stitches. And once you’ve mastered those stitches, books like DK’s Embroidery will show you how to take your skills even further—the stitch encyclopedia contains more than 200 stitches presented in step-by-step instructions.
Resources for Embroidery Designs and Patterns
The only way to improve your embroidery skills is consistent practice. Luckily, there’s no shortage of hand embroidery patterns for you to try—many of which are free.
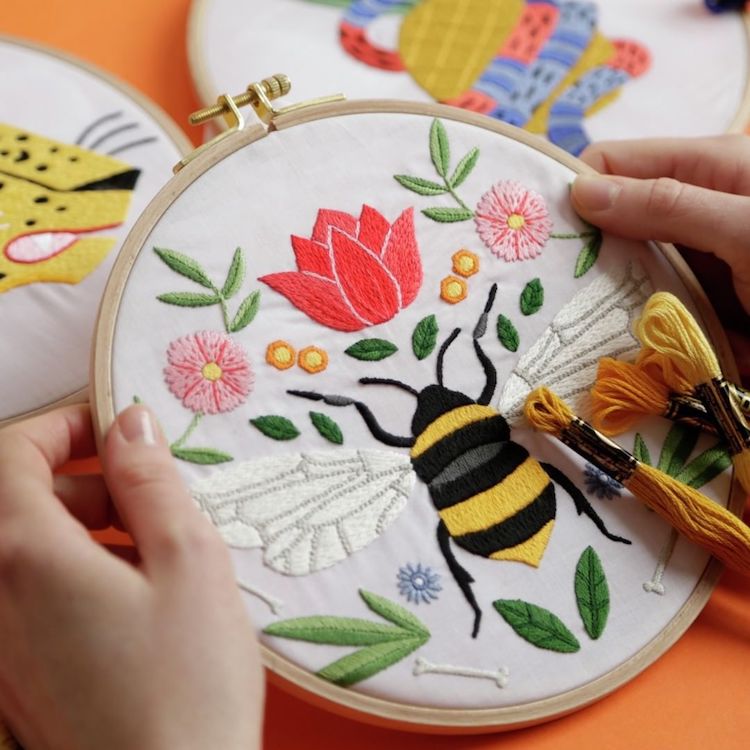
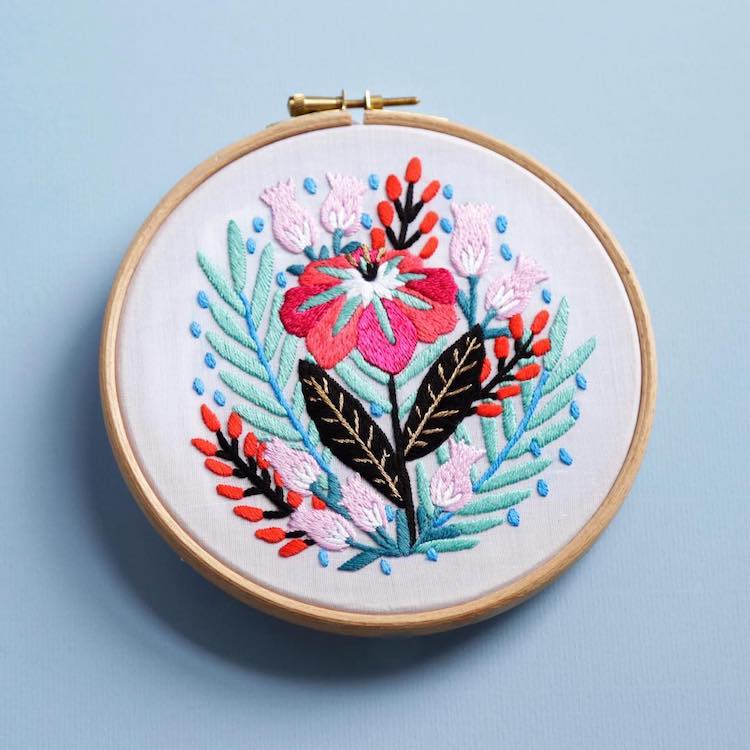
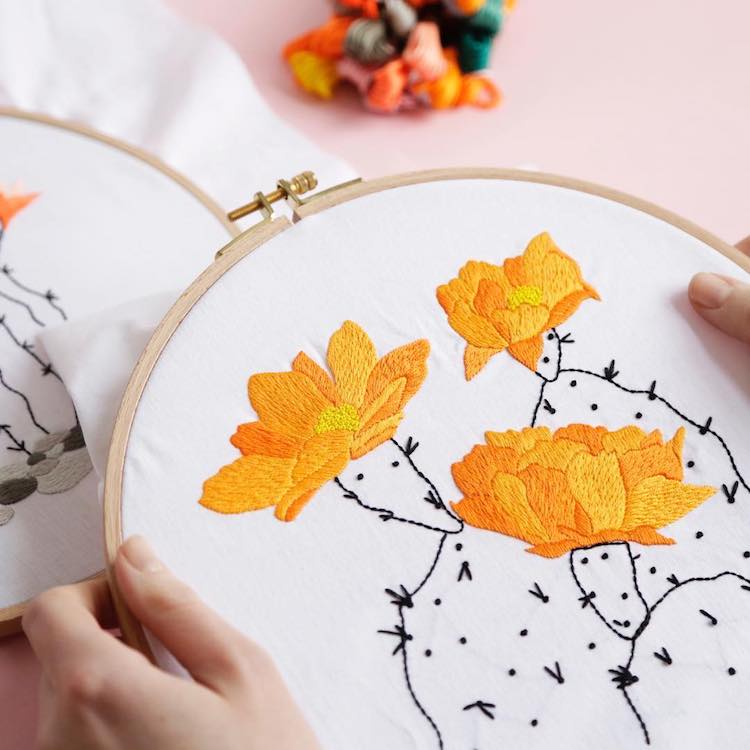
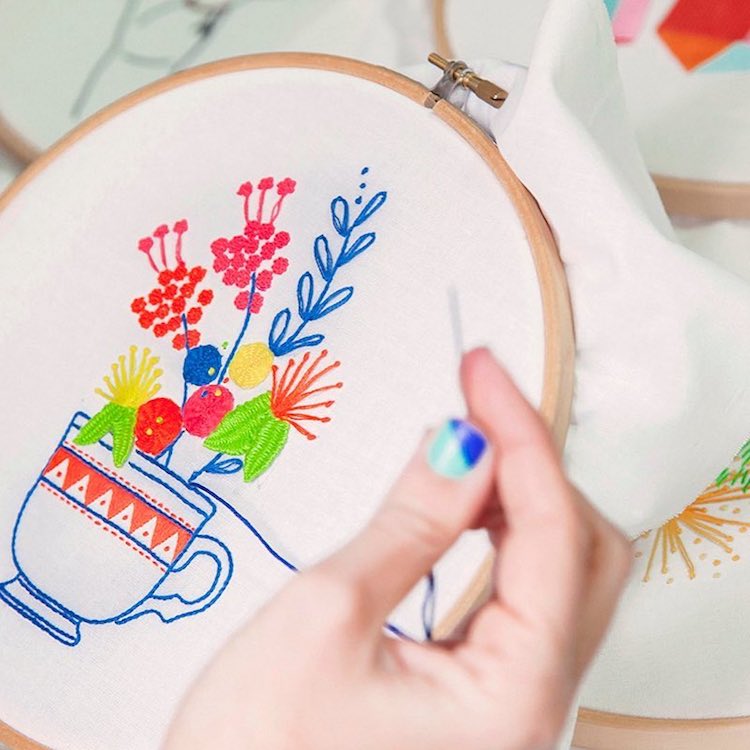
DMC is making it easier than ever to try embroidery and have fun stitching contemporary imagery. The company has worked with illustrators from around the world to create over 1,000 patterns that feature a wide range of subject matter, from cacti to cats. Each of their free embroidery patterns comes with a diagram detailing the types of stitches you’ll use as well as the colors necessary to complete them. To make things even easier, they have the colors bundled as kits available for purchase on their website. (Although this isn’t required to download the pattern.)
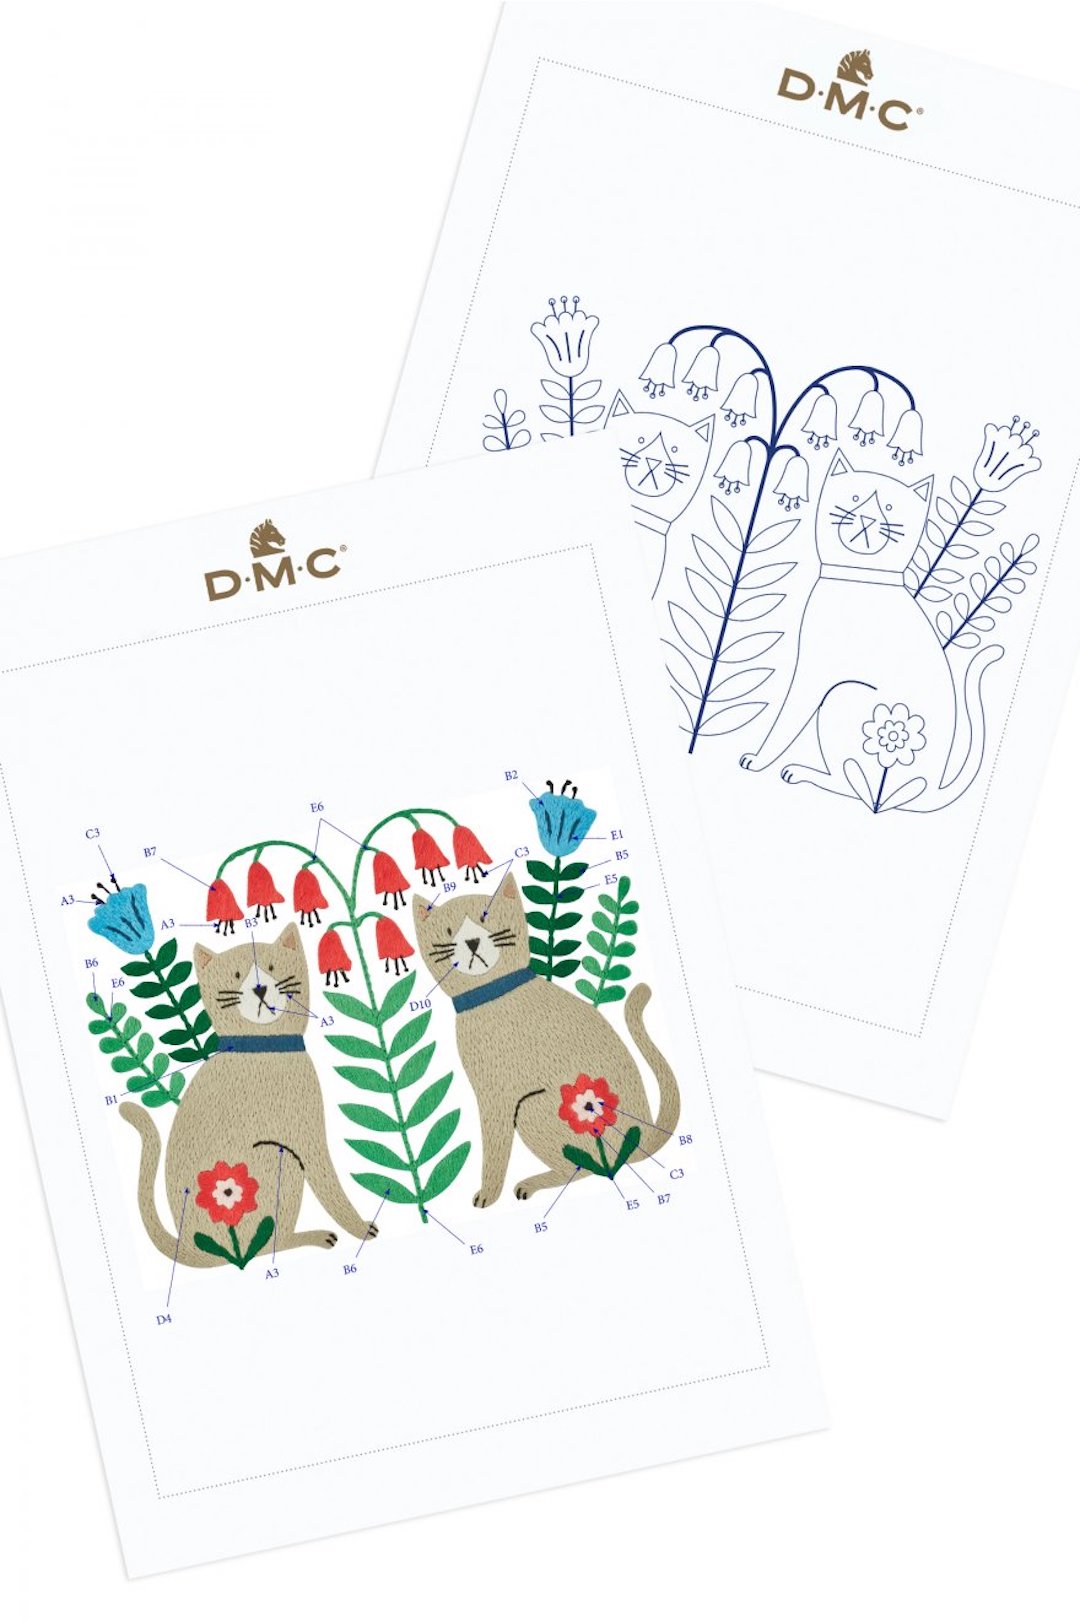
Contemporary Embroidery Art Samples
Here is a small sampling of contemporary embroidery art that’s available for free on DMC.
Another place to find hand embroidery patterns is through Etsy. There are many artists who regularly release their work as patterns that are available instantly for a nominal fee. Between the free DMC patterns and Etsy, you’re sure to stay busy stitching.
Free Pattern Resource for Cross-Stitching
Many DMC patterns utilize several stitches, from the satin stitch to the chain to the split stitch. But if you’re interested in cross stitch (a type of embroidery in which all the stitches comprise an X or a + shape), Stitchboard is a great free resource. This site allows you to design your embroidery patterns with just a click of a button.
Creating your own pattern is easy. Simply upload any image and select the type of craft you intend to make—in this case, you’d select cross-stitch, but Stitchboard also works for knitting, crocheting, and beading. Then, the pattern wizard matches the colors in your image to common threads. Alternatively, you can tweak the colors and refine the image even further. Once you are done setting up your pattern, Stitchboard imports it into a PDF available for download.
Stitchboard has a social component as well. You can choose to upload your pattern to their community so that other crafters can enjoy your design. Their database of over 2.5 million patterns allows you to search via keywords for things you’d like to sew.
Interested in even more embroidery resources? Check out our guide, Everything You Need to Start Stitching Your Own Embroidery.
Want to Learn Embroidery?
There are many ways to learn embroidery, but the first step is to practice your stitches. Dropcloth Samplers has created patterns that will help you learn the most basic stitches as well as more advanced techniques. Then, put your skills to practical use with all-inclusive animal doll kits by Kiriki Press.

How to Learn Embroidery Online
Whether picking up a needle and embroidery thread for the first time or looking to polish your skills, there’s no shortage of online resources to learn hand embroidery. From inspirational demonstrations of new embroidery stitches to step-by-step tutorials, there are a wide variety of videos that can help you accomplish your creative goals.
From free YouTube videos to paid online classes, there’s something for everyone and even the most accomplished embroidery artists will want to take a peek and see what’s out there. You may even be inspired to take up a new form of embroidery or simply learn some new tricks for how to finish off your hoops or push your designs to the next level.
We’ve curated the ultimate list of embroidery videos to help you accomplish any goal you set your mind to, and take away any excuse not to start your next embroidery project.
Free Embroidery Videos
Whether learning to paint, draw, or embroider, YouTube is a great resource for free video tutorials. We’ve focused in on channels that have a wide array of embroidery videos, both for beginners and advanced artists. Some are narrated lessons, while others are simply tutorials to learn new stitches and hand embroidery patterns. And with the luxury of video, you can pause and rewind as much as you want until you have the steps down.
So, if you are looking for quick explanations, new inspiration, or just want to dip your toe in the water without making a big investment, check out our list of YouTube accounts filled with free embroidery videos.
Materials and Tips
HandiWorks
Peacock & Fig
Penguin & Fish
DMC
MadXStitcher
Stitch Demonstrations
Namaste Embroidery
Stitch and Flower
Hand Embroidery School
Cutesy Crafts
Hand Embroidery Channel
Nakshi Katha
Online Embroidery Classes
If you’ve exhausted what’s available on YouTube and are looking for more or just like the ability to interact, you may want to invest in an online embroidery class. There are many available classes online for all skill levels and each will give you the chance to ask questions, have your work checked, and go at your own pace.
Embroidery Basics
- Skillshare – Hand Embroidery Fundamentals
- Creative Live – Introduction to Cross-Stitch
- Skillshare – Cross-Stitch Fundamentals
- Creativebug – Punch Needle Embroidery Workshop
Advanced Embroidery Classes
- My Modern Met Academy – Intermediate Embroidery: Getting Creative with Printed Fabrics
- Skillshare – Hand Embroidery on Tulle and Organza
- Skillshare – Embroidering Your Letters
- Creative Live – Customize Your Embroidery
- Skillshare – Painting With Thread
- Creativebug – Layered Floral Embroidery
- Creativebug – Stitched Rose Embellishment
Time to start embroidering!
Related Articles:
Textile Artist Creates Nature-Inspired Embroidery Art That “Grows” Beyond Its Frame
Ethereal Embroidery Designs Stitched into Tulle Look Like They’re Floating in Mid-Air
Floral Embroidery Stiched Into Used War Helmets Contrast War and Peace
Hyperrealistic Pet Portraits Rendered with Up to 18 Hours of Exquisite Embroidery
Artist Uses Colorful Embroidery to Explore Natural Forms
Colorful Embroidery Breathes New Life into Portraits of Cultural Icons
Art History Masterpieces Reimagined as Hand-Sewn Embroidery
Best of 2016: Top 17 Artists Who Have Revitalized Embroidery


