Photo: Jason Yoder
This post may contain affiliate links. If you make a purchase, My Modern Met may earn an affiliate commission. Please read our disclosure for more info.
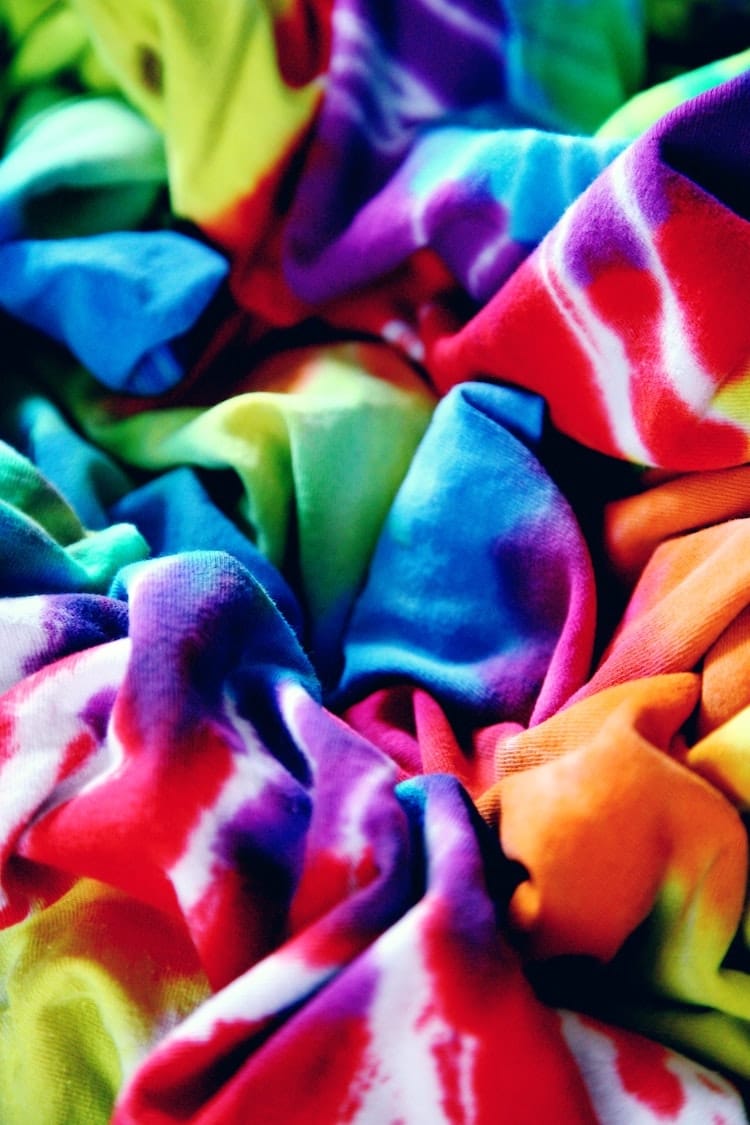
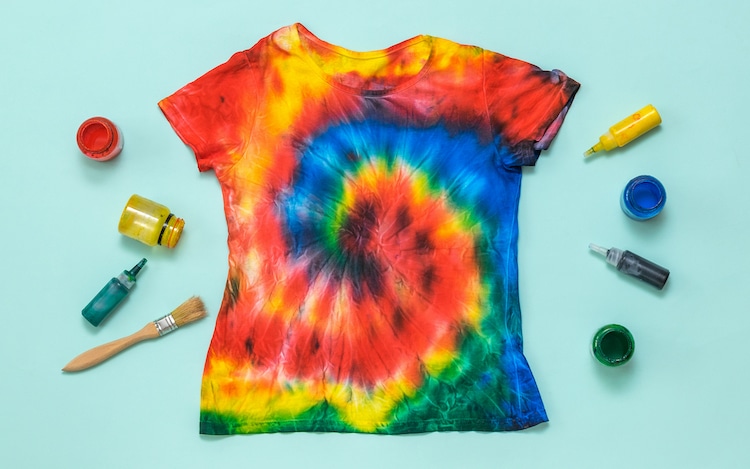
There are ways to create a custom wardrobe without breaking the bank. One way to do that is by altering your clothing with fun and easy DIY projects. Tie-dye is one of them. The process is nothing new, and chances are you might’ve done it before; it’s an all-ages-friendly project that adds swirling patterns to garments by securing them with rubber bands and then submerging them in dye. When done, clothes and accessories can have a funky ‘70s-inspired look to them.
Using just a few supplies, you can begin tie-dying with ease. To get you started, we’ve assembled an essential materials list and the general steps that you’ll want to take with tie-dye. The good thing about this process is that it’s really hard to mess up. Even if you feel like you’ve goofed, chances are that it will turn out just fine and might be even better than you had hoped.
Scroll down for a supplies list, techniques, and helpful videos that will teach you how to tie-dye.
But first, what is tie-dye?
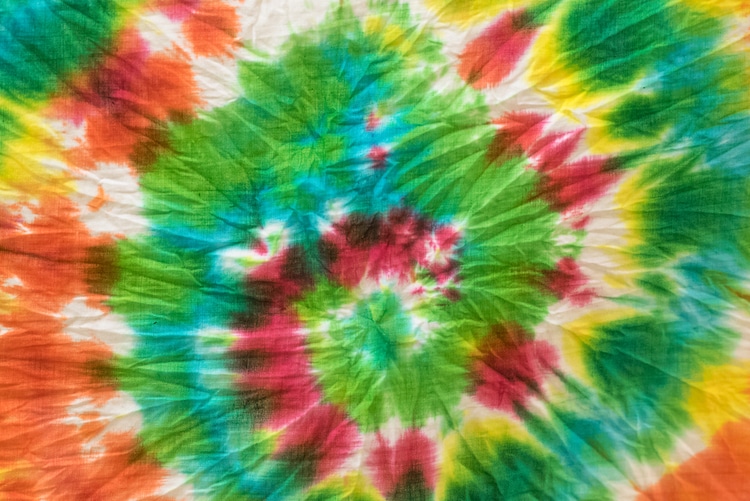
Tie-dye is a dyeing technique that uses folding and tying to resist dye. Essentially, wherever you fold or tie the fabric, the dye will not go to those places. It will keep the fabric the same color as when you began the process.
Using heavy-duty string or rubber bands, you’ll fold the fabric in the places that you want the dye to avoid. To make sure your folding stays in place, you’ll then tie it with string or secure it with rubber bands. Then, using a vat of prepared dye or squirt bottles, you’ll submerge or apply the dye. Once complete, you’ll have a unique pattern. Any place that was folded (or even crumpled) will be free of pigment.
Essential Supplies for Tie-Dye
Tie-dye is a choose-your-own-adventure sort of craft. The supplies list below will be helpful in getting started, but you can always customize your process depending on the pattern you're trying to achieve and the items you're trying to dye.
A garment or piece of fabric to dye — Look for something with natural fibers (such as cotton) because it will be more amendable to the dye.
Fabric dye or a dye kit — A dye kit will make everything easy by including the dye and soda ash. But these kits can be limited in colors, which are generally beautiful and plentiful in hues. Dharma Trading Co. is perhaps the most well regarded in terms of dyes for its vibrancy and variety. Another alternative is Rit Dye which also has many colors and is easy to source online or in your local craft store. Depending on the type of dye you buy, you may need an additive called soda ash.
Bucket — It’s best to have some sort of bucket for dyeing. Invest in a five-gallon bucket and you can use it for tie-dye or shibori dyeing.
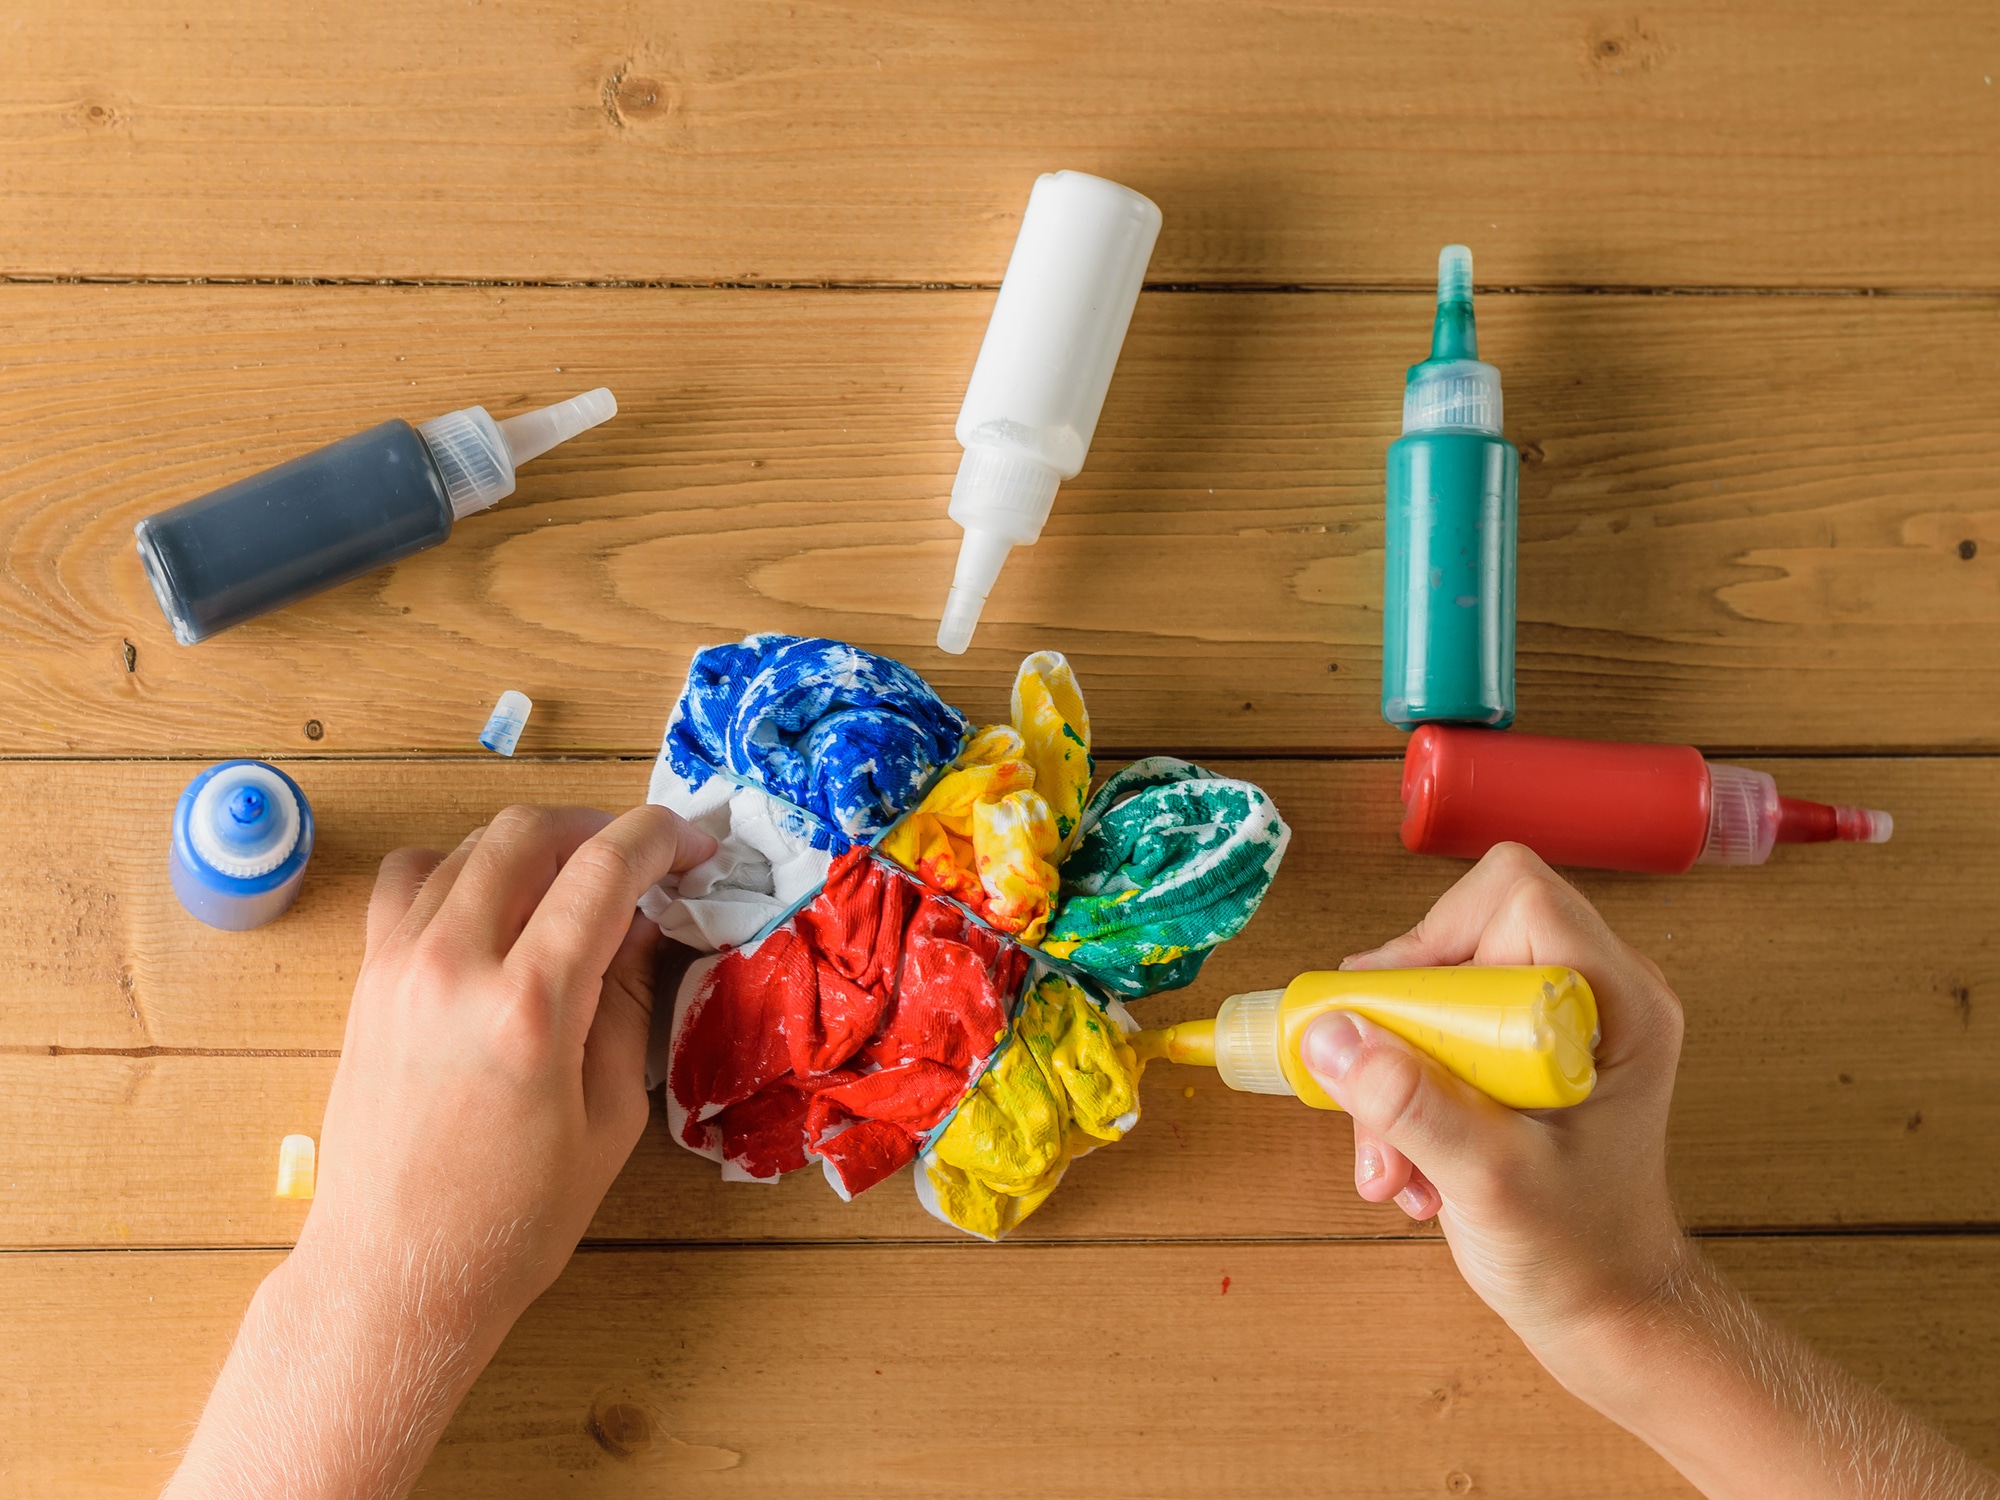
Squirt bottles — This is another way you can apply your dye instead of dipping it in a bucket. Using squirt bottles will allow you to easily incorporate different colors onto your garment.
Rubber gloves — Wear rubber gloves to protect your skin from the dye.
Rubber bands — While you can use a tie to tie-dye (it’s in the name, after all), rubber bands are recommended for this DIY. They will keep your design tight and ensure the resistance will stay.
Stir stick — A wooden stick will work great for mixing your dye. Depending on the size of your vat, you could use paint stir sticks you get with mixed paint at the hardware store.
Plastic wrap — You’ll use plastic wrap in a later stage of the tie-dye process.
Basic Steps for How to Tie-Dye
Pick the material you’d like to dye.
You can buy new fabric for tie-dye, but you probably don’t need to do that. Just look in your closet! Is there a shirt that you’re not in love with anymore? A pair of sweatpants that could use an upgrade? White fabric will be best to tie-dye as it will have the most vibrant colors, but you could do some lighter colored fabrics, too, and see what happens.
Mix your dye according to manufacturer instructions
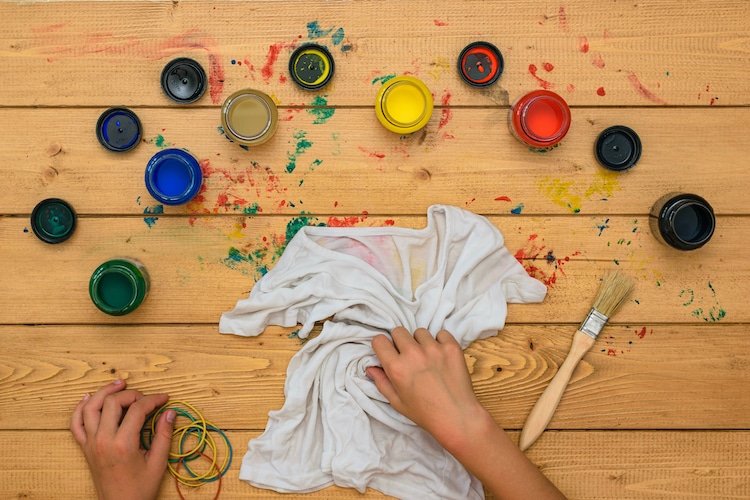
Using your bucket and wearing gloves, mix your dye according to the manufacturer's instructions. This will probably involve warm water and adding soda ash or vinegar (if you’re dyeing wool). Stir well to combine—you don’t want any excess dye powder floating around in your mixture. If you want to use multiple colors, you could put them in squirt bottles at this time.
Create a tie-dye pattern with rubber bands.
Here’s where the fun really begins. Scrunch, crumple, twist, or fold your fabric to create those resist lines and then secure using a rubber band. There are really no rules at this step, although you can take inspiration from shibori dyeing for ways to manipulate your fabric.
Soak your garment in water to prepare it for dye.
This step will prepare the fibers to accept the dye. You might want to add a bit of soap. Let it sit for about 20 minutes.
Place your tie-dye into a dye vat or squirt with dye.
Dip, soak, or squirt the dye onto your garment. How you apply the dye will depend on the tools you’re using (bucket or squirt bottle) and the number of colors you have. Once you’ve finished applying all the dye, let it soak into the garment. The manufacturer instructions should have suggested times, but essentially, the longer you let the dye soak onto the fabric, the darker it will be.
Wrap your tie-dye piece and let it sit.
Once your design has been thoroughly soaked, take it out of the dye and wrap it in plastic wrap. Then, let it sit some more—for anywhere between six hours and two days.
Rinse your garment with cold water.
Once you’ve soaked your piece, rinse out the dye using cold water. This might take a while, and you’ll only stop rinsing once the water runs clear.
Wash your garment in a washing machine.
The final step is to wash your tie-dye in a washing machine on a cold water cycle. It's important that you wash it alone; if you wash it with other garments, chances are high that the dye from your project will bleed onto the other laundry. Once it’s out of the washing machine, dry and enjoy your new tie-dyed piece!
More Tie-Dye Tutorials and Inspiration
Because of the accessibility of tie-dye, crafters have created a lot of videos that demonstrate a variety of designs you can achieve with tie-dye.
How to Tie-Dye: Tips and Tricks for Beginners
Six Easy Methods for Tie-Dyeing
Watermelon Design Pattern
Five Different Shirt Designs
Tie-Dyeing Everything
Gems Folding Technique
Multi-Geode Technique
Related Articles:
Learn How to Ice Dye to Add Some “Cool” to Your Craft Projects
Adidas Releases Groovy Tie-Dye Sneaker in Celebration of Woodstock’s 50th Anniversary
Dip-Dyed Macrame Wall Hangings Add a Modern Pop of Color to Any Room