How to Draw a Landscape in Four Steps
This realistic landscape drawing process translates across terrains. Using the same four steps, it will help you break down even the busiest of places so that they can be rendered in pencil.
Before you begin, make sure you have a great view of your landscape, whether that’s in real life or in a photograph. It’s always best to draw things on location—it helps with your observational skills—but many times, that just isn’t possible. In that case, look for a picture that has ample lighting to where the details of the landscape are crystal clear.
Step 1: Block out the big shapes.
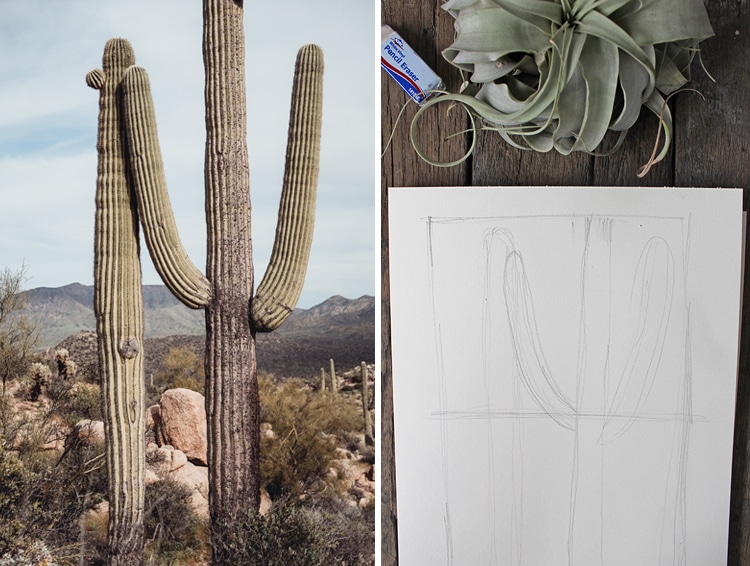
The process for drawing a landscape is like a funnel. You'll start with very general shape-sketching and gradually work your way to the finer details. To begin your drawing, create a composition that is at the same scale as your source. The entire sheet of paper might fit the scale of your photograph, for instance, or you might need to create your own (like we did).
Once you have your composition set, look at the big shapes in the landscape as well as where the horizon line falls. What stands out to you? Is it the silhouette of rolling hills? Large cacti? Trees that span the width of the page? Record these bigs shapes on the paper. They can be very loose and light—we’ll refine their edges later—because they’ll act as a guide for the rest of the drawing. So, make sure you take the time to get these elements right. Otherwise, it can throw your whole piece off.
Step 2: Refine with contour lines.
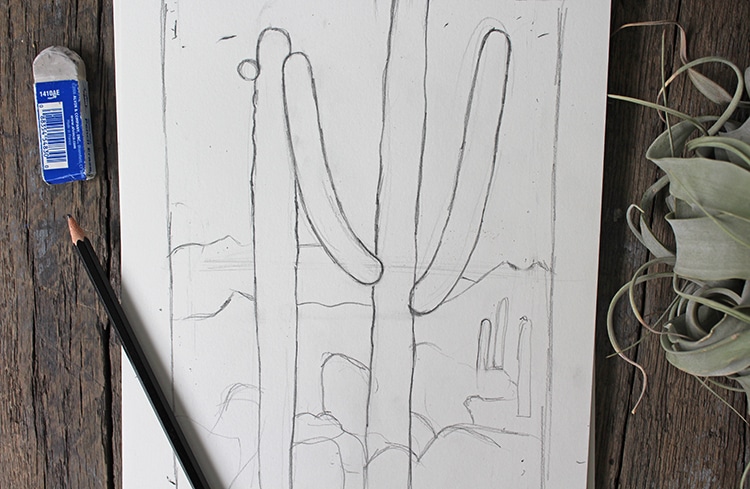
Photo & artwork: Sara Barnes / My Modern Met
Now that you’ve got the guidelines set, start to refine your drawing using contour lines. Begin with the big shapes you just drew and closely observe their edges. In our large cacti, for instance, the body of the plant isn’t straight—in some parts, it’s wavy. With a heavier hand, define these lines.
Once you have your big shapes fine-tuned, study the landscape yet again. There are other elements of the setting that, while not as large, are still eye-catching parts of the compositions. This includes large rocks, bushes, and things that are off in the distance. Using your big shapes as a guide for placement, sketch out these things.
Step 3: Apply tonal shading all over.
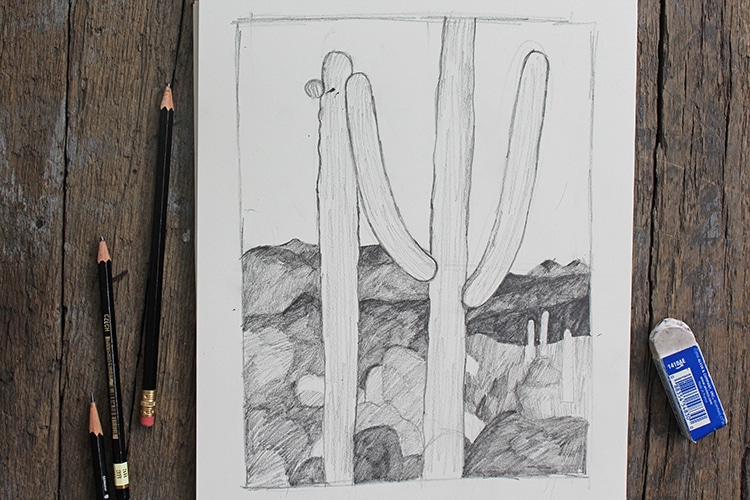
Photo & artwork: Sara Barnes / My Modern Met
Now that the major elements of the composition are sketched, it’s natural to want to start drawing the details. But, not yet! What makes a landscape appear realistic isn’t all of the small bushes and trees—although they help—it’s the tonal shading of the place. Shading and highlights will give your work depth, so the next step is to record the values you see in your source images.
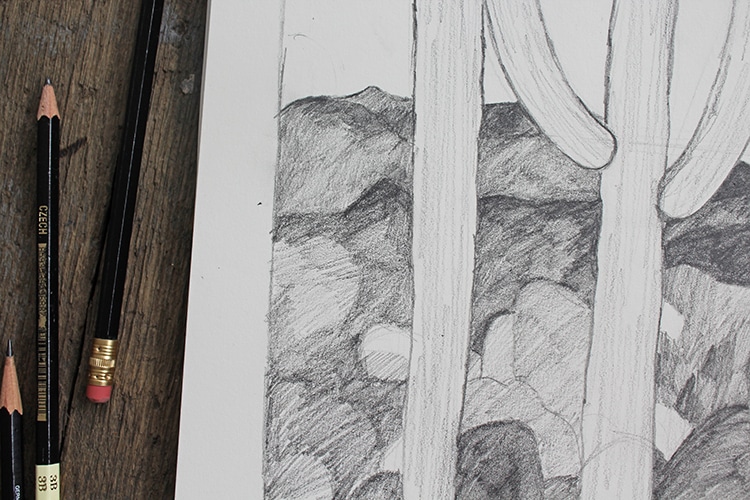
Photo & artwork: Sara Barnes / My Modern Met
Working from the background to the foreground, begin to add tonal shading to your composition. You can use a variety of drawing techniques, but the back-and-forth approach is the most popular used with your HB and B pencils. As you apply the graphite, compare the area you’re shading with another area that’s right next to it. Is it darker or lighter? Additionally, is this section darker or lighter than other parts of your drawing? By constantly assessing and comparing, you’ll ensure that the tones of your piece are consistent and correct.
Step 4: Draw the details.
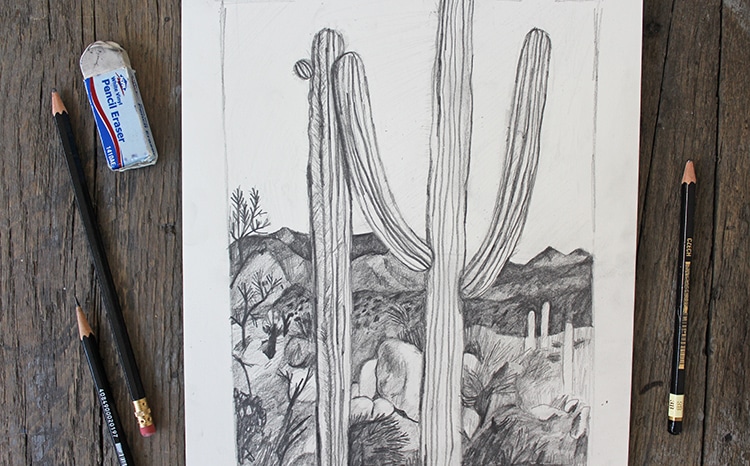
Photo & artwork: Sara Barnes / My Modern Met
We’ve reached the end of the funnel. Now, it’s time to draw the details. Working again from the background to the foreground, use your pencil to sketch the elements that bring the landscape to life. Your darker B pencils are ideal for recording silhouetted bushes and shrubs. Your HB pencil works great for tall grasses and the subtle texture on rocks. And—here’s where the H pencil comes into play—for parts of the landscape that are in the foreground, use the precise graphite for defining these features.
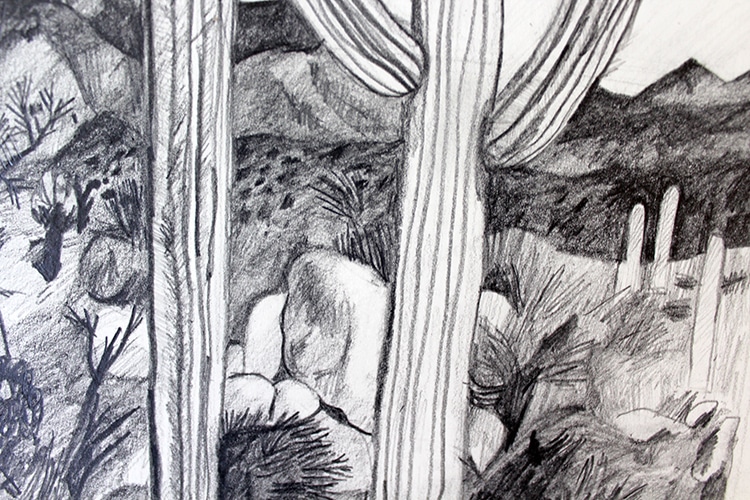
Photo & artwork: Sara Barnes / My Modern Met
Are you feeling overwhelmed by how much detail there is? Don’t worry about capturing every little thing. Just render the elements that you feel are most eye-catching and capture the essence of the landscape—it’s why we draw them in the first place. Not because we want to record everything, but because we want people to connect to the spirit of a location.
Share your landscape drawing! Join our Art, Design, Photography, and Drawing Club on Facebook.
Related Articles:
Learn How to Draw Thousands of Flowers Using the Same Simple Technique
50+ Drawing Ideas That Will Get You Sketching Right Now
Best Drawing Pencils for Professionals and Beginners Who Love to Sketch