Prismatic
Can you describe the process of creating your photos?
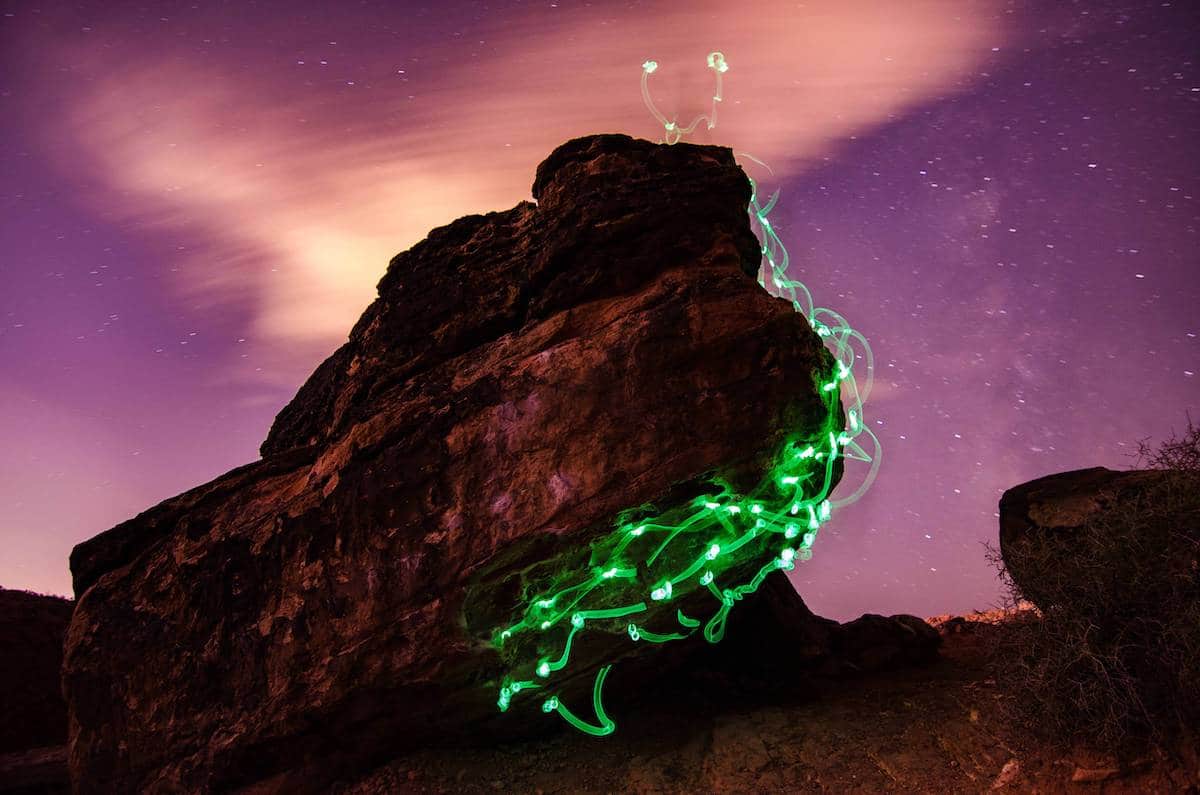
In order to get most of my shots, I use an LED light strip (the second cheapest one off of Amazon) that I've taped to a black sweater. The lights usually run up the left side of my back, down my arm to my wrist, back down my arm, across my shoulders, down my other arm, down the right side of my back, and wrapped once around my waist. They plug into a lithium-ion battery pack that I wear in a fanny pack around my waist. The lights are programmable and have different settings for different blinking patterns and different colors. Sometimes, I set the lights to change automatically every x number of seconds, while other times I bring the remote with me so that I can change the colors manually as I climb.
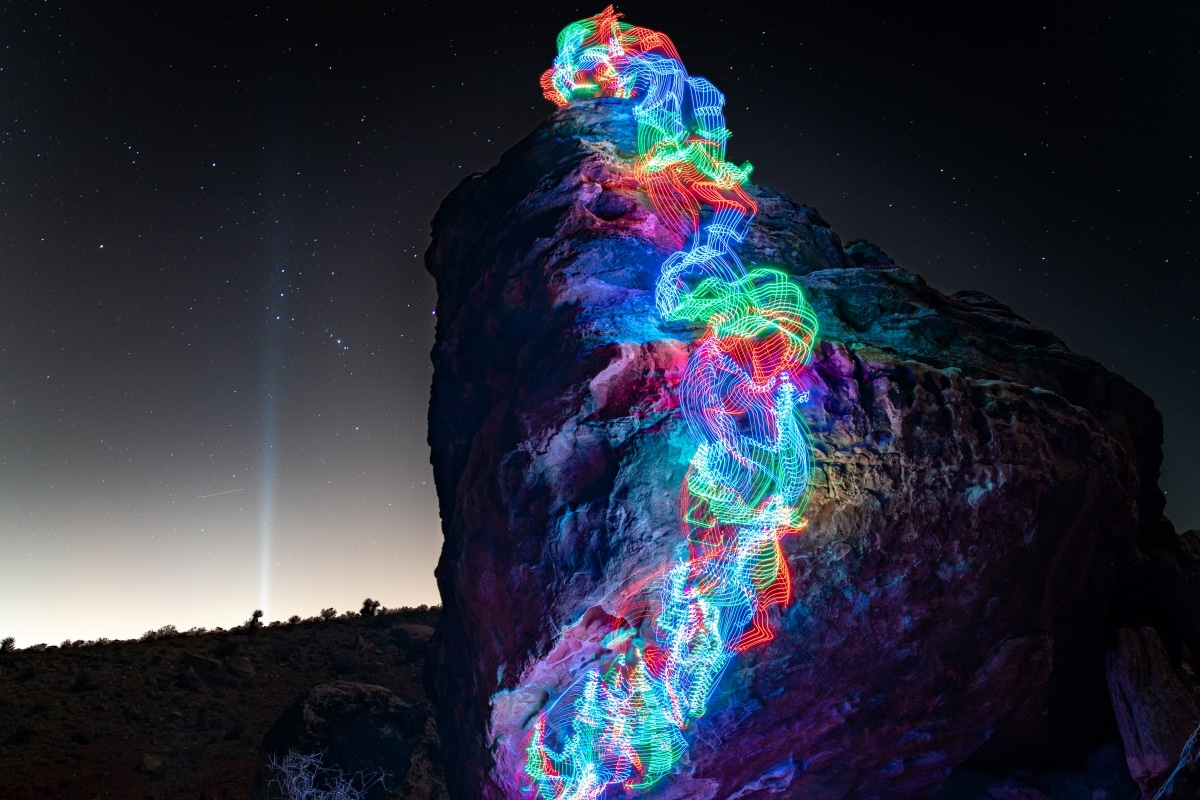
Orion’s Belt
How long is a typical exposure?
I set up my camera on a tripod and take a few test shots to dial in the composition. Then, using an app on my phone I can link my camera to it so that I can use it as a remote shutter. Depending on my circumstances, I'll either put the phone in my pocket, give it to my belayer, or set up burst mode so that my camera takes a series of 30-second exposures one right after the other. If I'm by myself, I can just use my phone to open the shutter just before I start climbing, and close it when I reach the top. Otherwise, my belayer can do it for me. If I am doing a much longer climb, or will be too far away from my camera for the app to connect, I will set it up in burst mode to take a long series of photos. The advantage of this is that I can pick and choose the frames where I am actually climbing with the lights on. I can then blend just those frames together using Photoshop. I won't use the frames that have my headlamp walking away from the camera, or a mess of lights at the base where I am gearing up, or my partner climbing up behind me. What I can do with those extra frames is create an image with good star trails. I can then use Photoshop to cut out the stars from the image of my climbing with the lights (these star trails will usually be really short and blurry or have gaps in them from where I have to stop at the top of each pitch in order to belay my partner up) and replace them with the better star trail photo.
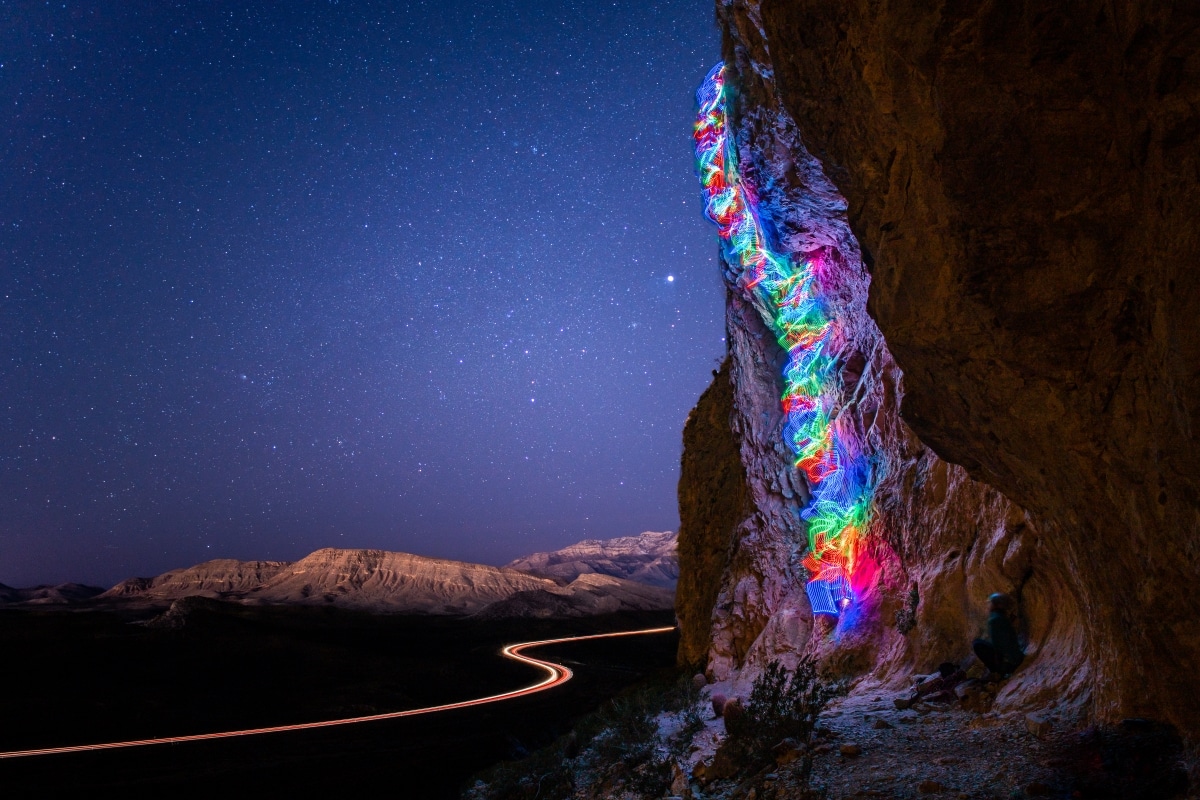
Road to Pahrump
Does this mean that you'll sometimes spend longer (or shorter) on a climb that you would normally?
In order for the exposure to turn out well, I have to climb as quickly as possible. This allows me to climb in a smooth flowing way so that there aren't any overexposed spots where I pause for too long. Instead, I have to climb at a steady and quick pace, only stopping when I get to the top. This results in fairly short exposure times. For short boulder problems under 20 feet, I climb them in 15-45 seconds. For routes in the 50-80 foot range, I'm usually climbing them in about a minute to a minute and a half. For longer routes, 100 feet plus (the longest I've done was 600 feet), I'm only picking very easy routes that I can climb quickly. This results in exposures between 10 and 30 minutes. In other words, I climb much more quickly than I generally would and only photograph routes that are either really easy or that I have particularly dialed.
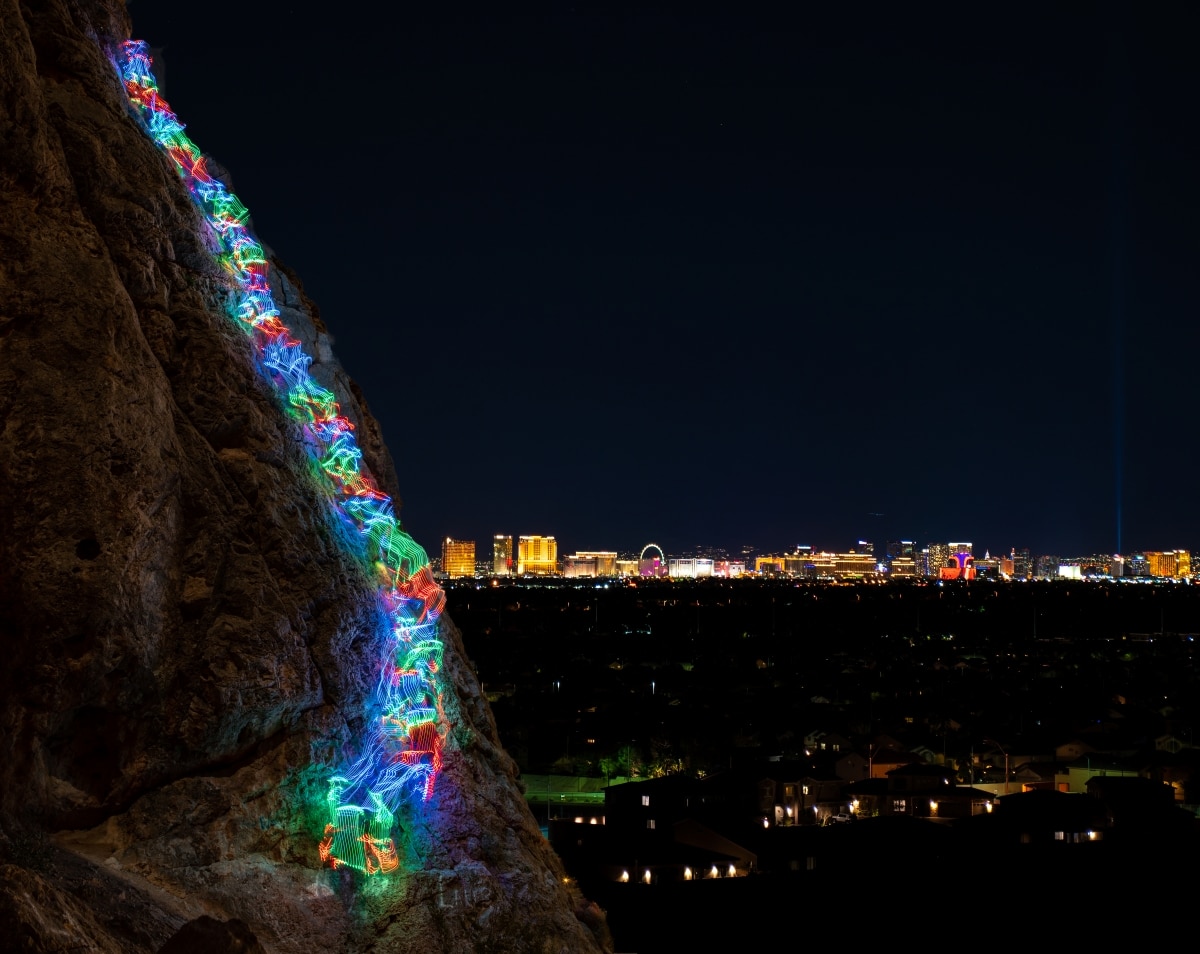
City of Lights
Sometimes the stream of light appears very geometric whereas other times it looks more like ribbons. What causes the change in how the lights look?
This question gets to the heart of the two major types of motion that I'm trying to depict in my photographs. One is the motion of the climber as he moves up the climb and the other is the motion of the climb as it moves up the rock face. When the climb is short, my body appears larger proportionally. This allows you to more easily make out the movement of my arms and legs as they flow in ribbons of light from one hold to the next. However, when my body is dwarfed by the sheer size of the rock face above me you can no longer discern my individual moves. Instead, the focus becomes the motion of the climbing route itself, as it meanders its way up the cliff. There is an art to moving your body between holds, positioning it in just the right way to make the climb possible. And there is also an art to picking just the right line up a rock face, moving from one feature to the next, connecting lines of weakness over roofs, around corner systems and, ultimately, to the summit. My photography is an attempt to depict both of these subtle arts of motion into single images.

Chop n Trees
What is the post-processing like for these images?
This is probably the trickiest part for me. I have never been particularly computer savvy, but I've been getting better in the short time that I've been taking these photos. I still have to open multiple tabs of YouTube Photoshop tutorials every time I edit a photo, but the number of tabs no longer crashes my computer.
The most drastic post-processing that I will sometimes do is to replace the stars from the exposure of me climbing with stars from a separate exposure. Because the Earth is spinning, the stars also appear to be spinning. If you leave the shutter open for longer than about 30 seconds (this number depends on the focal length of the lens that you're using and the size of your sensor), then that spinning will result in streaking lines of light. If the exposure is long enough, that can be aesthetically pleasing. However, if it's only around a minute or so, then it just appears as blurry stars. Because many of my photographs are around that length, I will take a separate shorter exposure for just the stars. I will take this exposure without moving my camera to a different location. It's still the same stars as the original exposure, just properly exposed. I can then use photoshop to cut out the stars from the climbing exposure and replace them with the properly exposed stars.
Other things that I've done in post-processing is to blend 3 separate exposures from 3 separate climbs on the same boulder into a single image. I did this with “Lit Ass Boulder,” so that I could visualize the three major routes up the East Face of The Big Ass Boulder. I've also added exposure of my headlamp pointed towards the camera from the top of the Pork Chop Boulder so that I could add a star to the top of my Christmas tree-esque shot of “Chop-n-trees” (I shot that image just a few days before Christmas).

Through the Looking Glass
What's on the horizon for you? Any other climbs planned?
Currently, I'm really struggling with getting an image that I'm happy with of longer (100+ feet) routes. From a climbing perspective, these are much more interesting to me. In my personal climbing, I enjoy climbing long multi-pitch routes, so I would love to successfully photograph one.
Beyond even just the photography related issues that I'm trying to work out, there are also more logistical issues with climbing longer routes. Many of the routes that I would like to photograph traditionally take hours to climb if not all day. And that's in the daylight without a string of distracting LEDs tied to me. Climbing them in the dark through the night will certainly add a much stronger sense of adventure. And, I can't wait to take on that adventure. I got my first taste of it just last week when I met up with a friend in Zion and we climbed a 5 pitch 600-foot route. It was my first time up the route and it was certainly an adventure leading up it with my headlamp on its dimmest setting (I don't want it to overpower my LEDs) while I searched out the correct path, all while climbing as fast as possible and trying not to stop at any one point. Unfortunately, the picture didn't turn out as I had hoped, but spending the night climbing under the stars in one of the most beautiful places in the world was certainly still worth it.
I look forward to bringing my photography to the canyon walls of The Black and the sandstone spires of Utah. Those places hold a special place in my heart as the sites of much pondering about the passage of time. This has ultimately played a major role in both the development of my climbing as well as my photography. To combine photography and climbing in these magical places will certainly carry a much deeper meaning for me. And hopefully, that deeper meaning will translate into a “better” photograph (whatever that may mean).
Currently, this seems to be an impossible task. But, just like that nerdy kid standing on the playground, I look forward to taking on that impossible task. I look forward to the new skills it will bring me and the places that it will take me. I look forward to the effortlessly beautiful photographs that I may take.
Monkey Bars